Build Menu
Build Your Menu
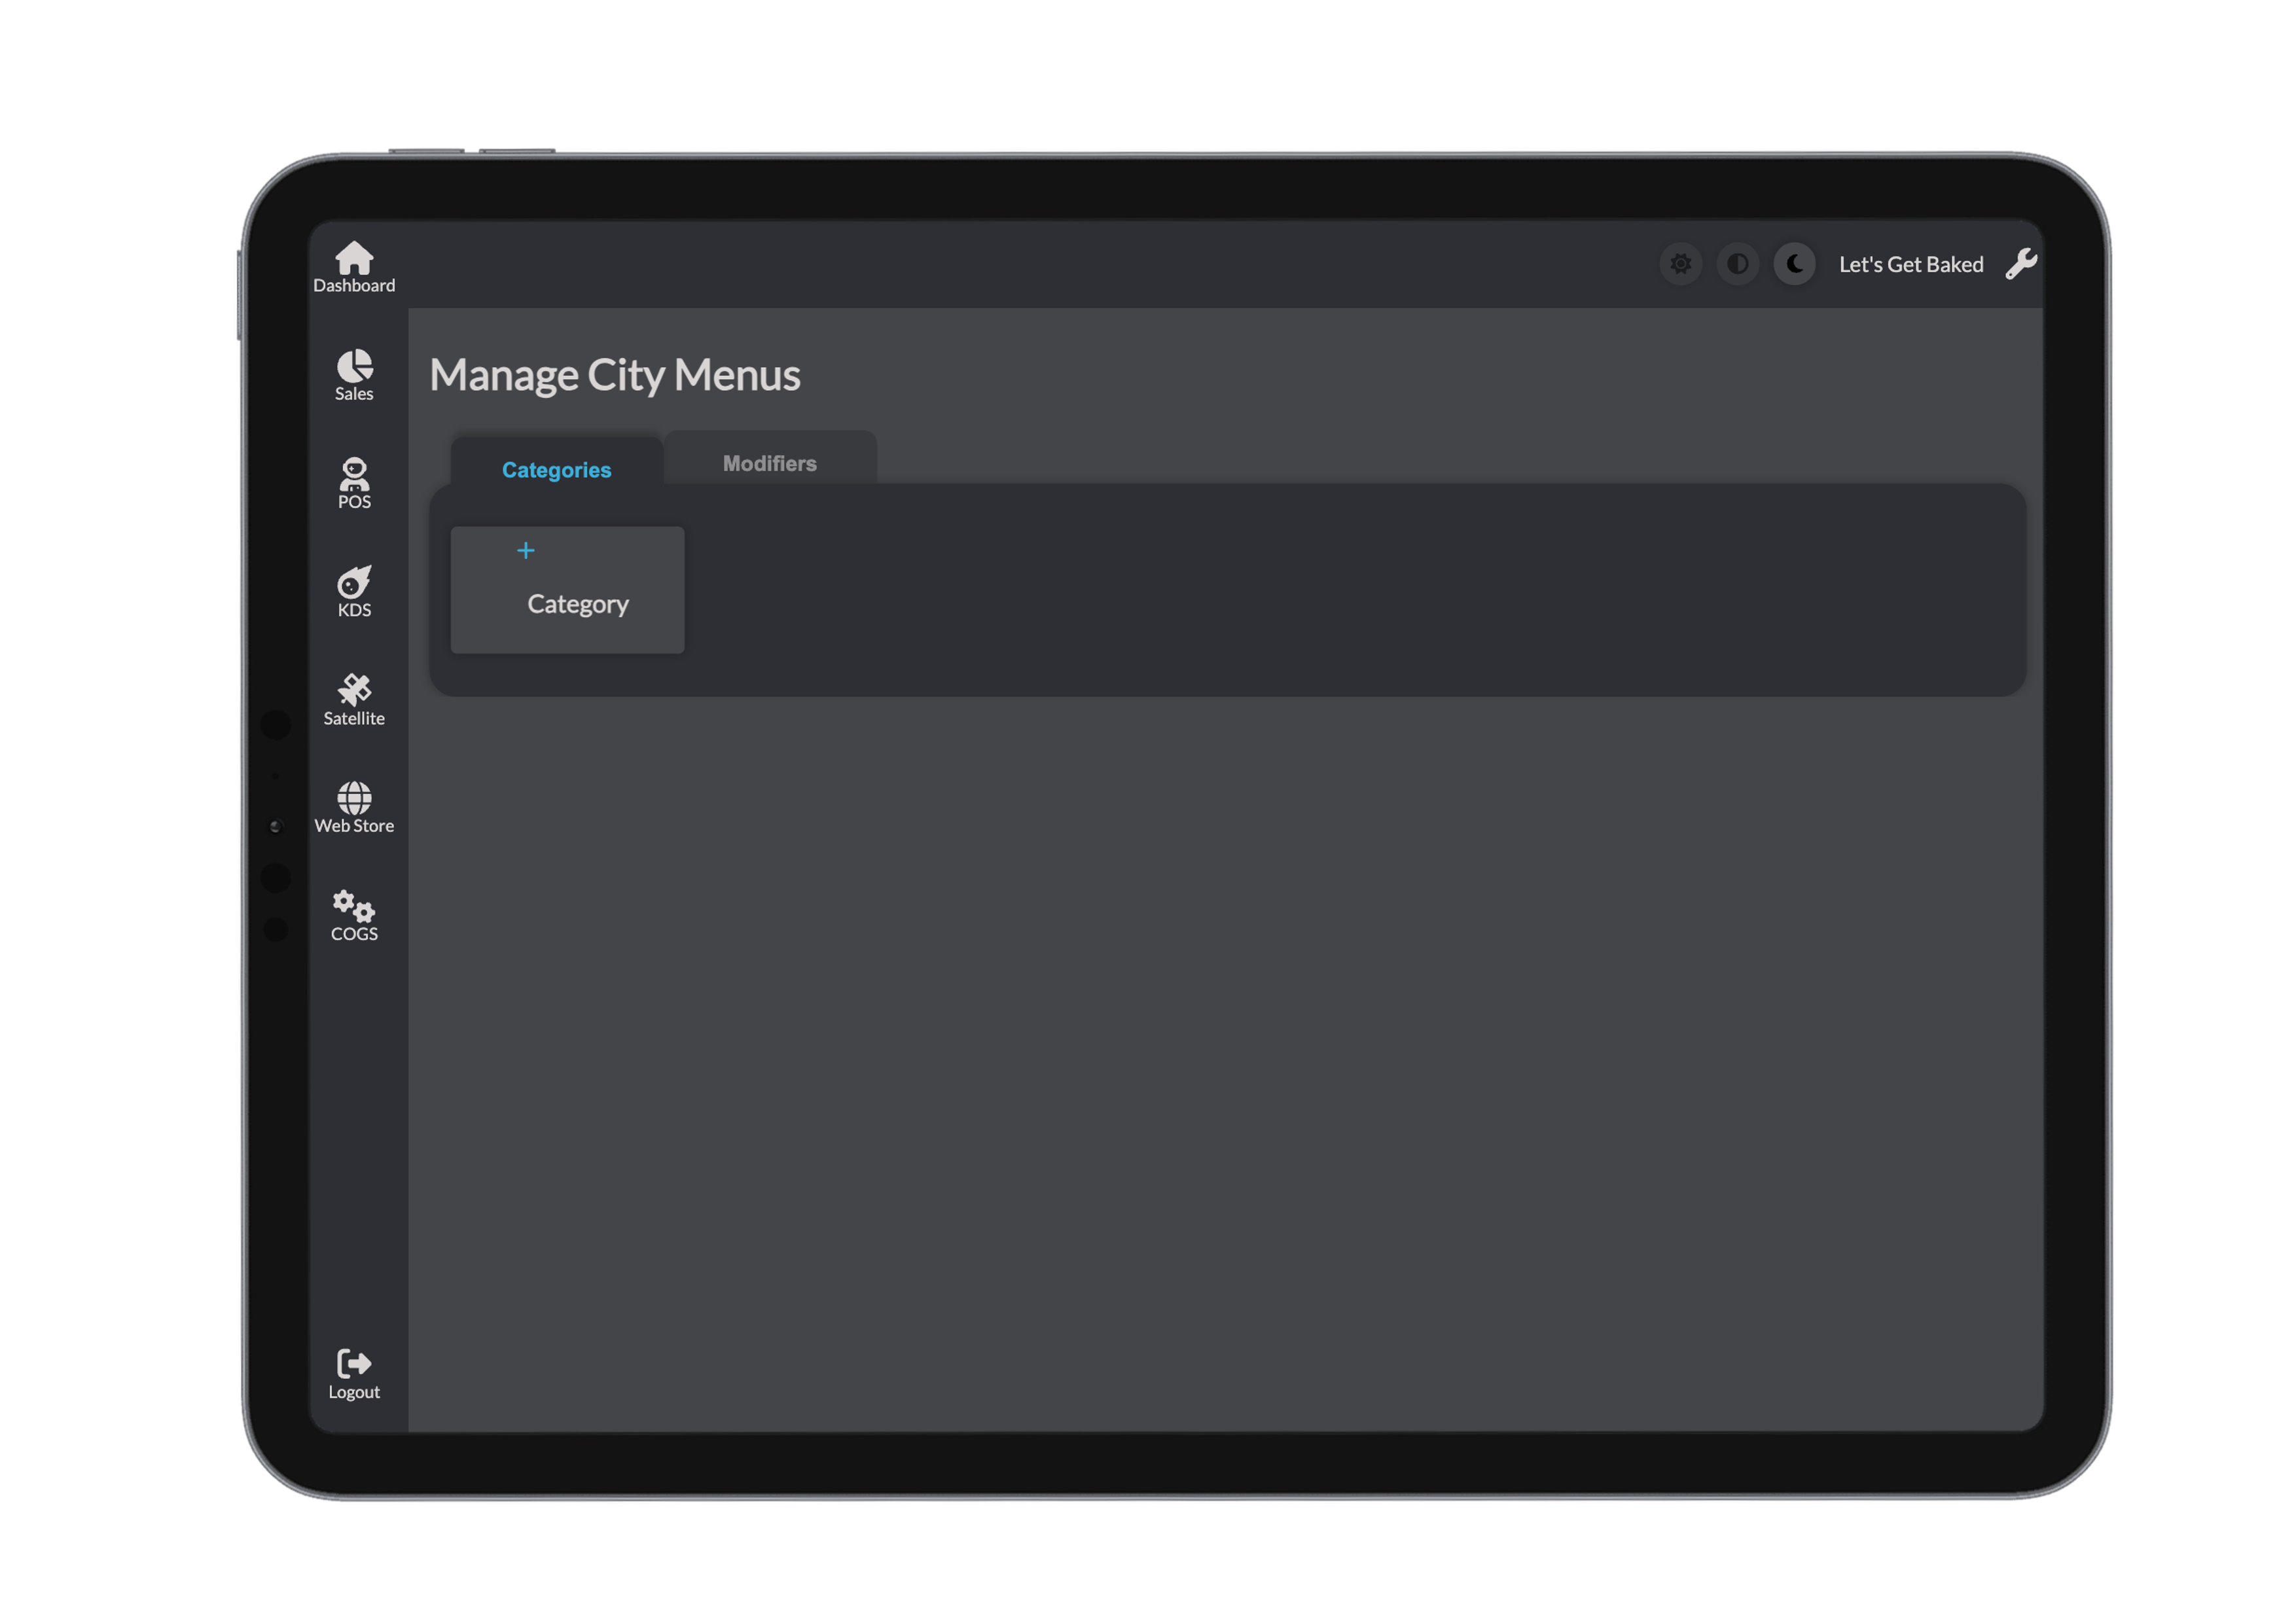
Add Categories
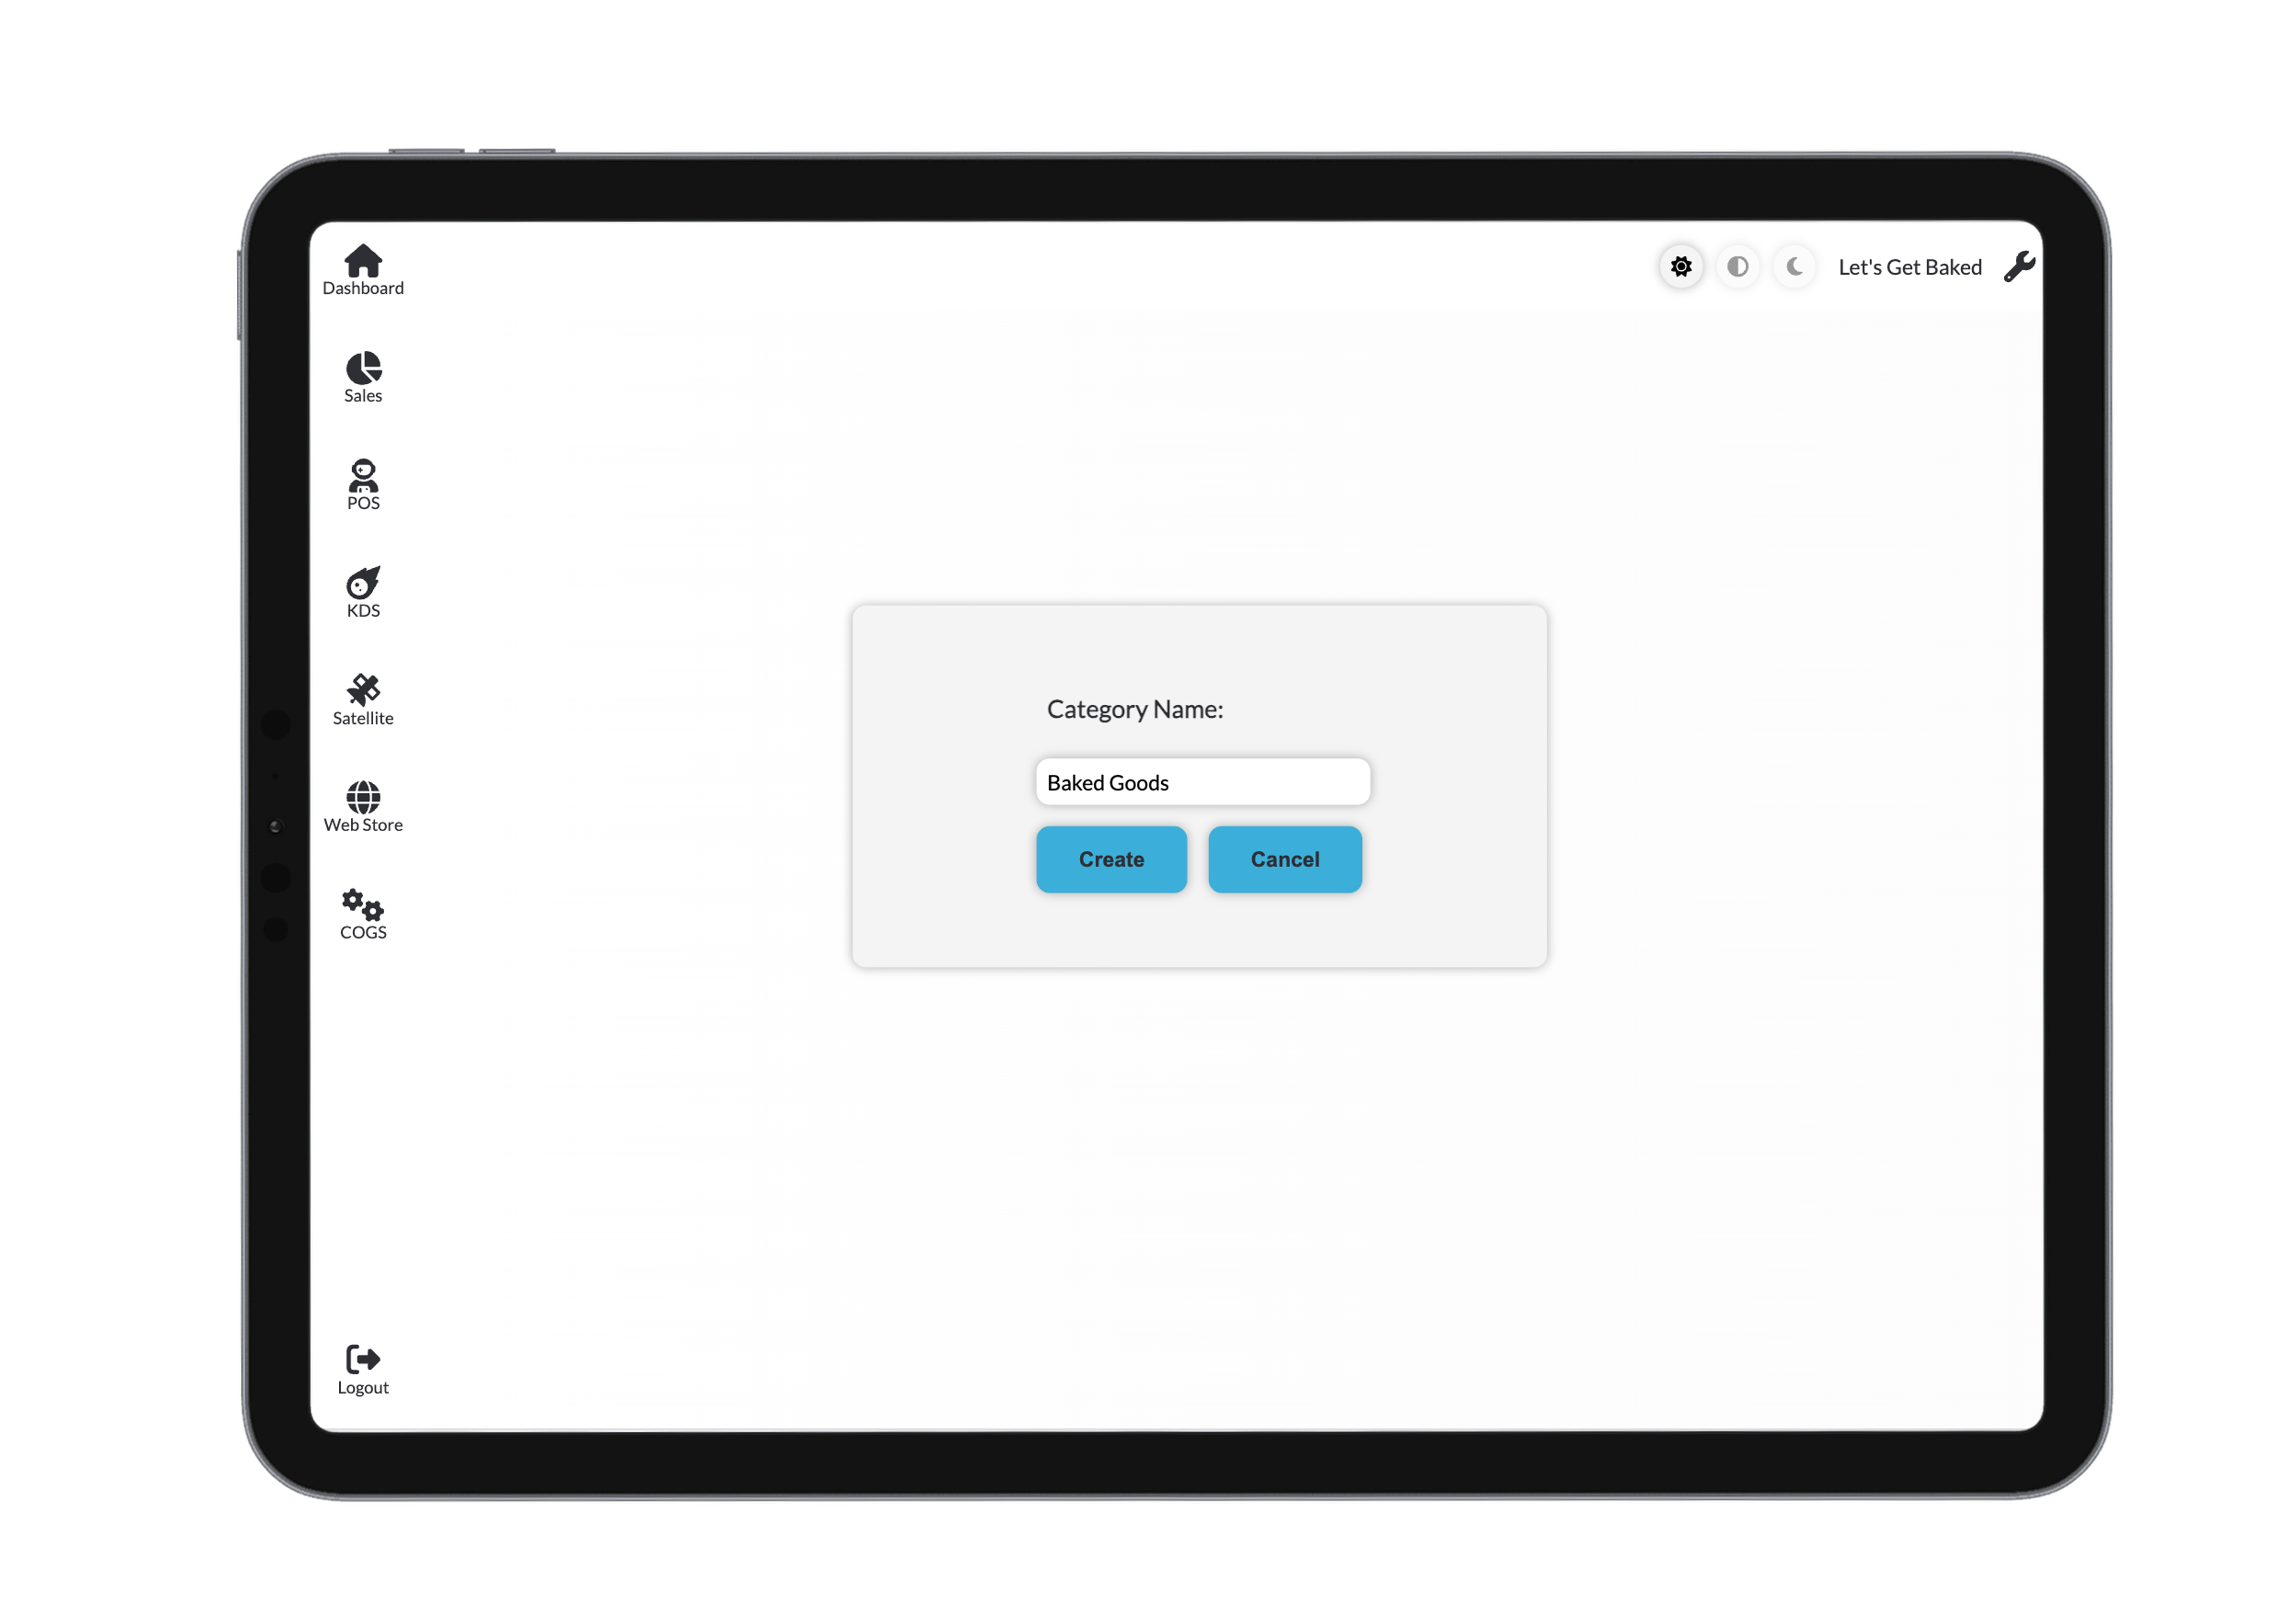
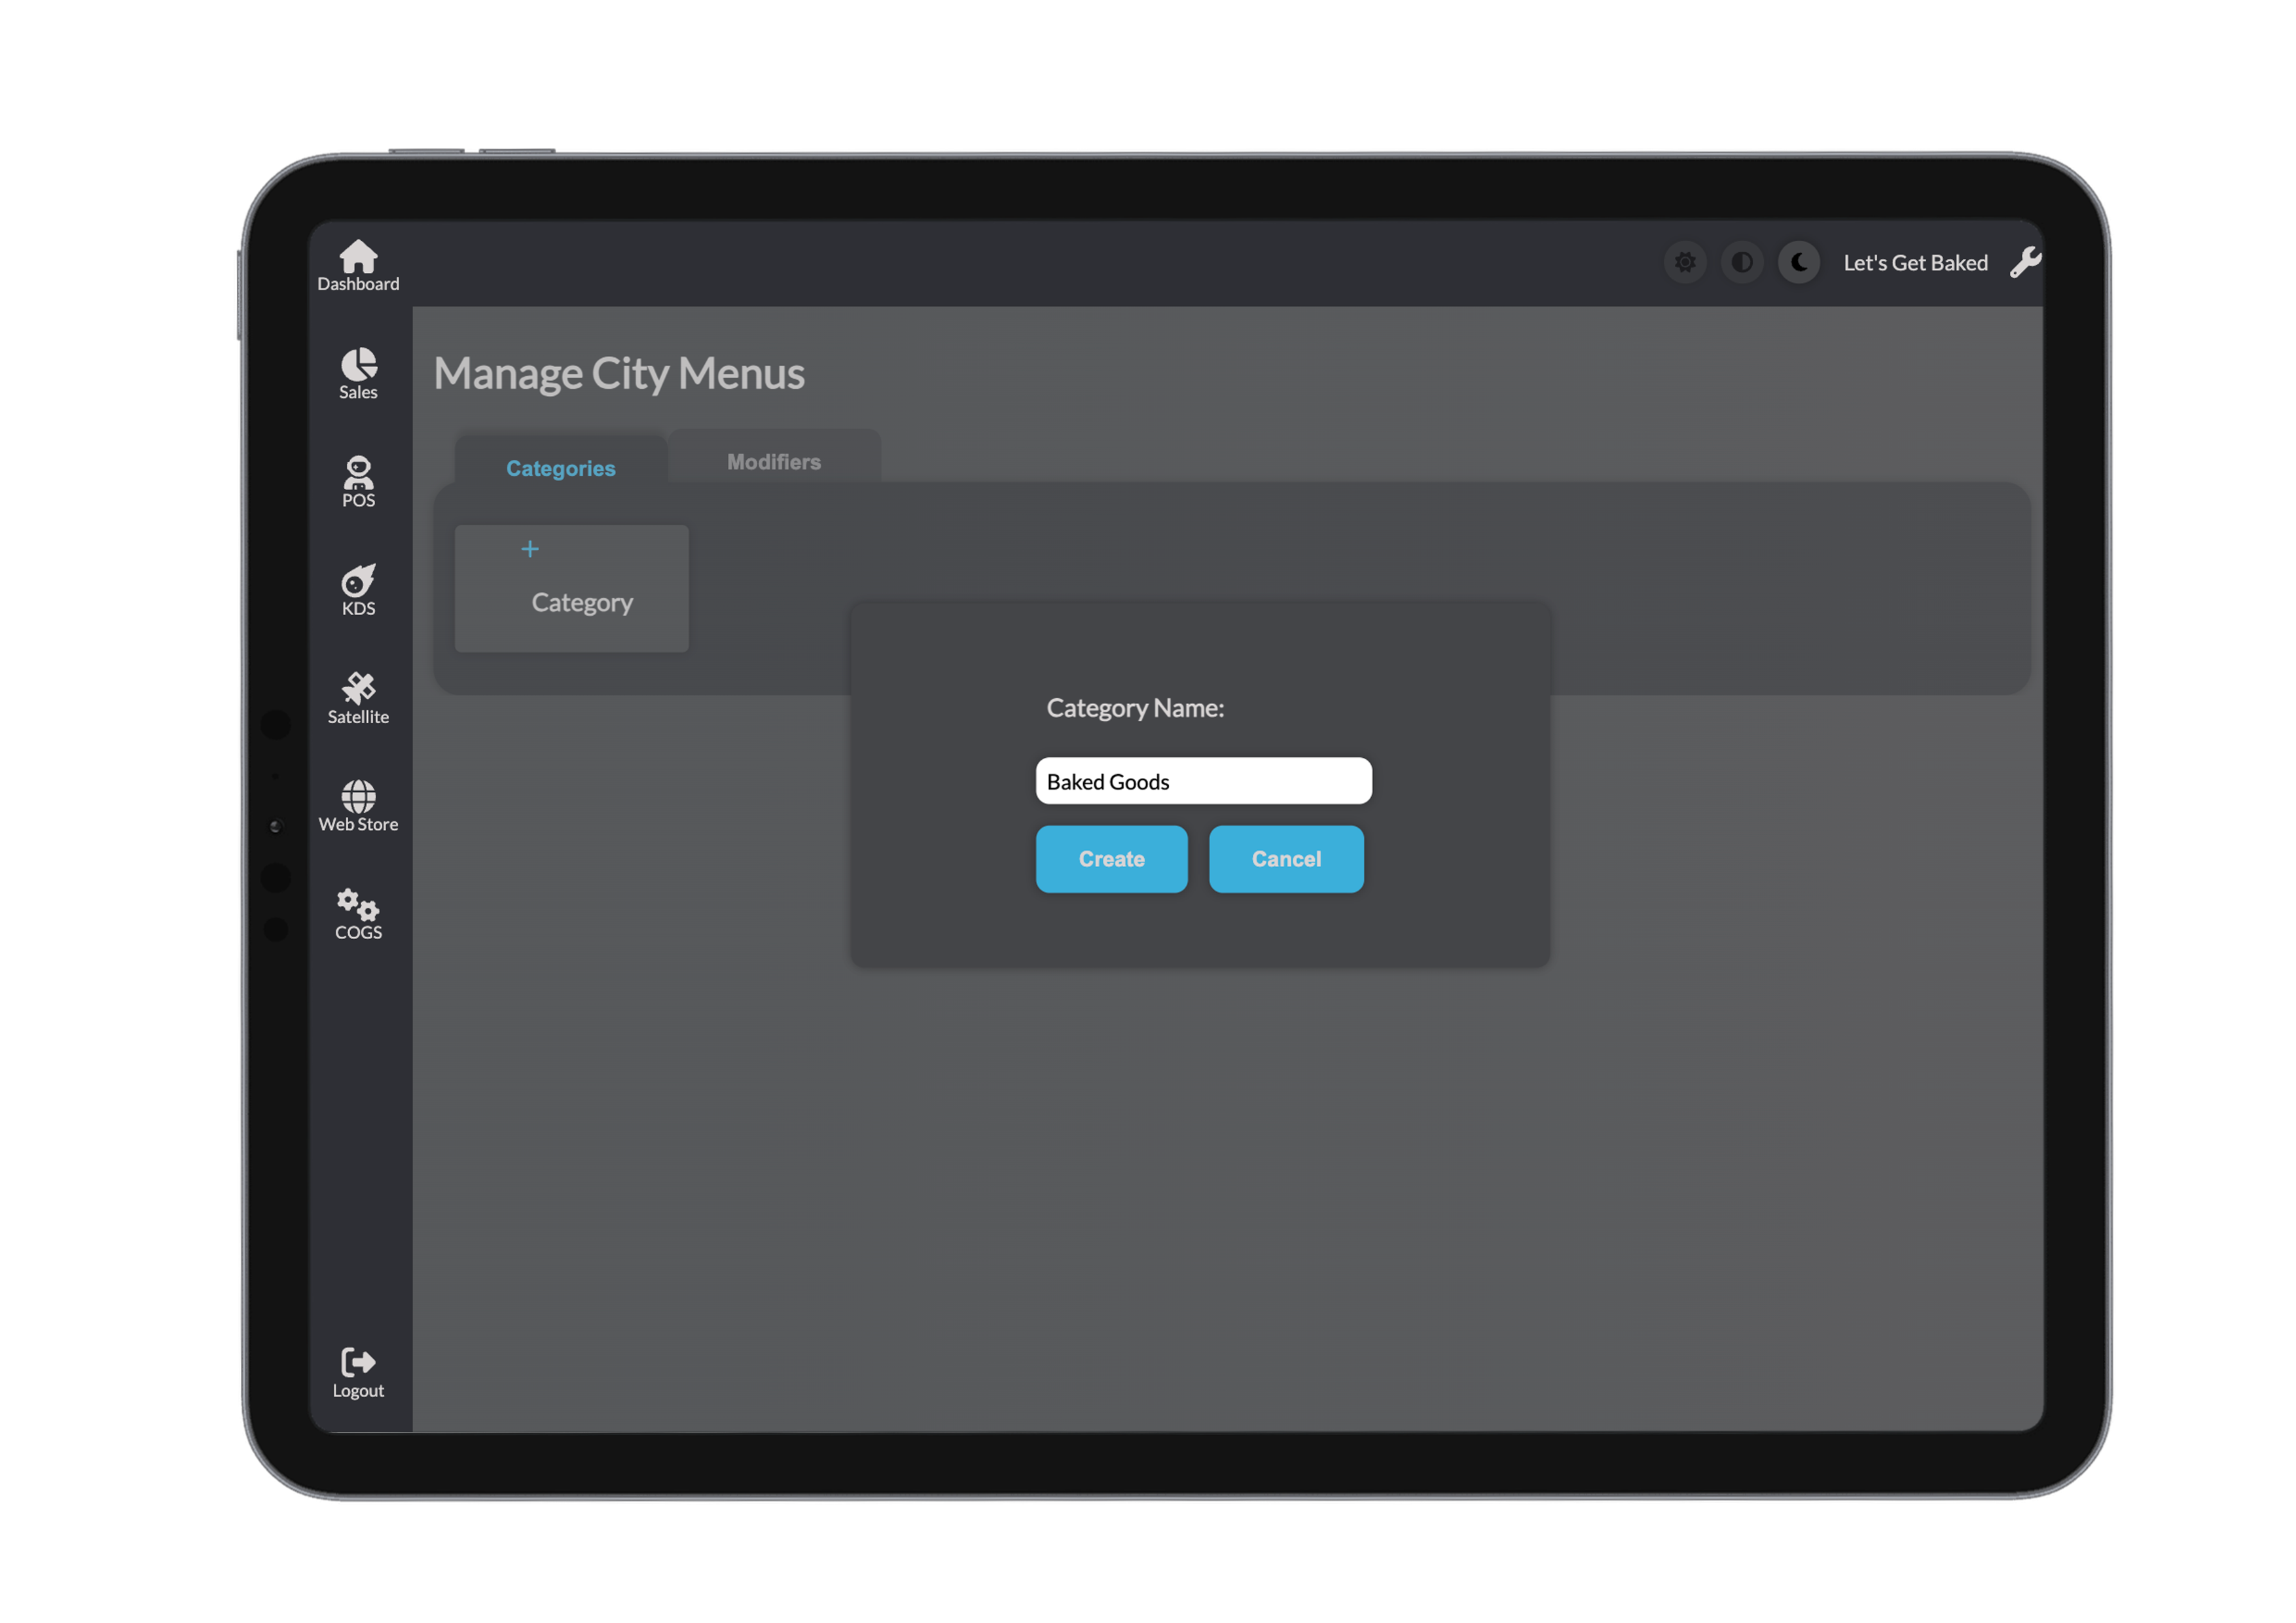
Step 1: Create a New Product Category
Click the Add Category button. You’ll be prompted to name your category and confirm its creation.

Step 2: Add a Product
Click Add Product
Fill in the required product details:
- Name – e.g., Choc Chip Cookie
- Caption – Optional short phrase to highlight the product
- Description – Displayed to POS staff and online customers
Make sure to toggle the product active to be seen on the store page, this can be edited later. You can also toggle the product to be sold out, this will keep the product on the store page with a sold put banner overlay. A product being sold out means it can not be purchased online but one the POS system it can be overridden at the staffs discretion.
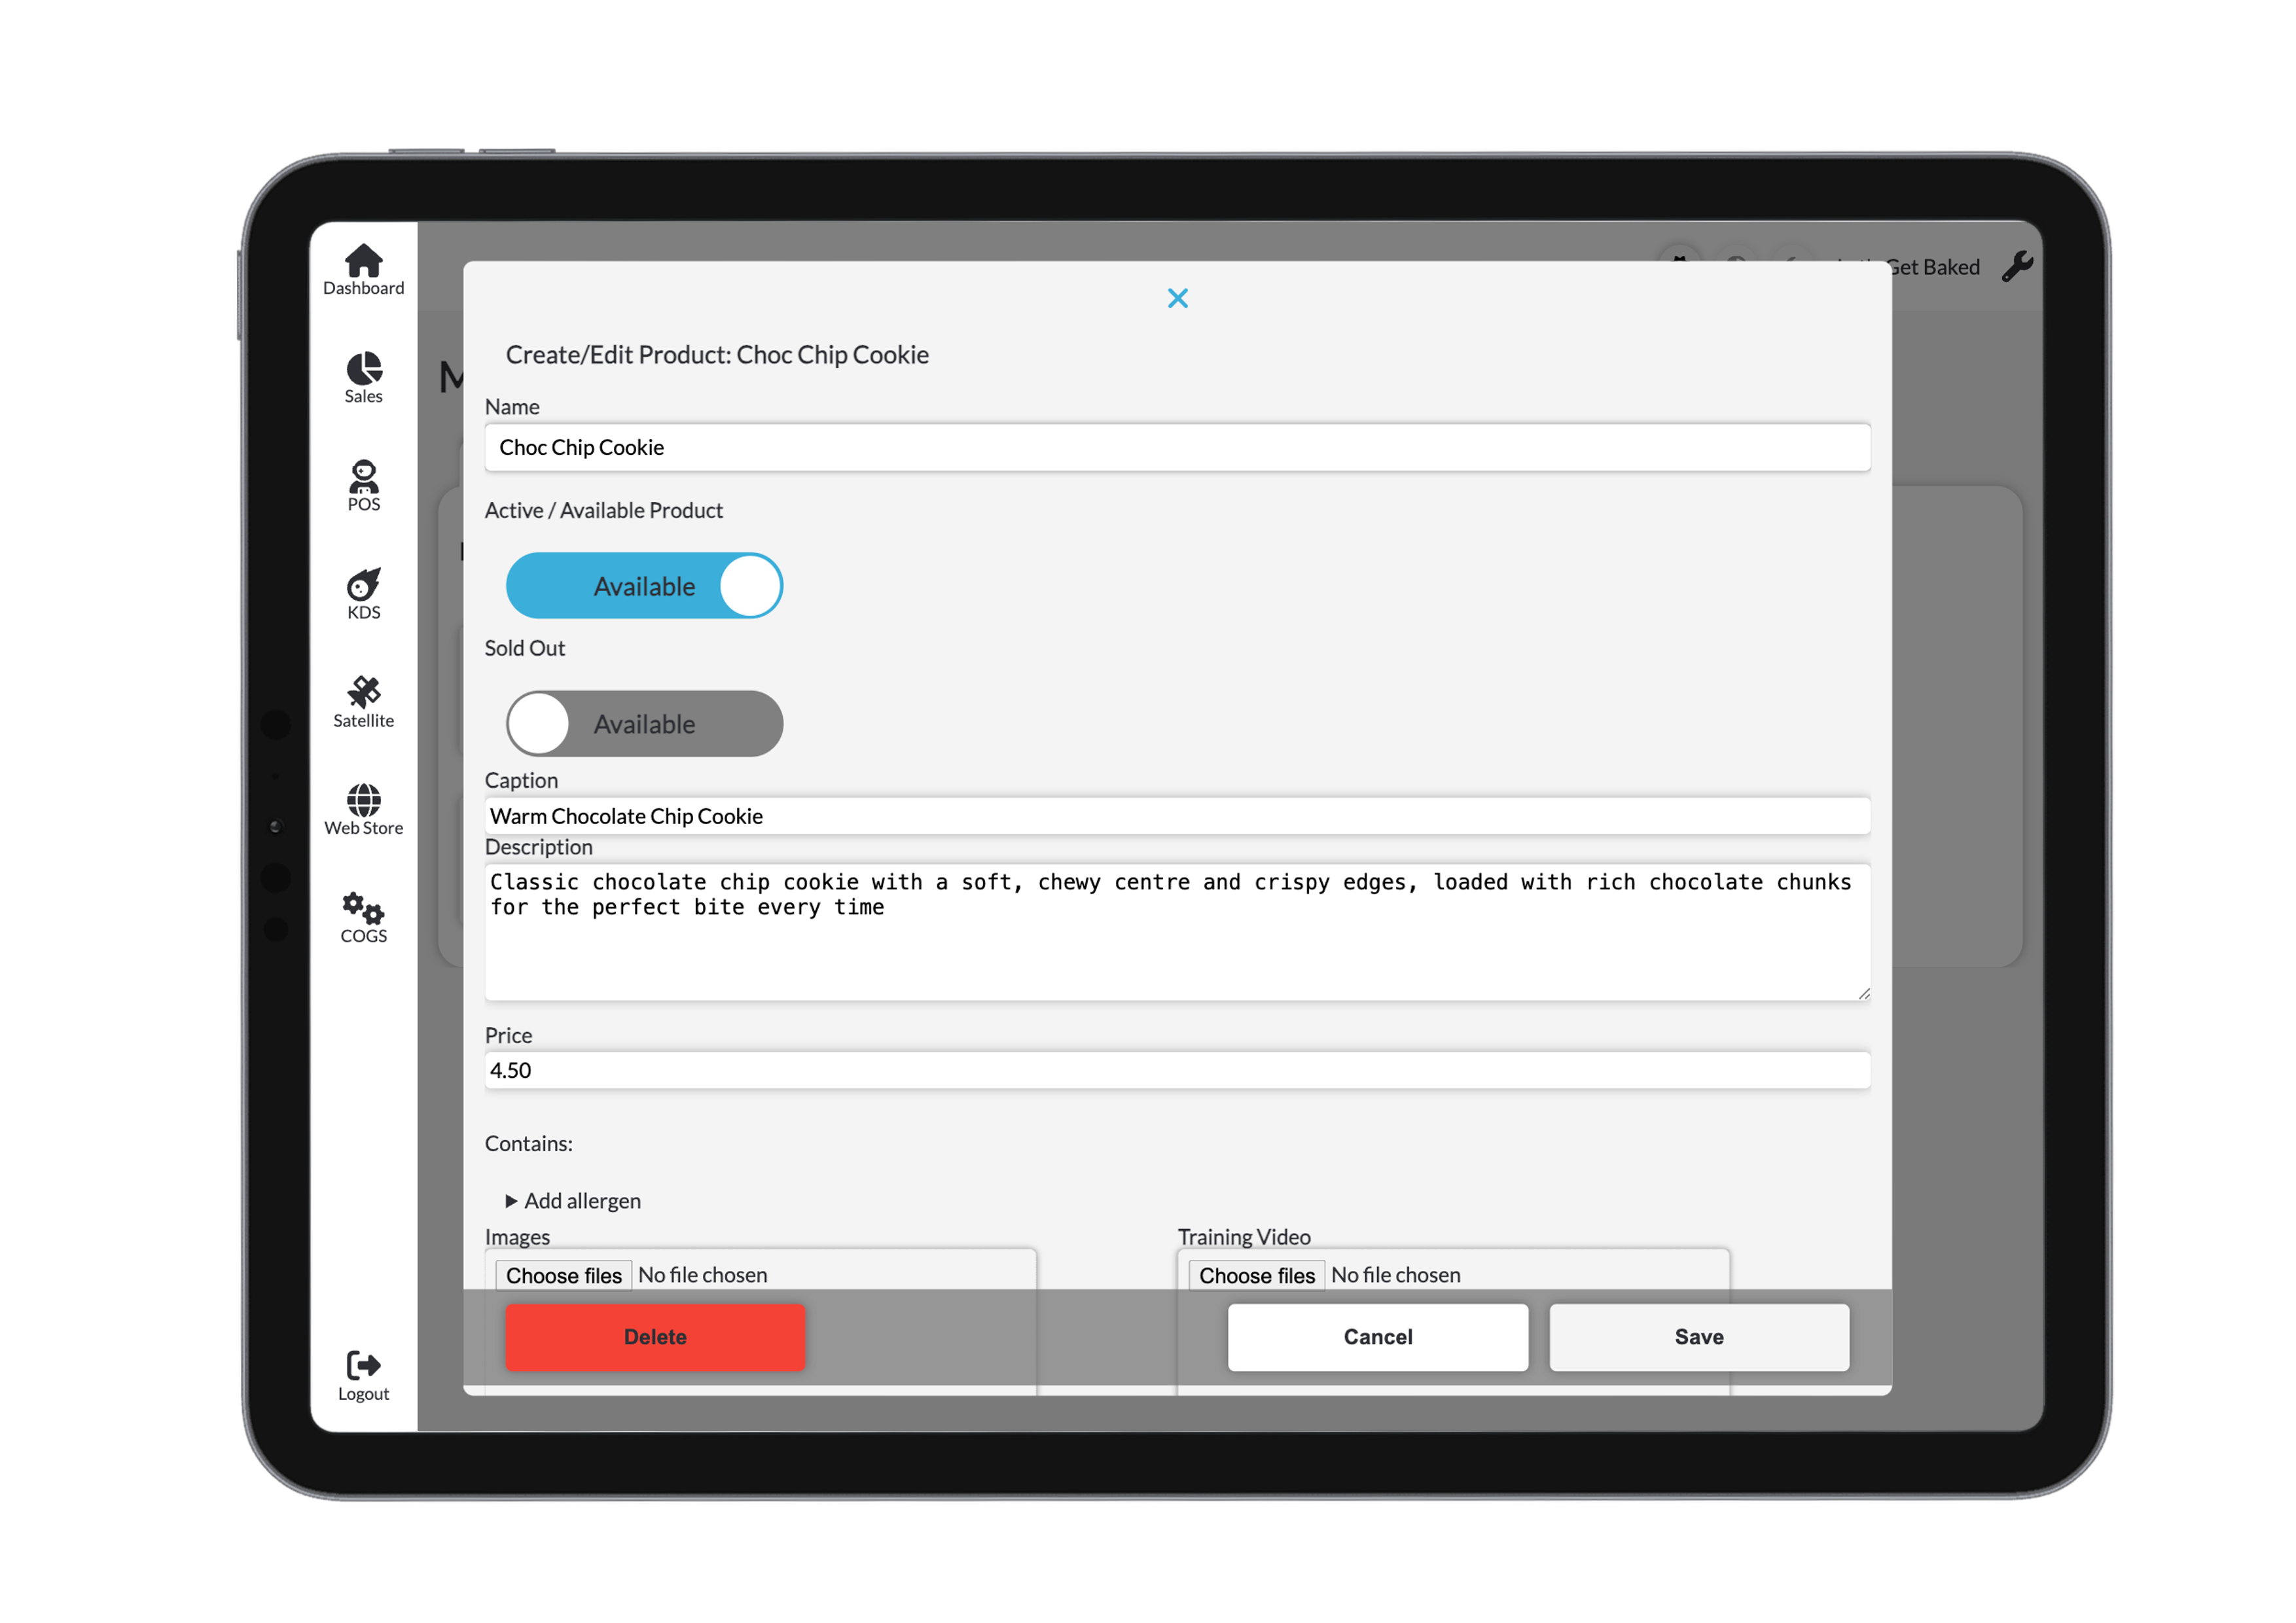
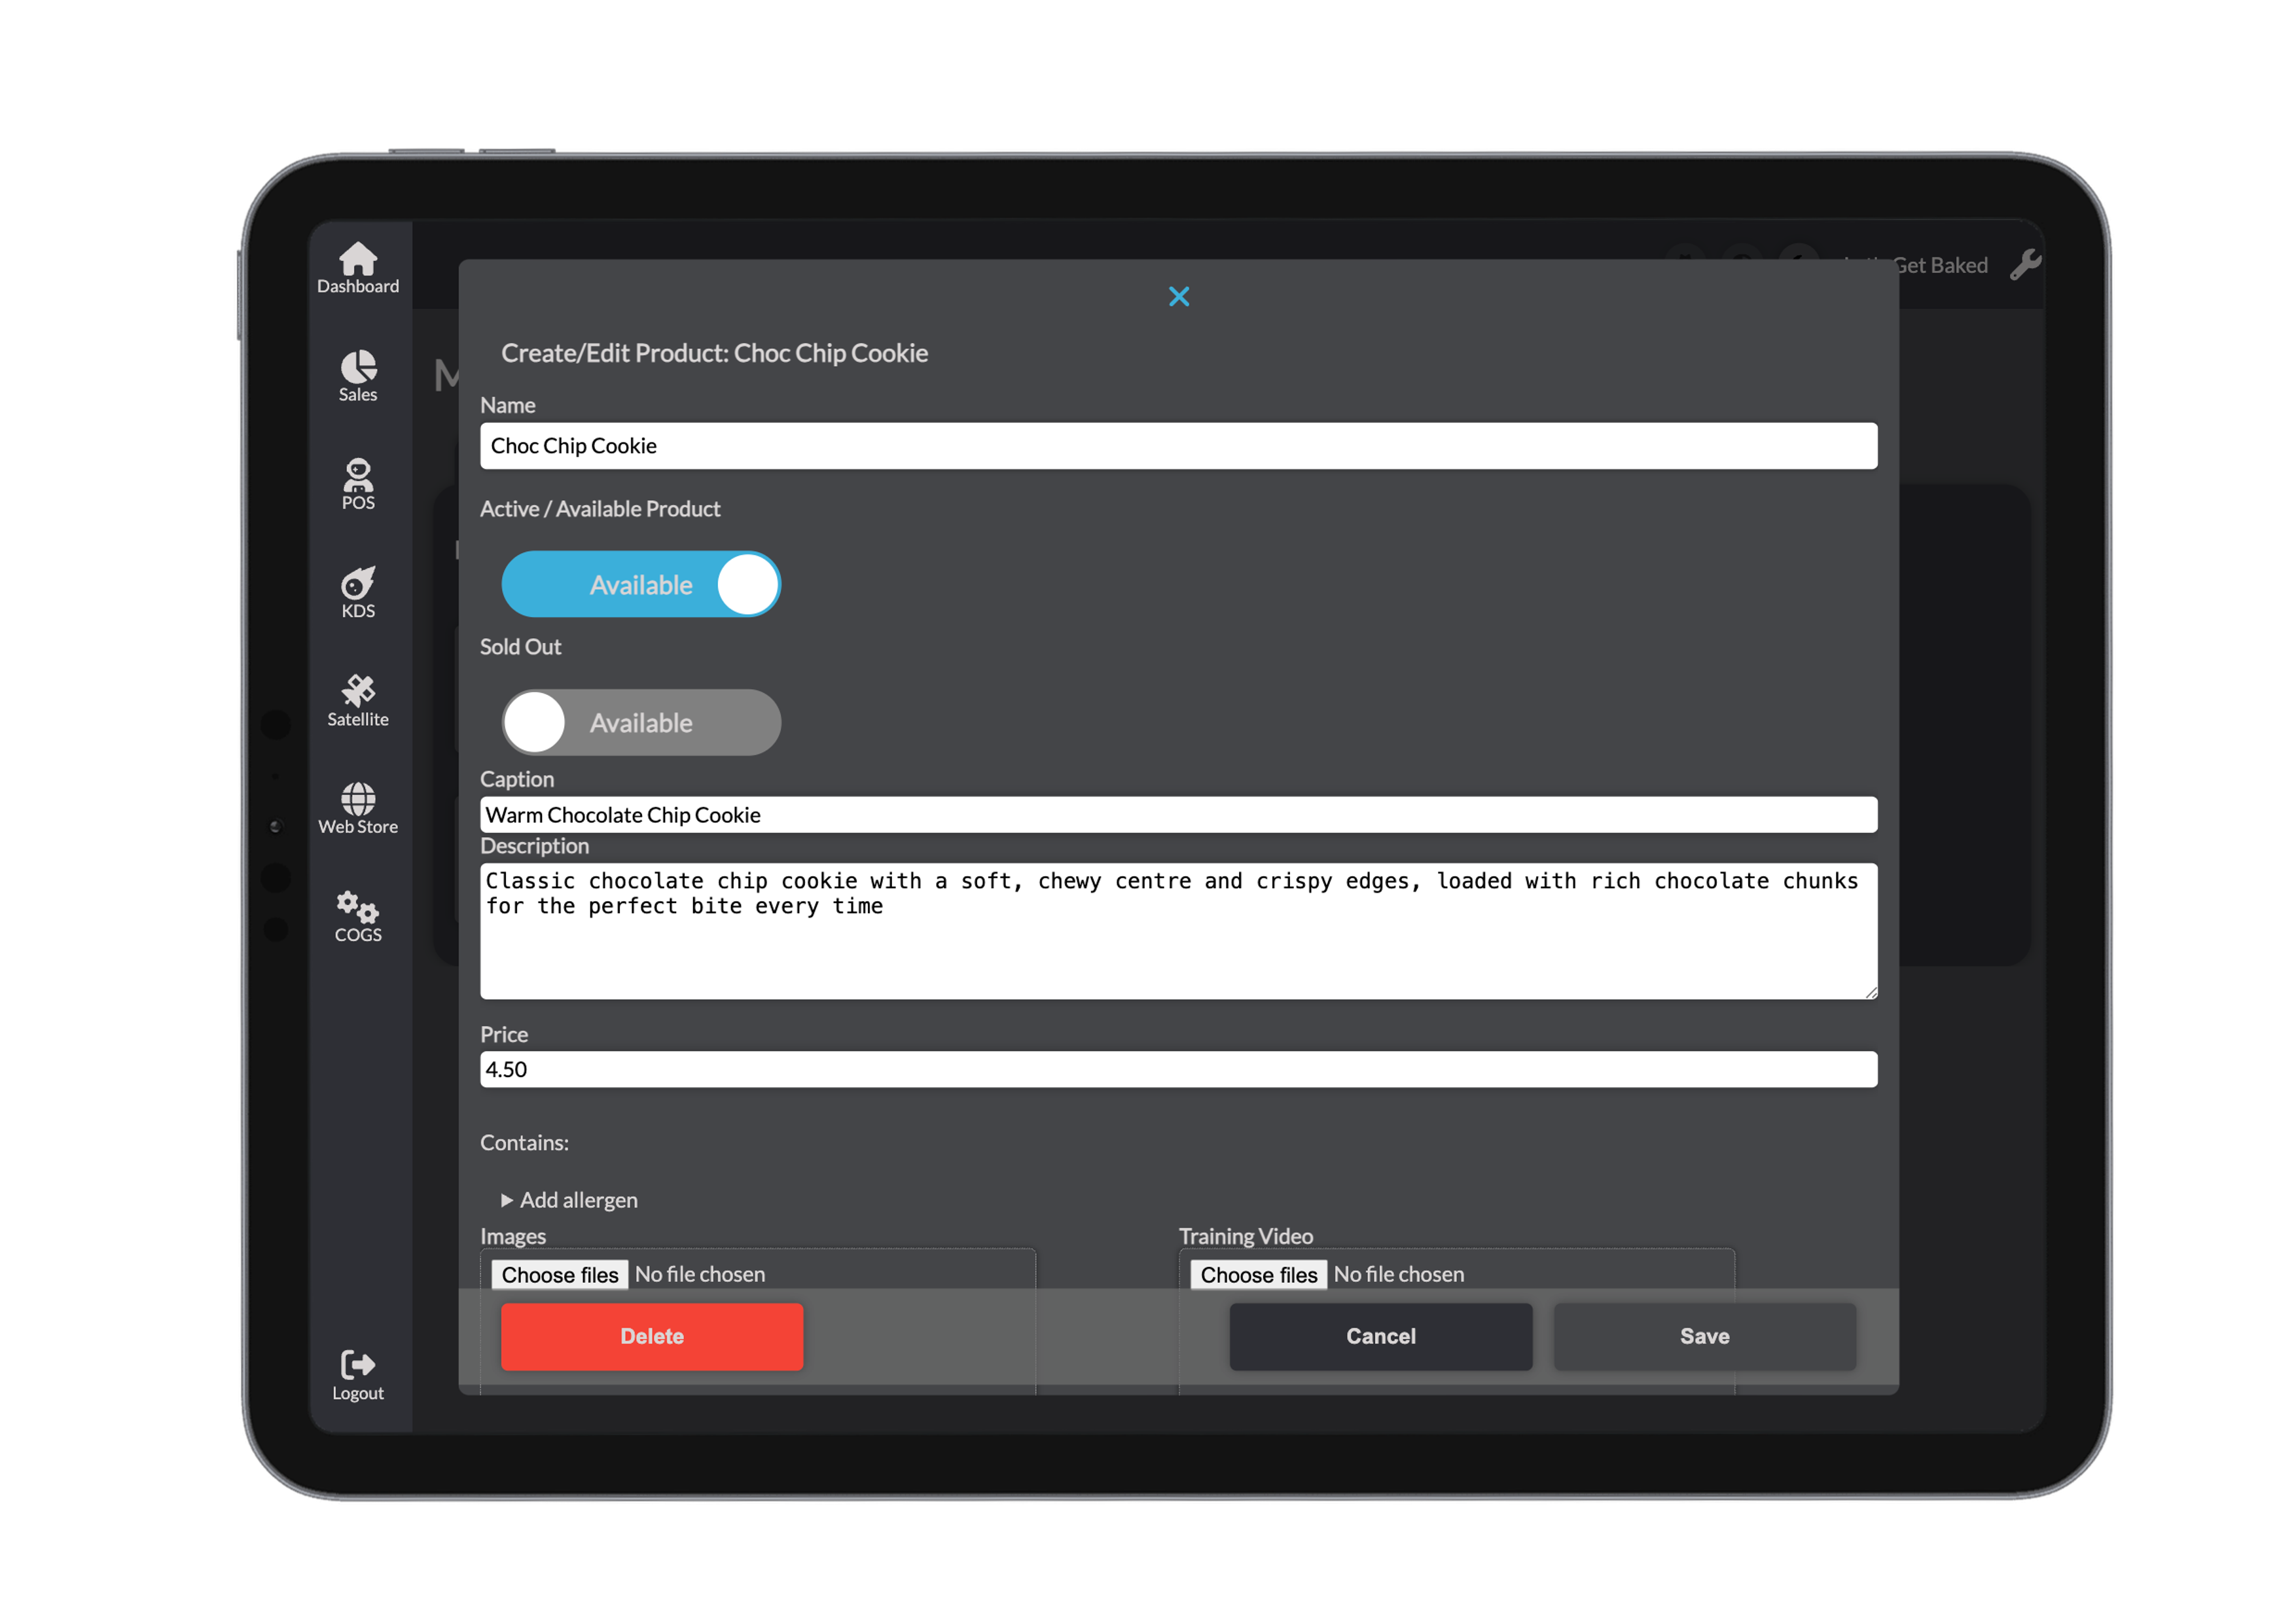
A price is required, this should be inputted as a dollar amount (4, 9.5). Toggling the set price to become a custom price allows the user to use a keypad to choose the price of the product at the time of purchase.
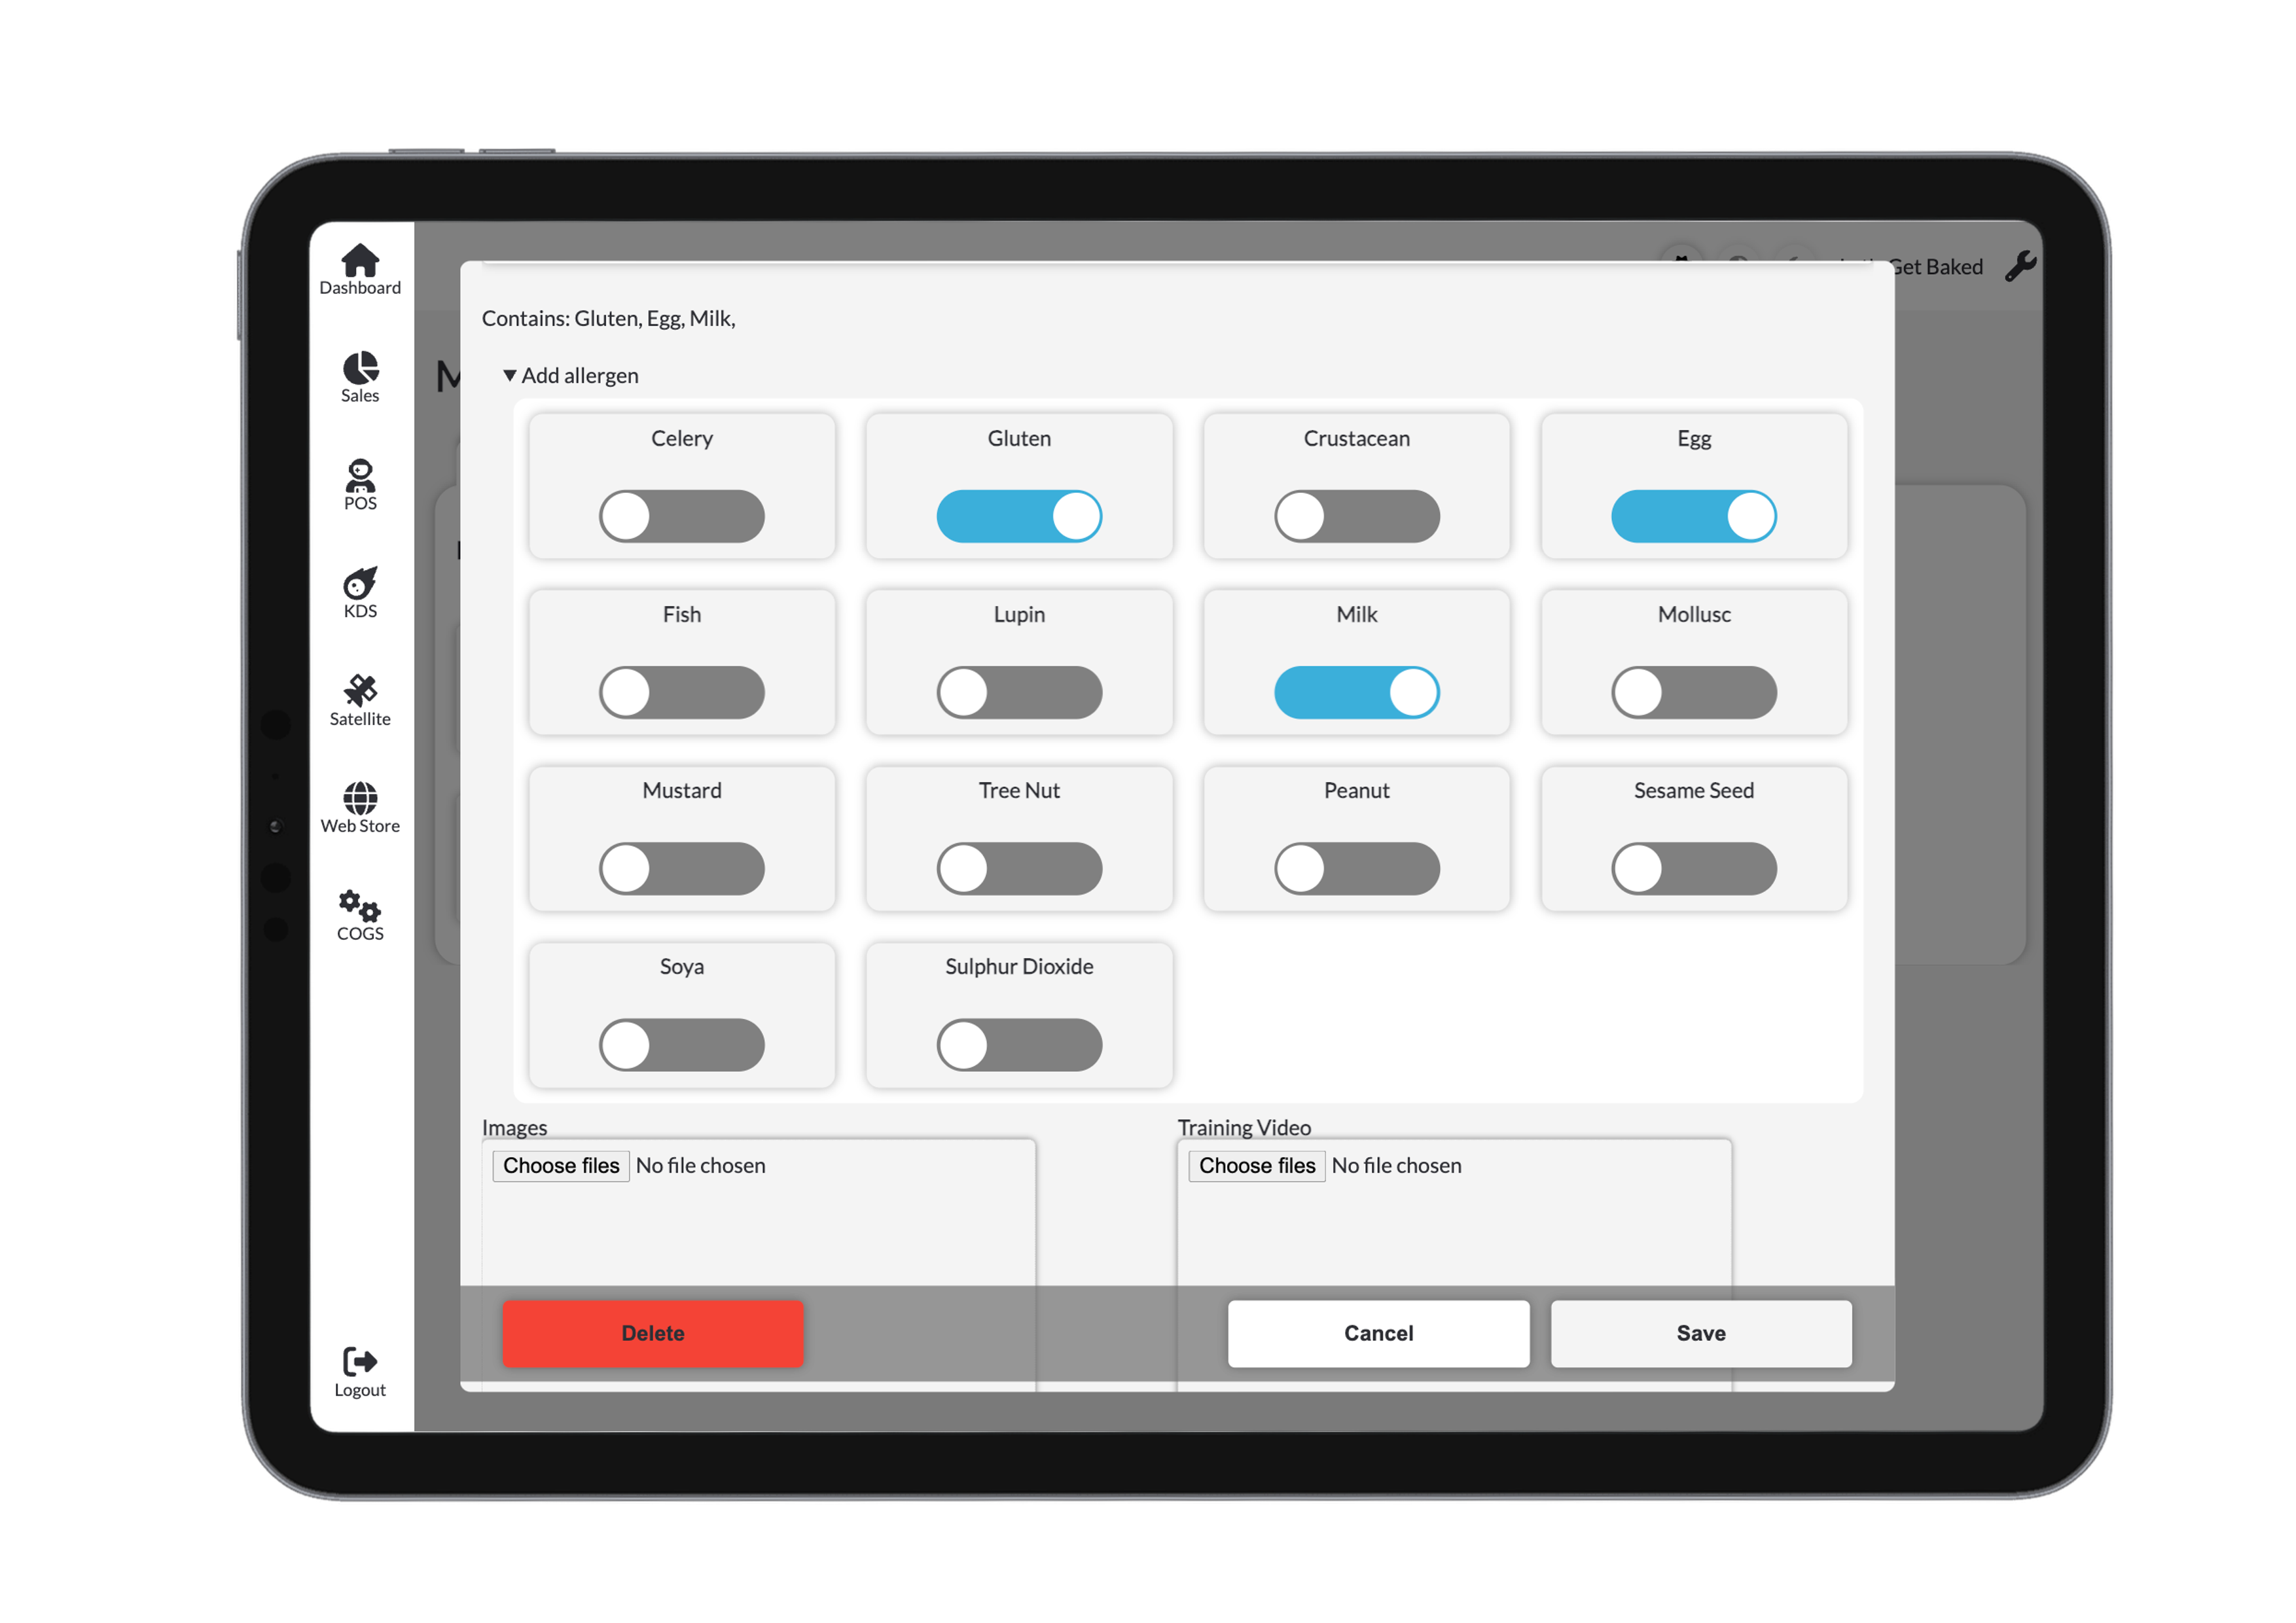
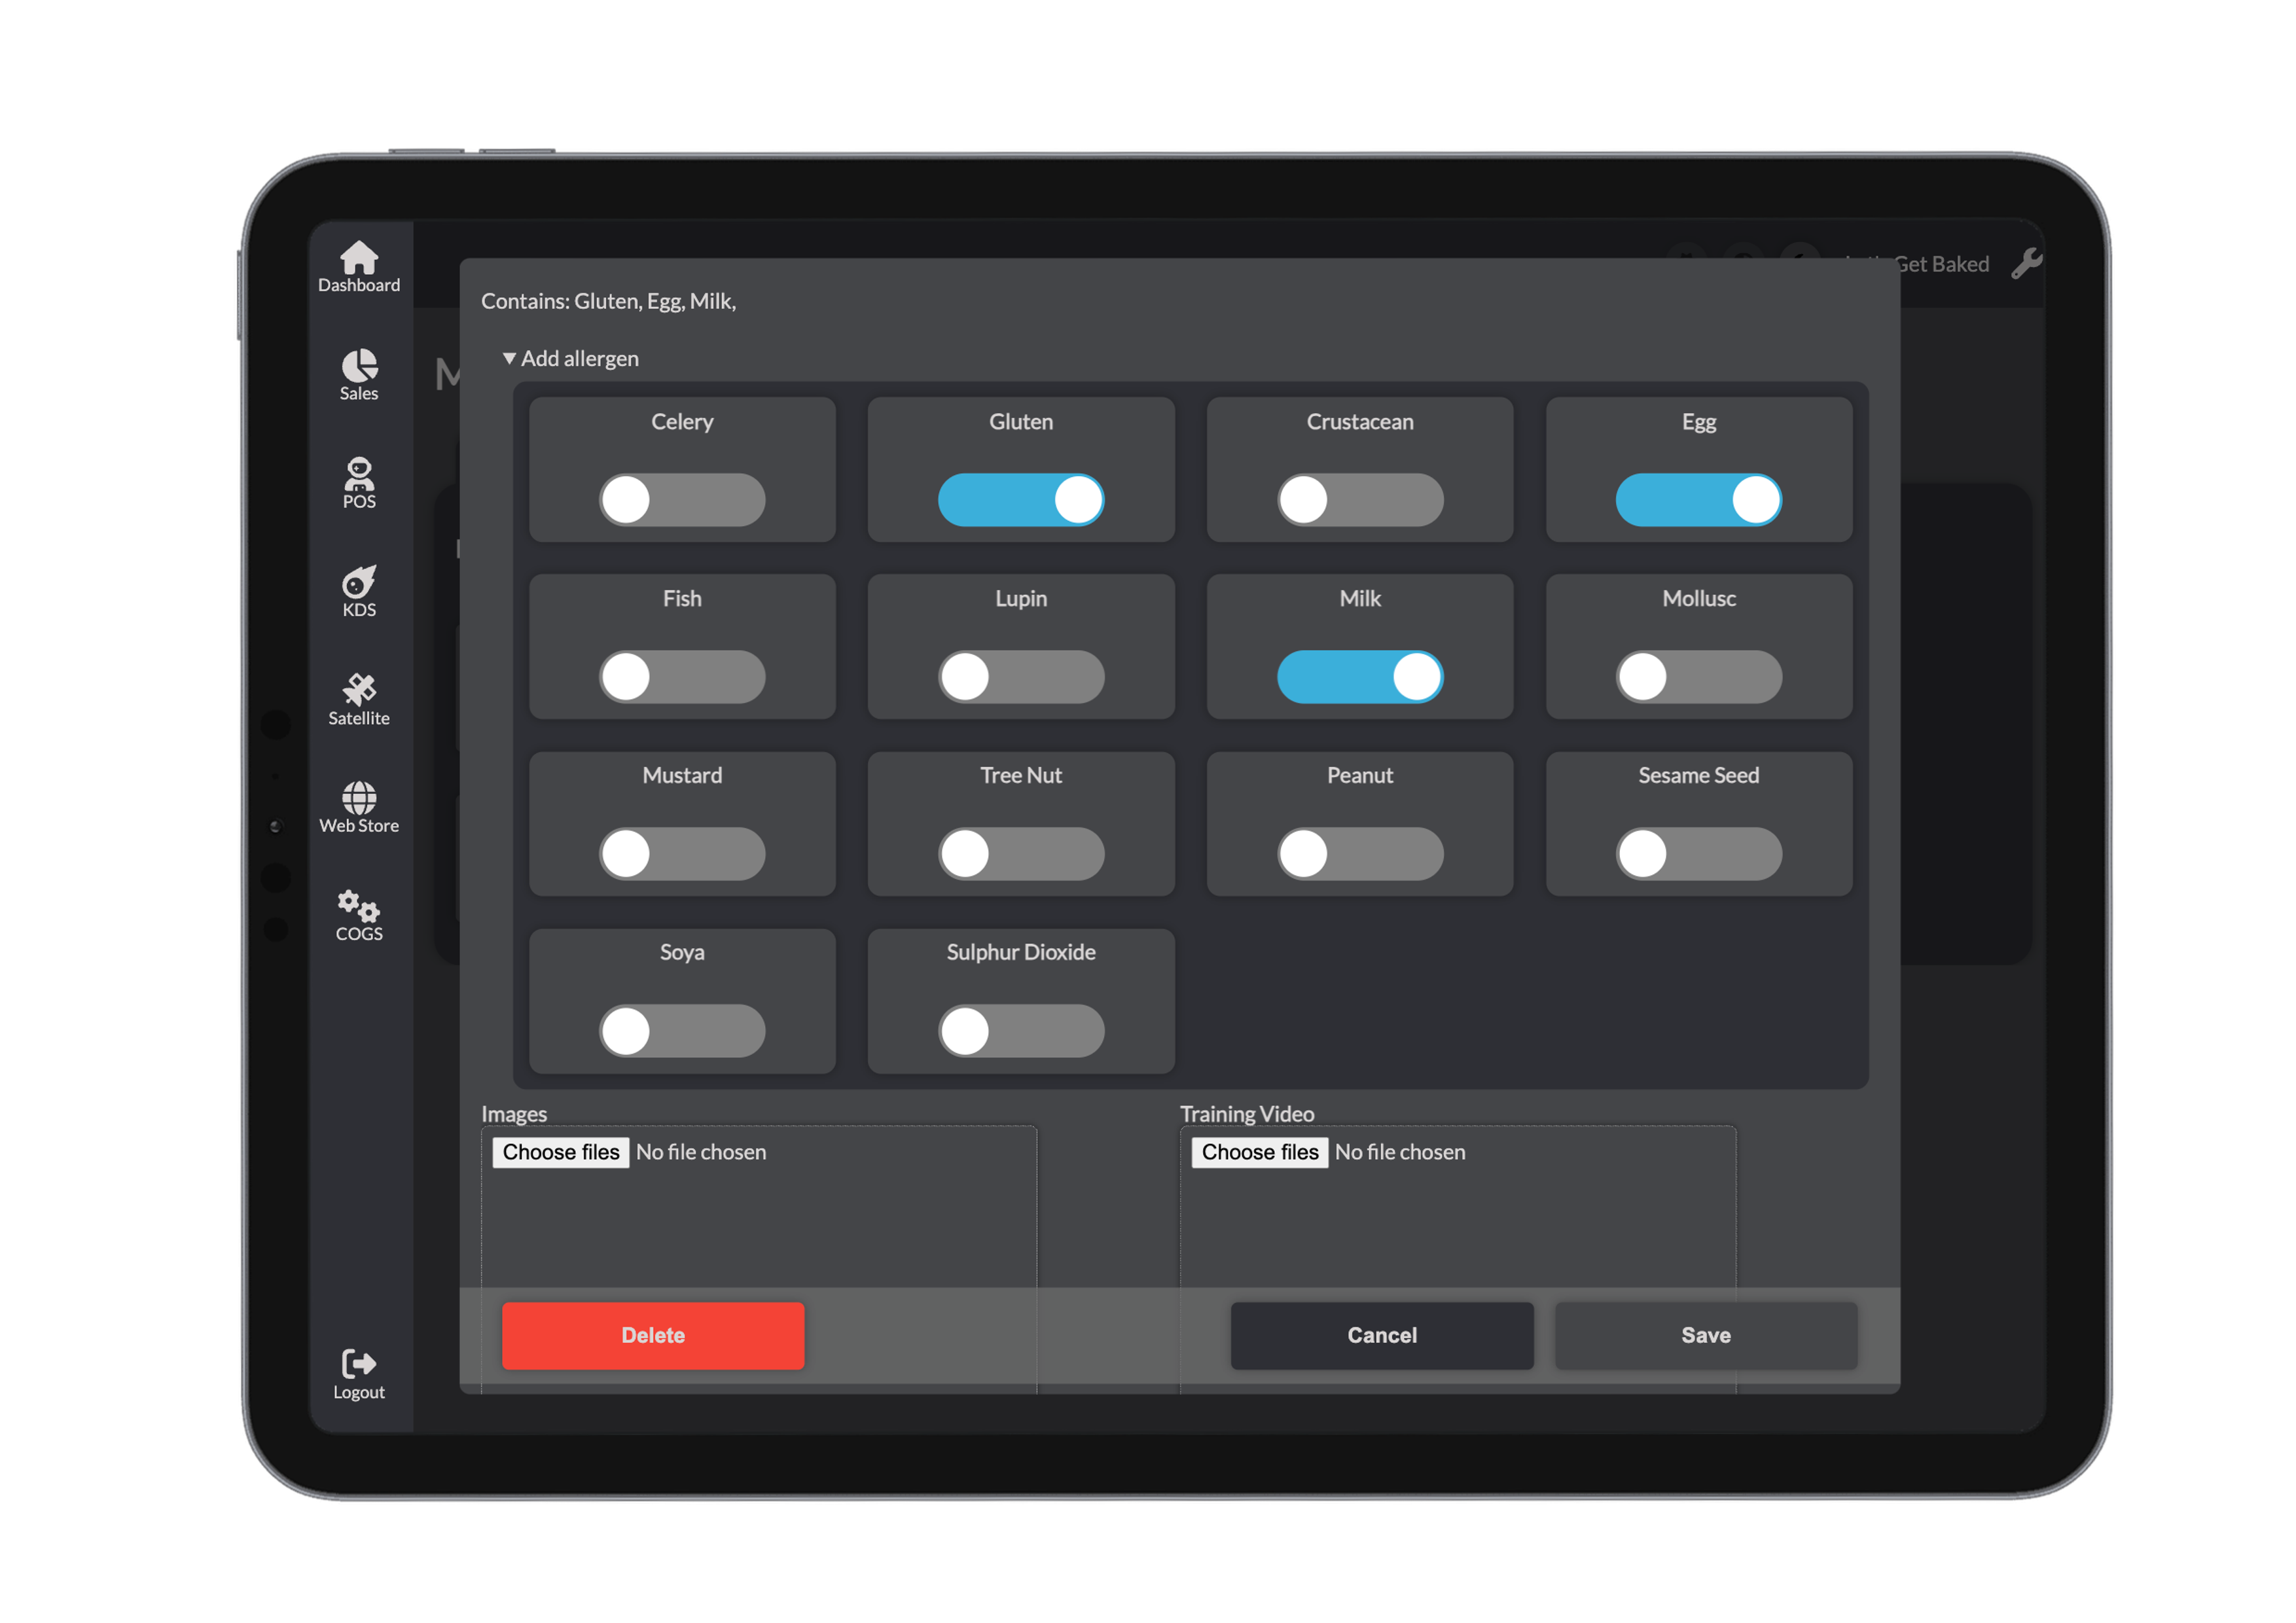
Then, select relevant allergens from the predefined list.
You can also:
- Add a product image (shown in POS and online)
- Upload a training video (optional)
- Assign modifier sets (e.g., extra toppings or size options)
Make sure all relevant modifiers are selected so they appear during checkout.
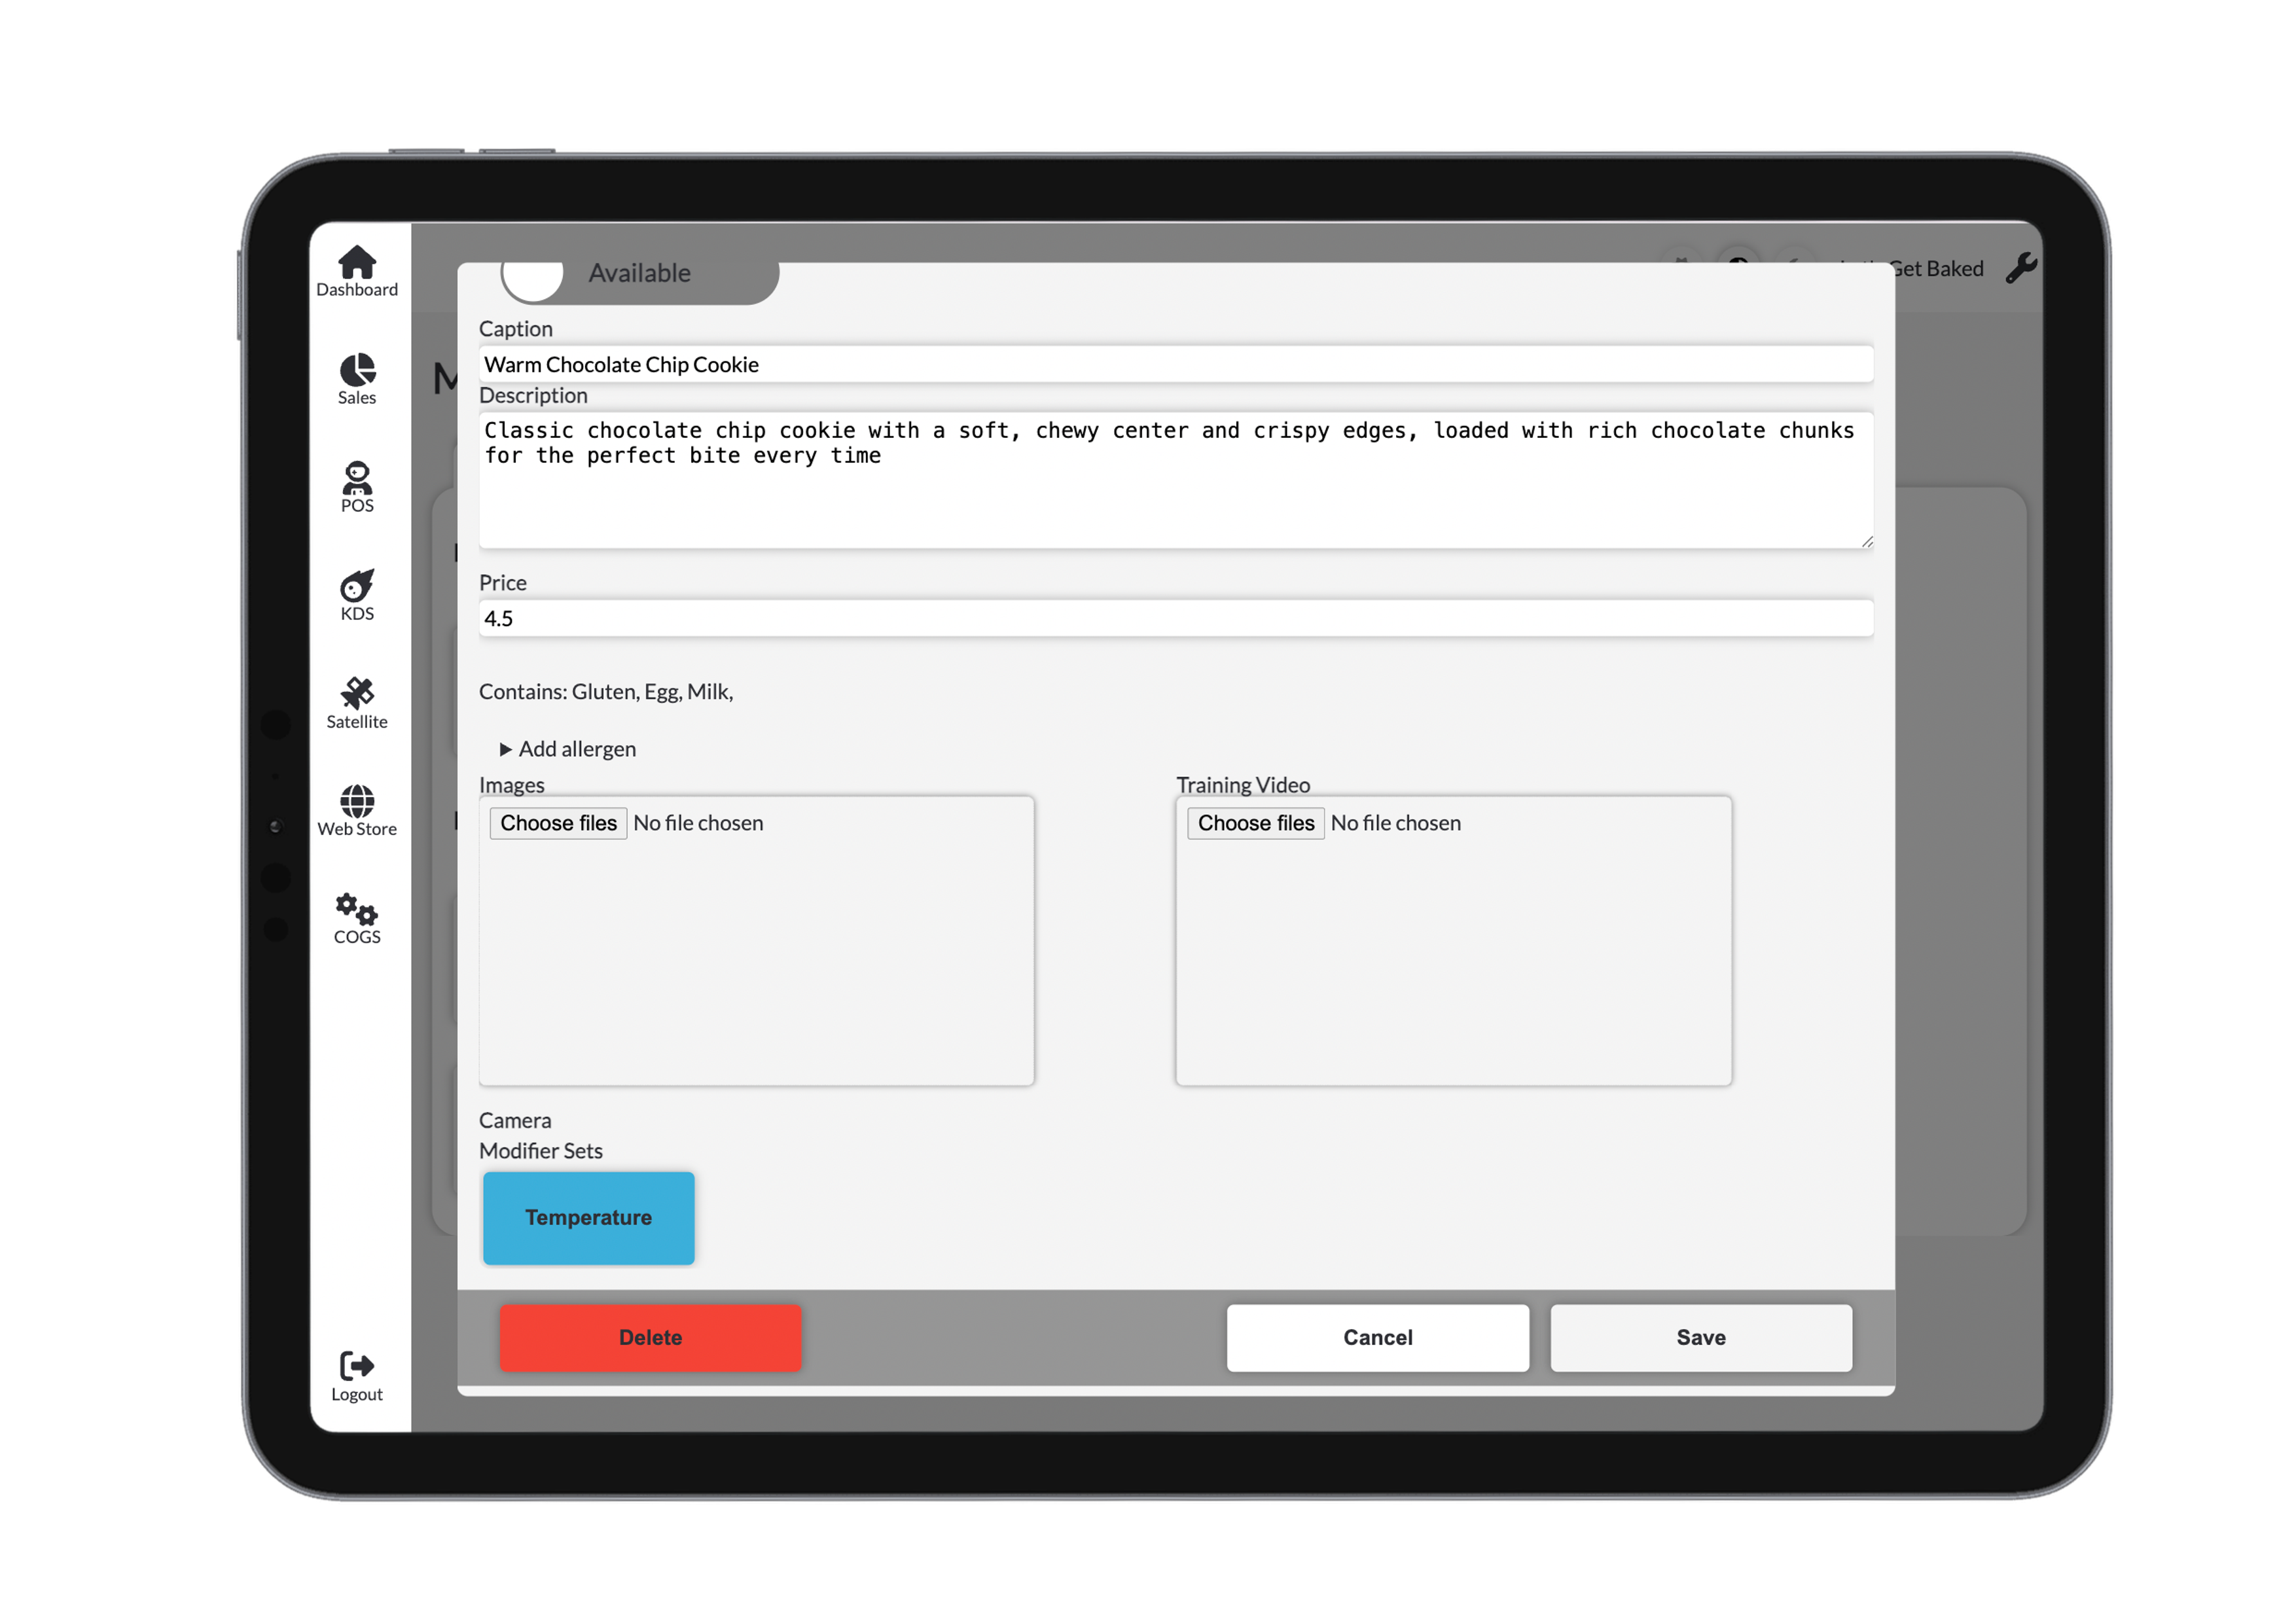
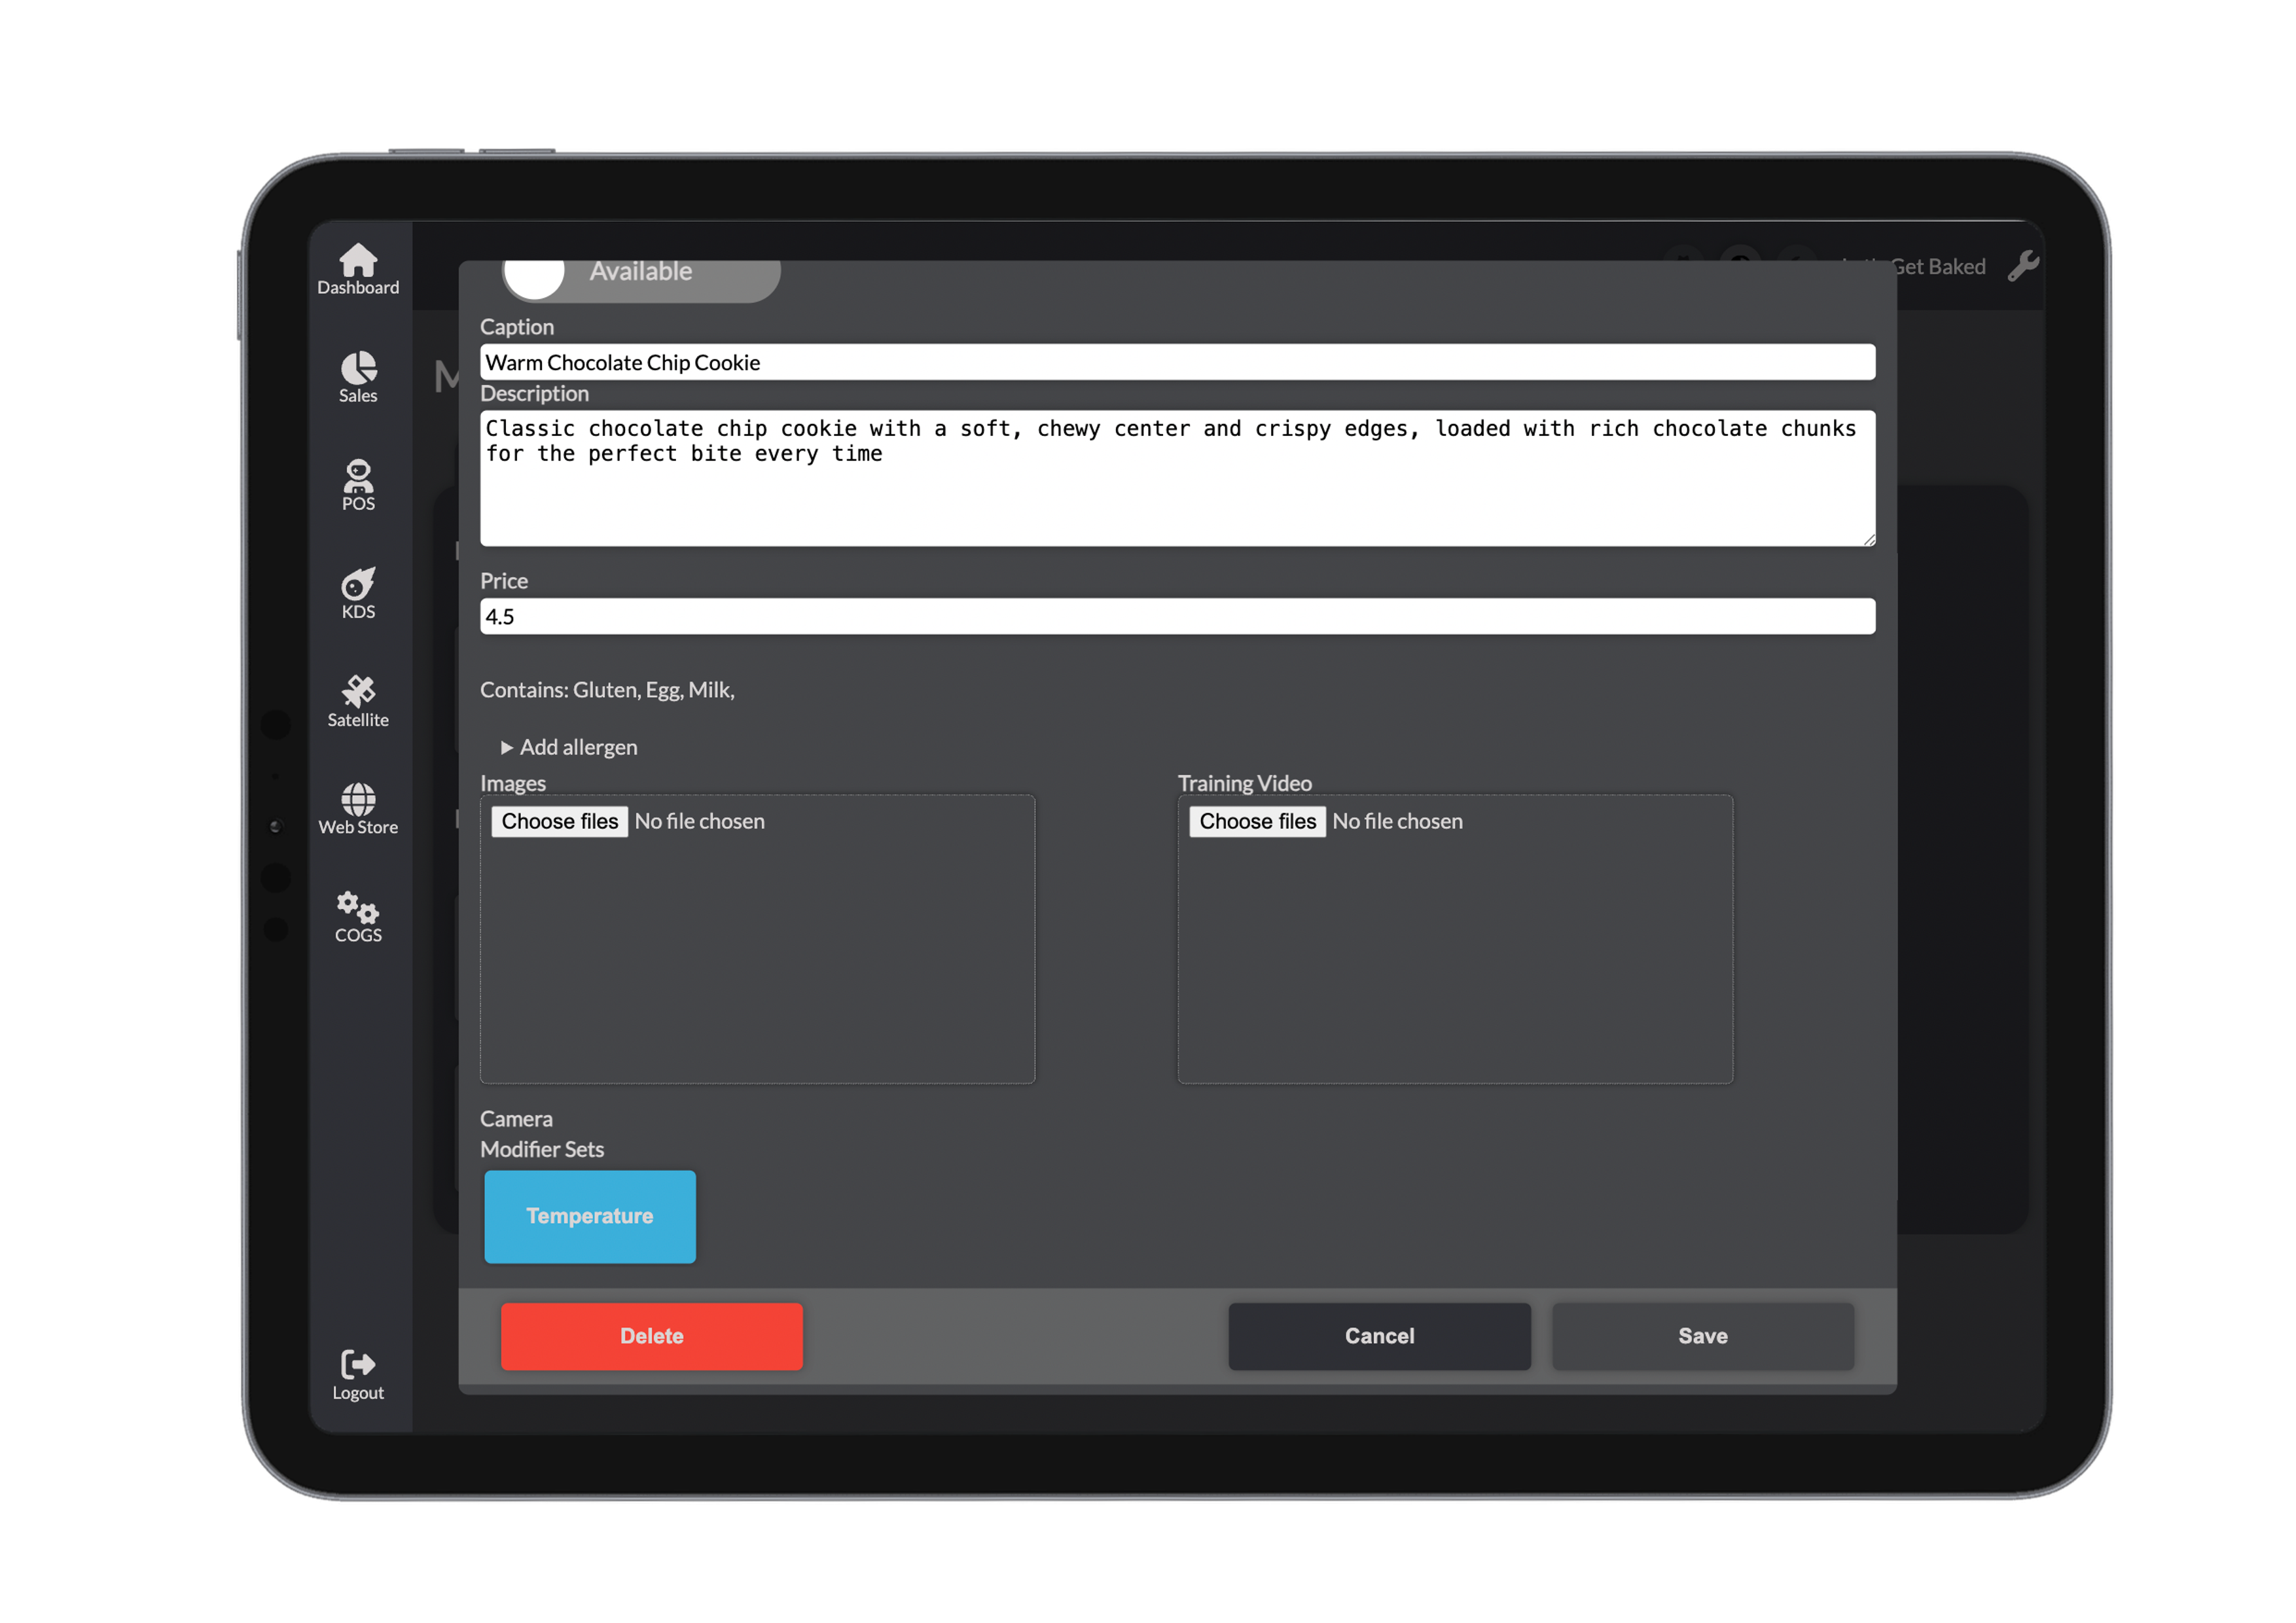
Once you're happy, click Save. The product will appear in your menu.
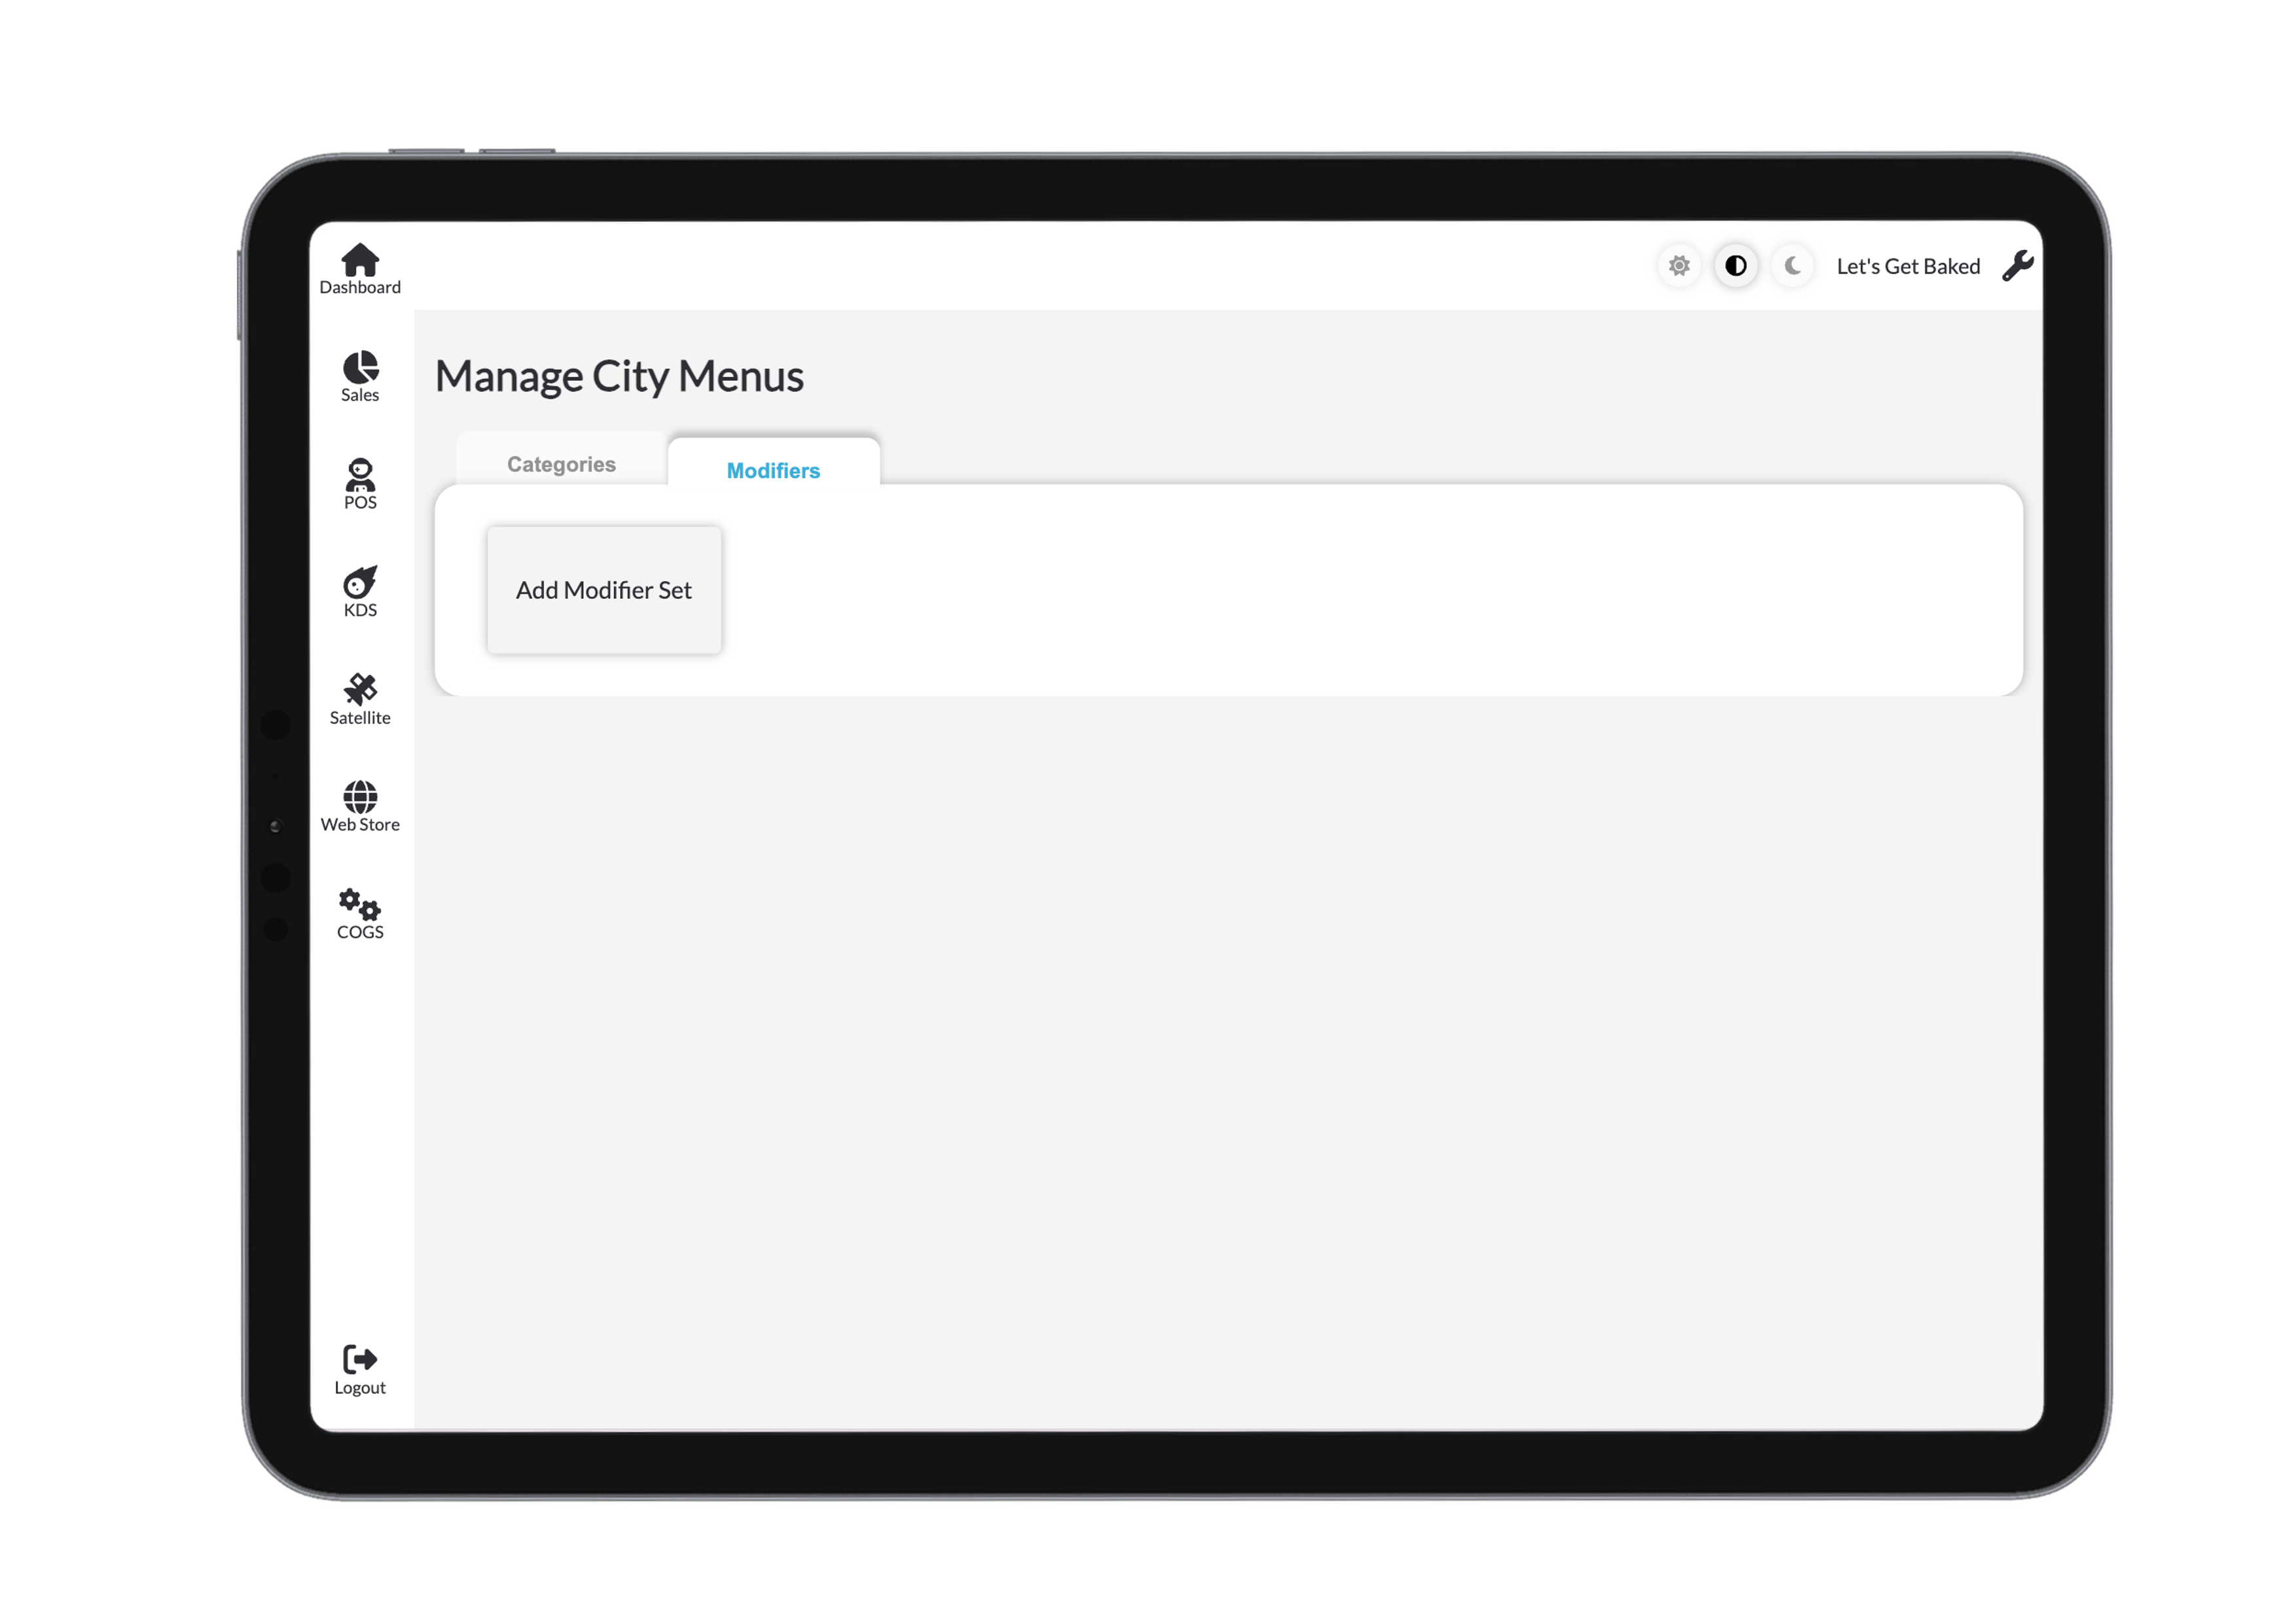
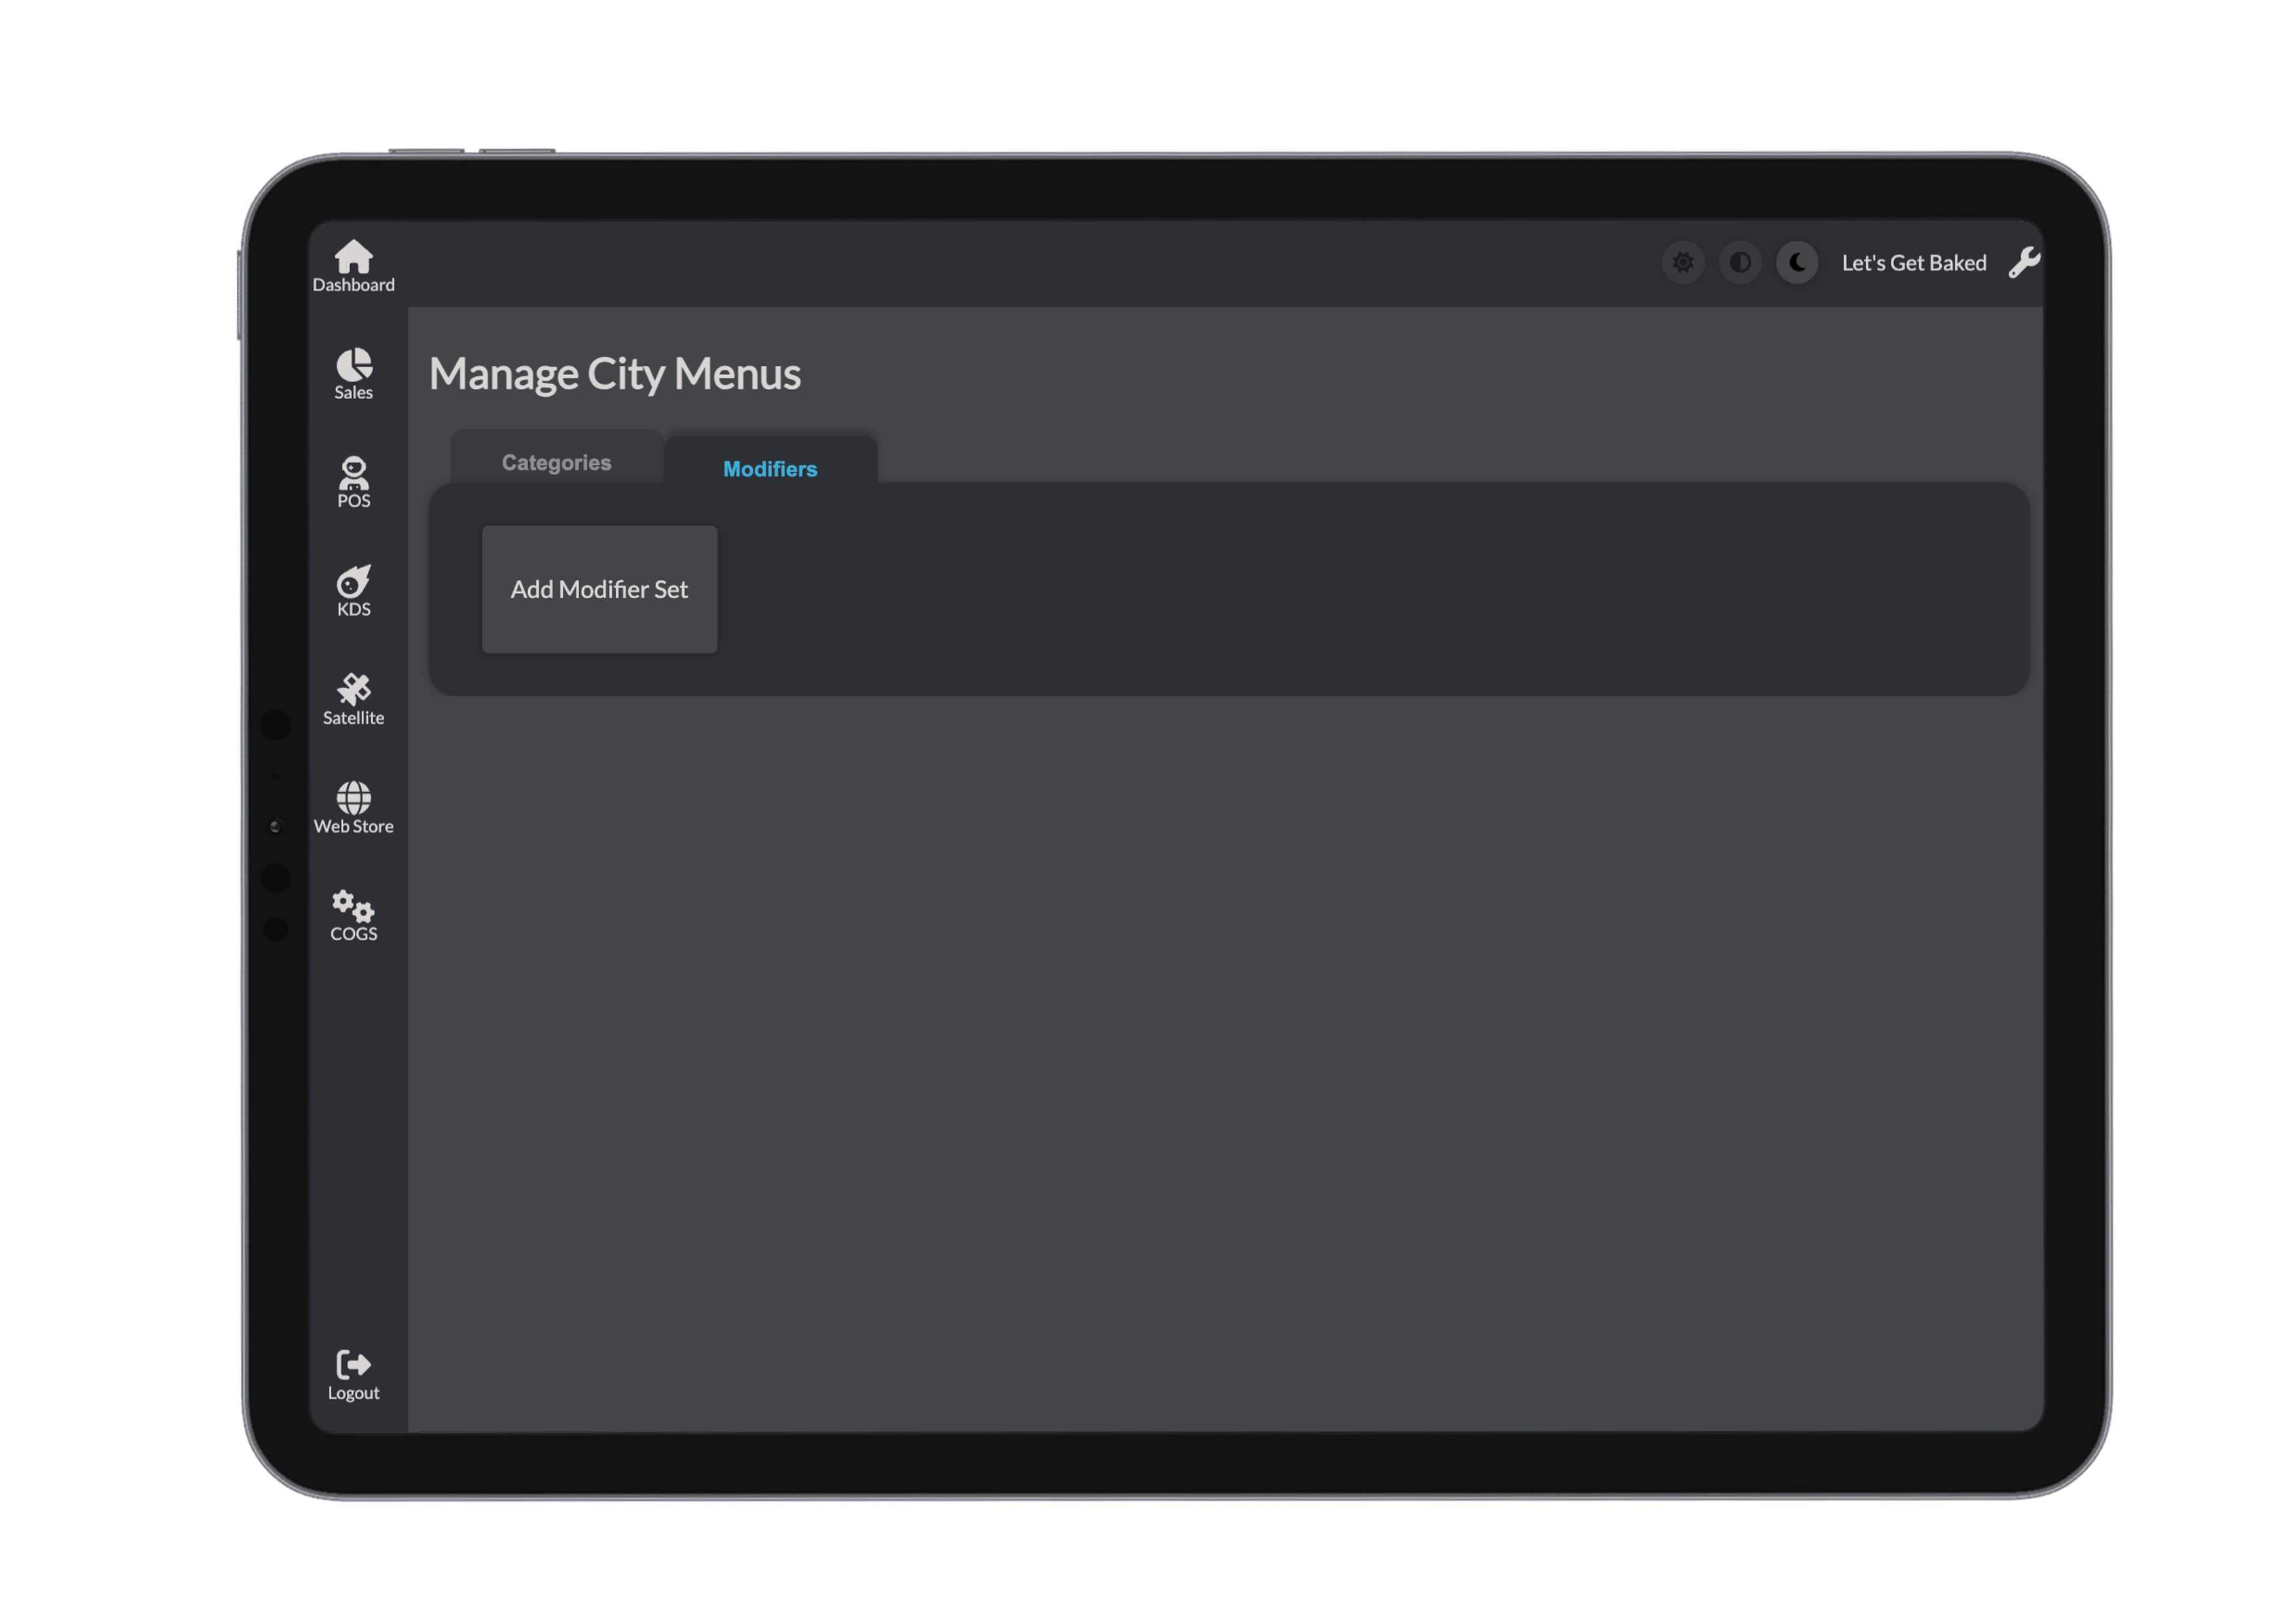
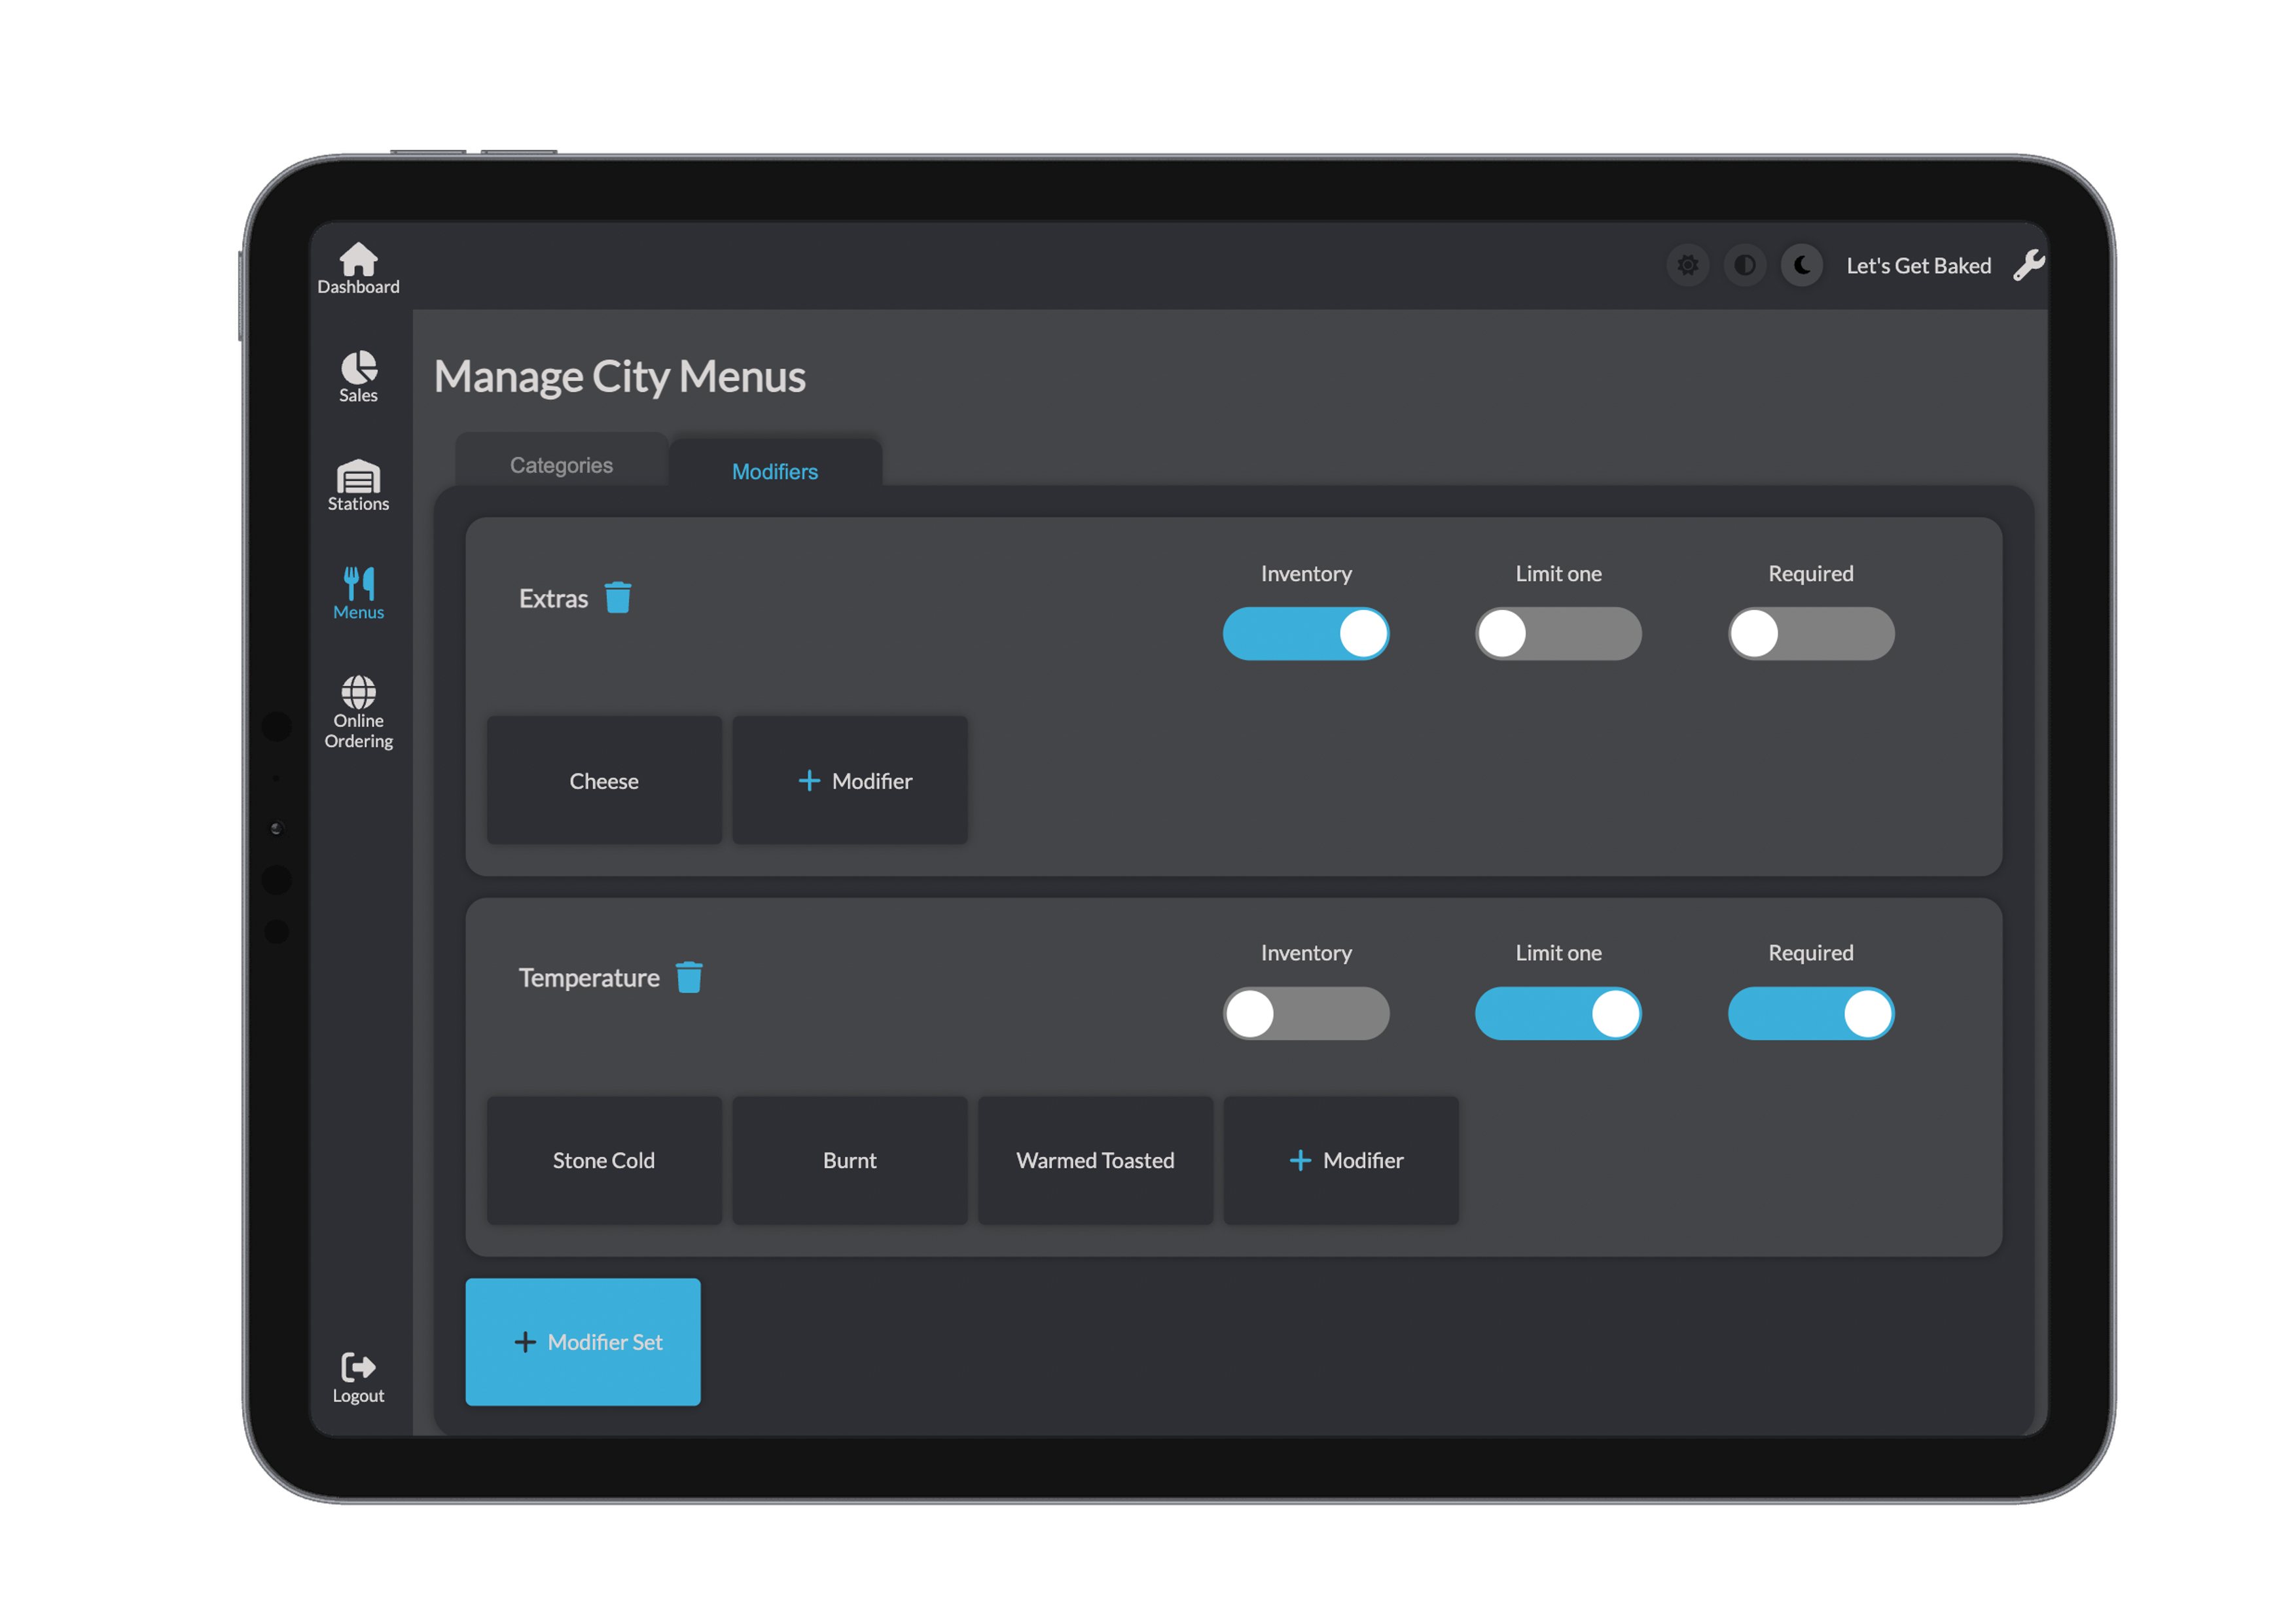
Add Modifiers
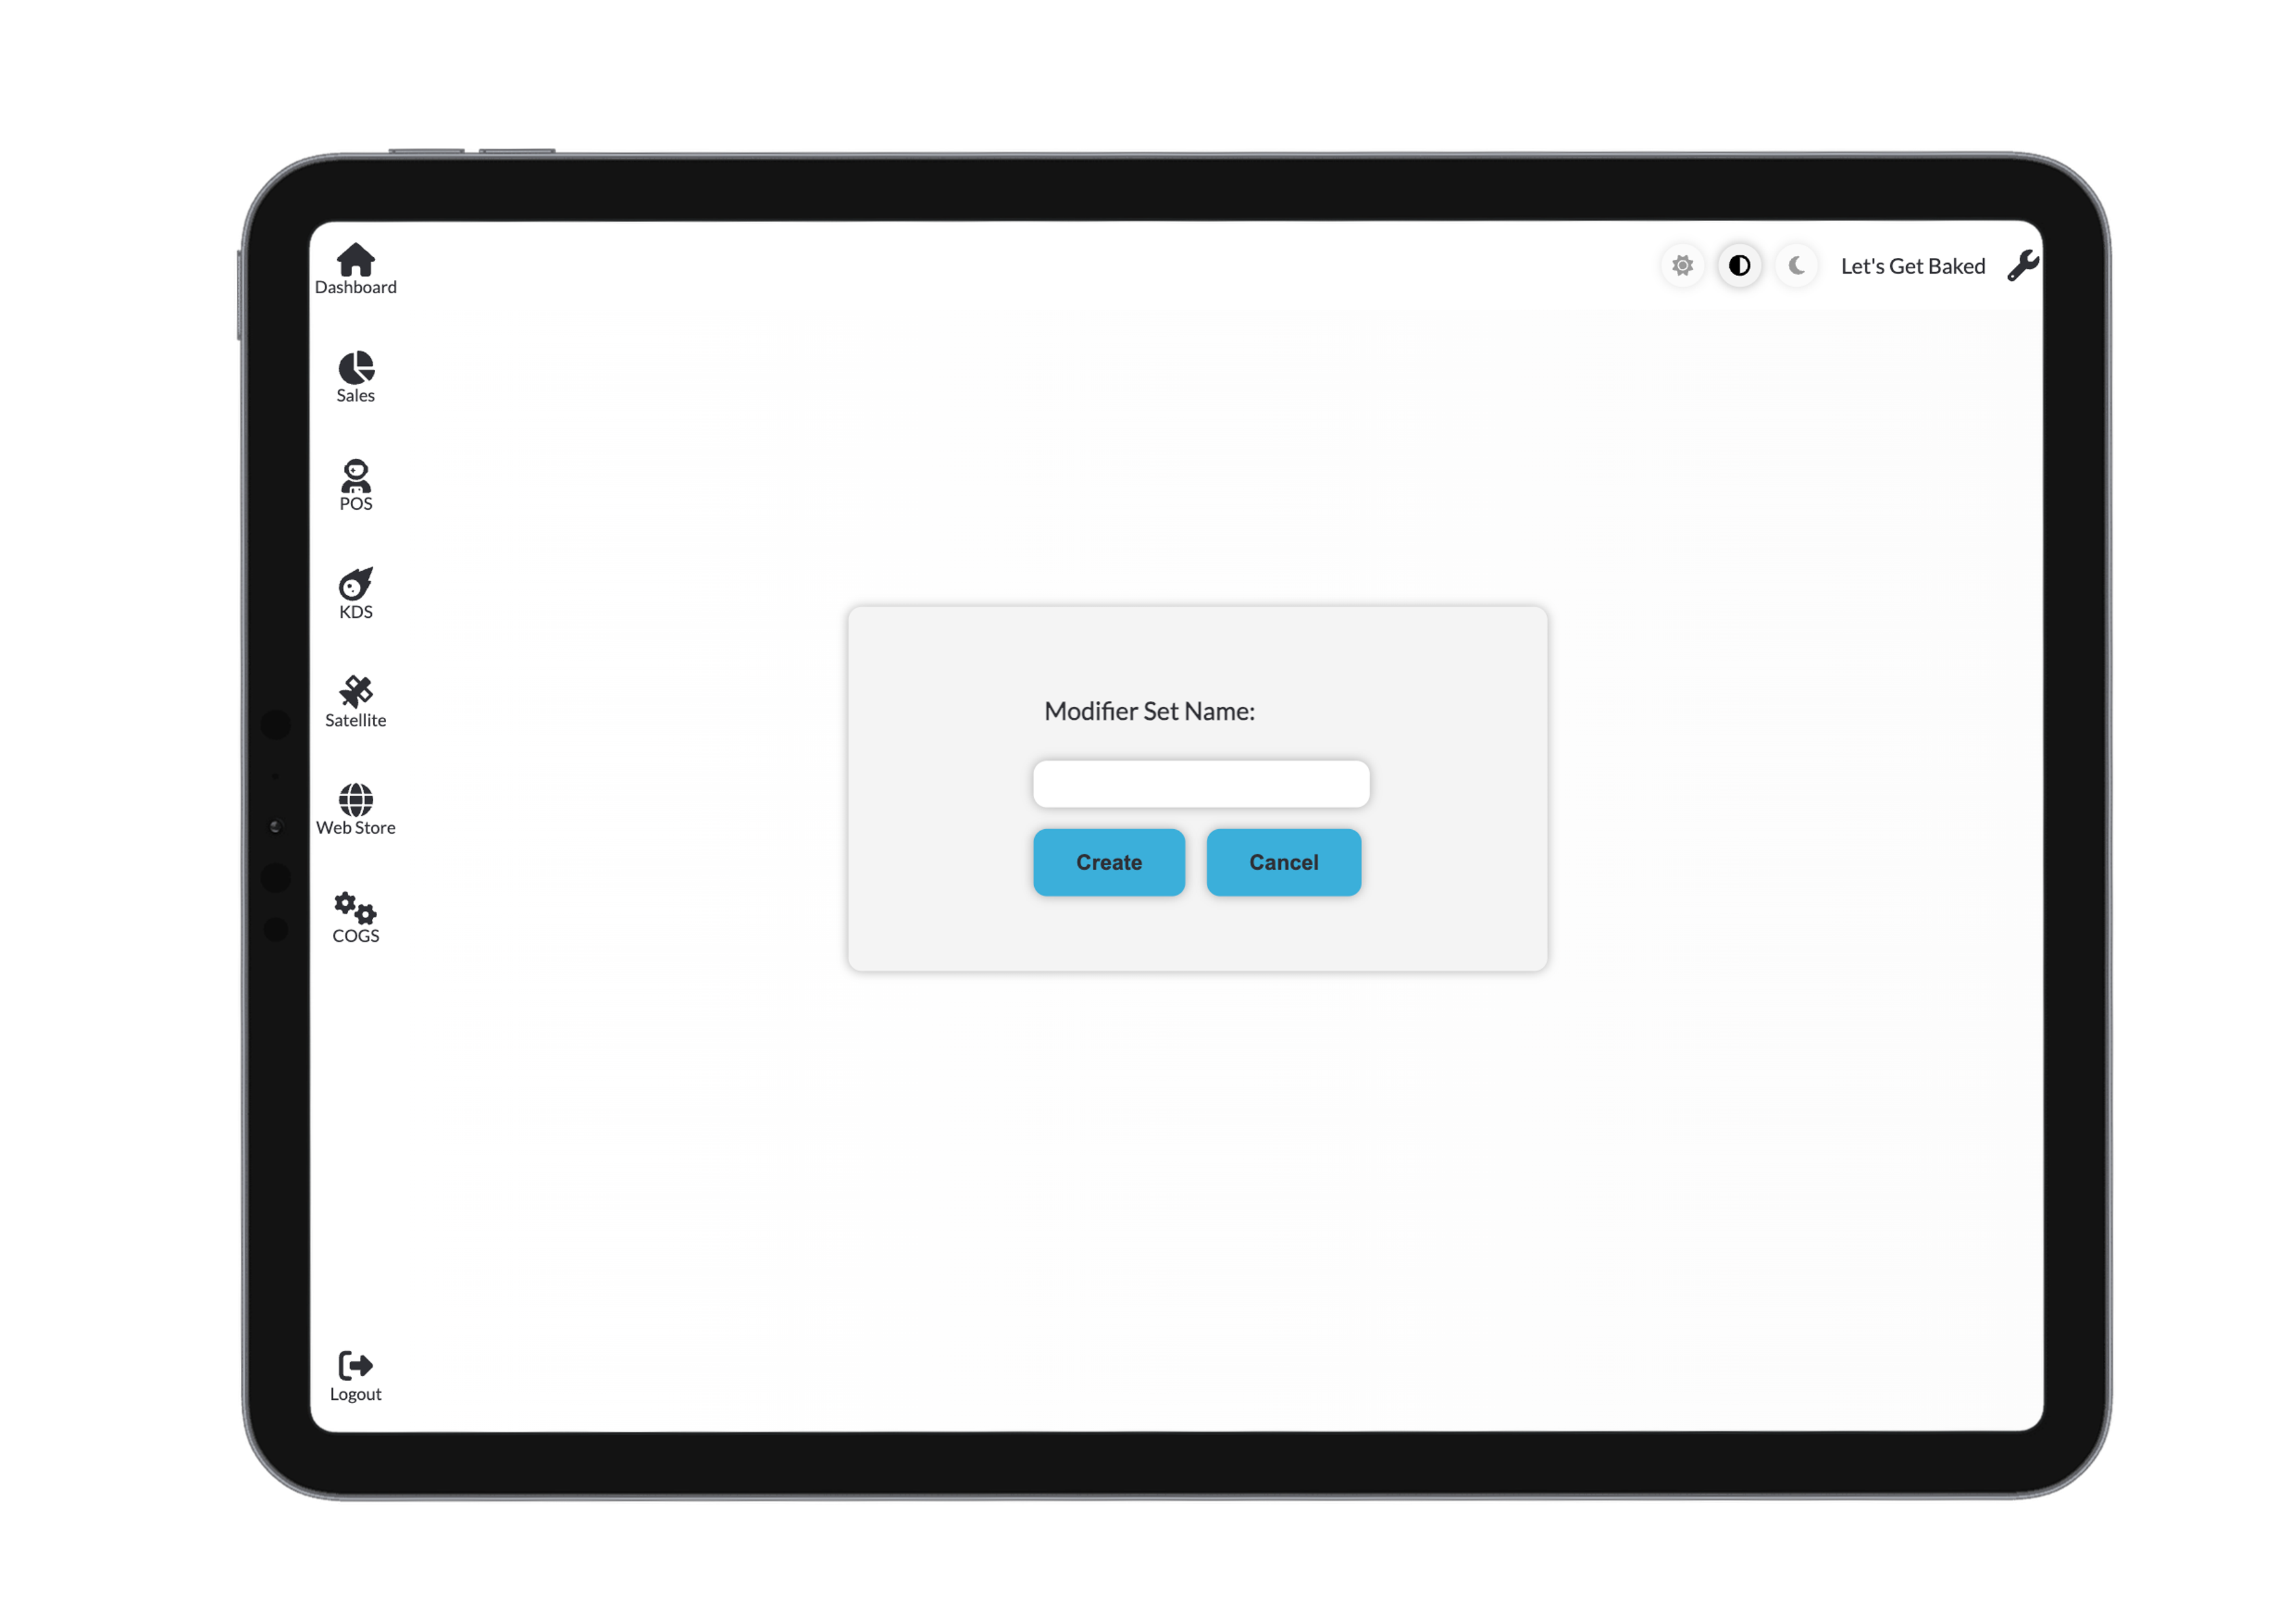
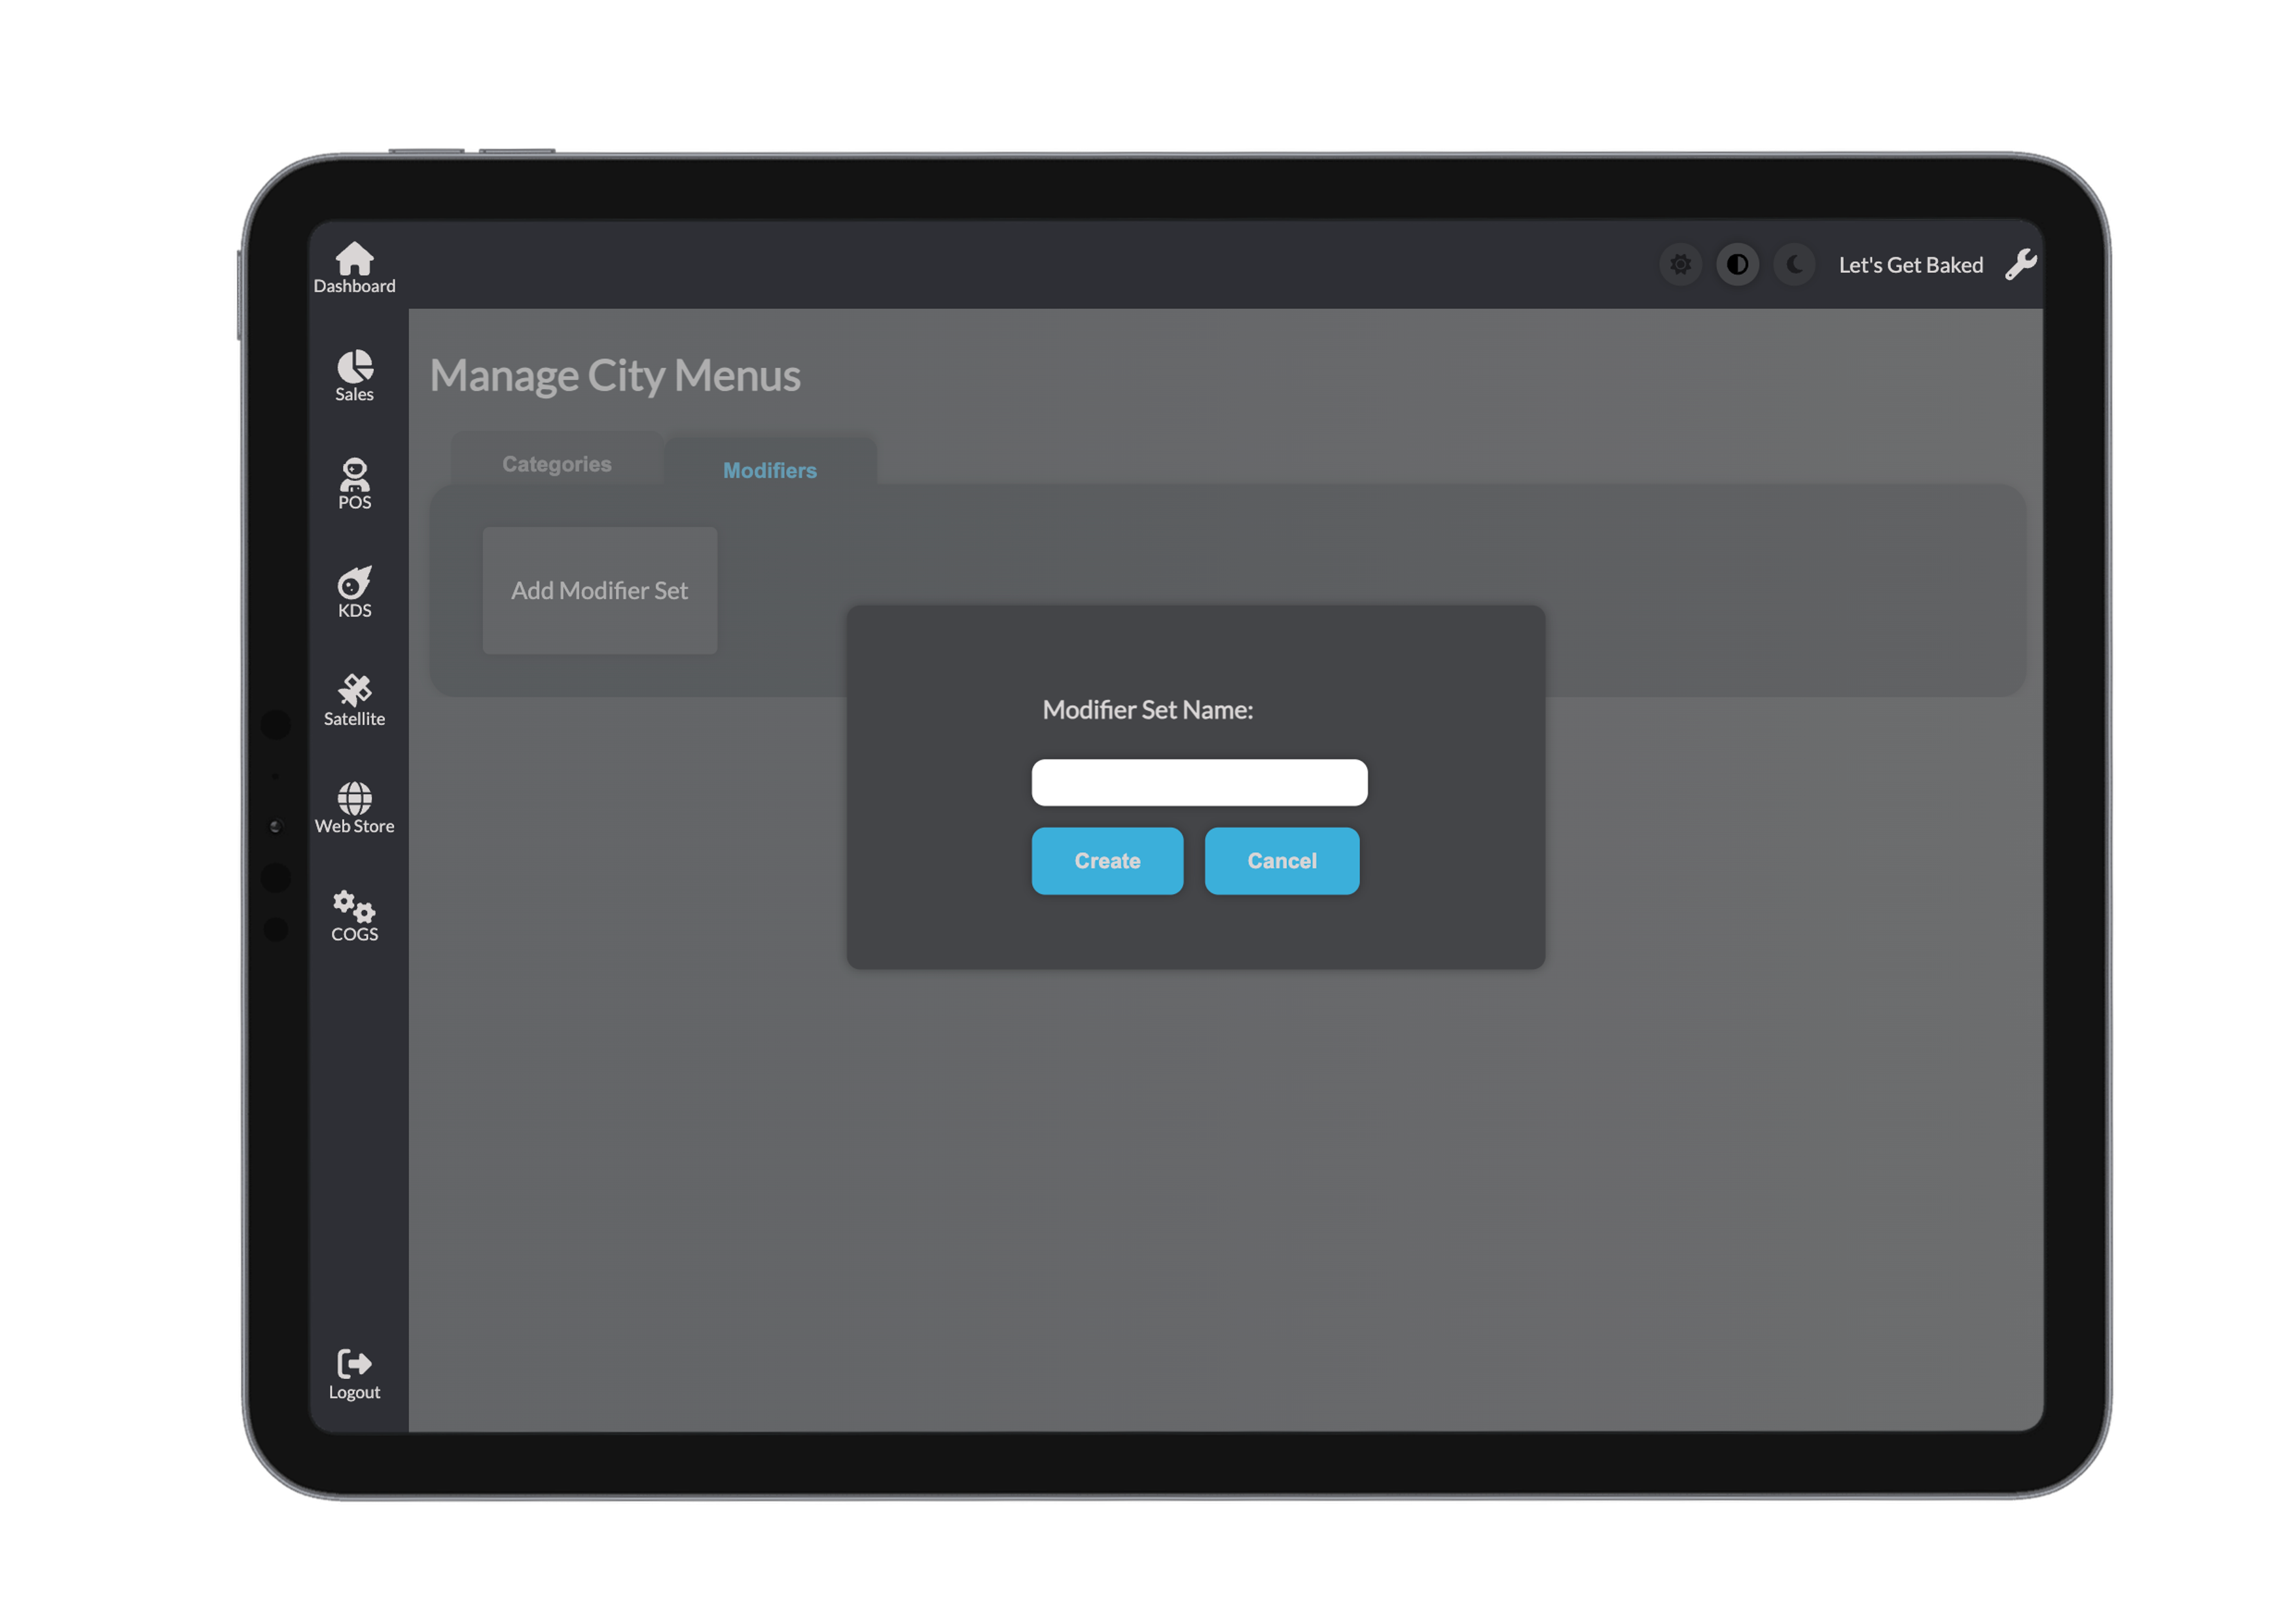
Step 1: Create a Modifier Set
Go to Modifiers and click to add a new set. You’ll be asked to name it and confirm.
Step 2: Add Modifiers
For each modifier, fill in:
- Name – e.g., Extra Cheese
- Description – Visible to staff and online customers
- Quantity – Available stock (e.g., 15 servings of cheese)
- Modifier Price – e.g., +$1.00
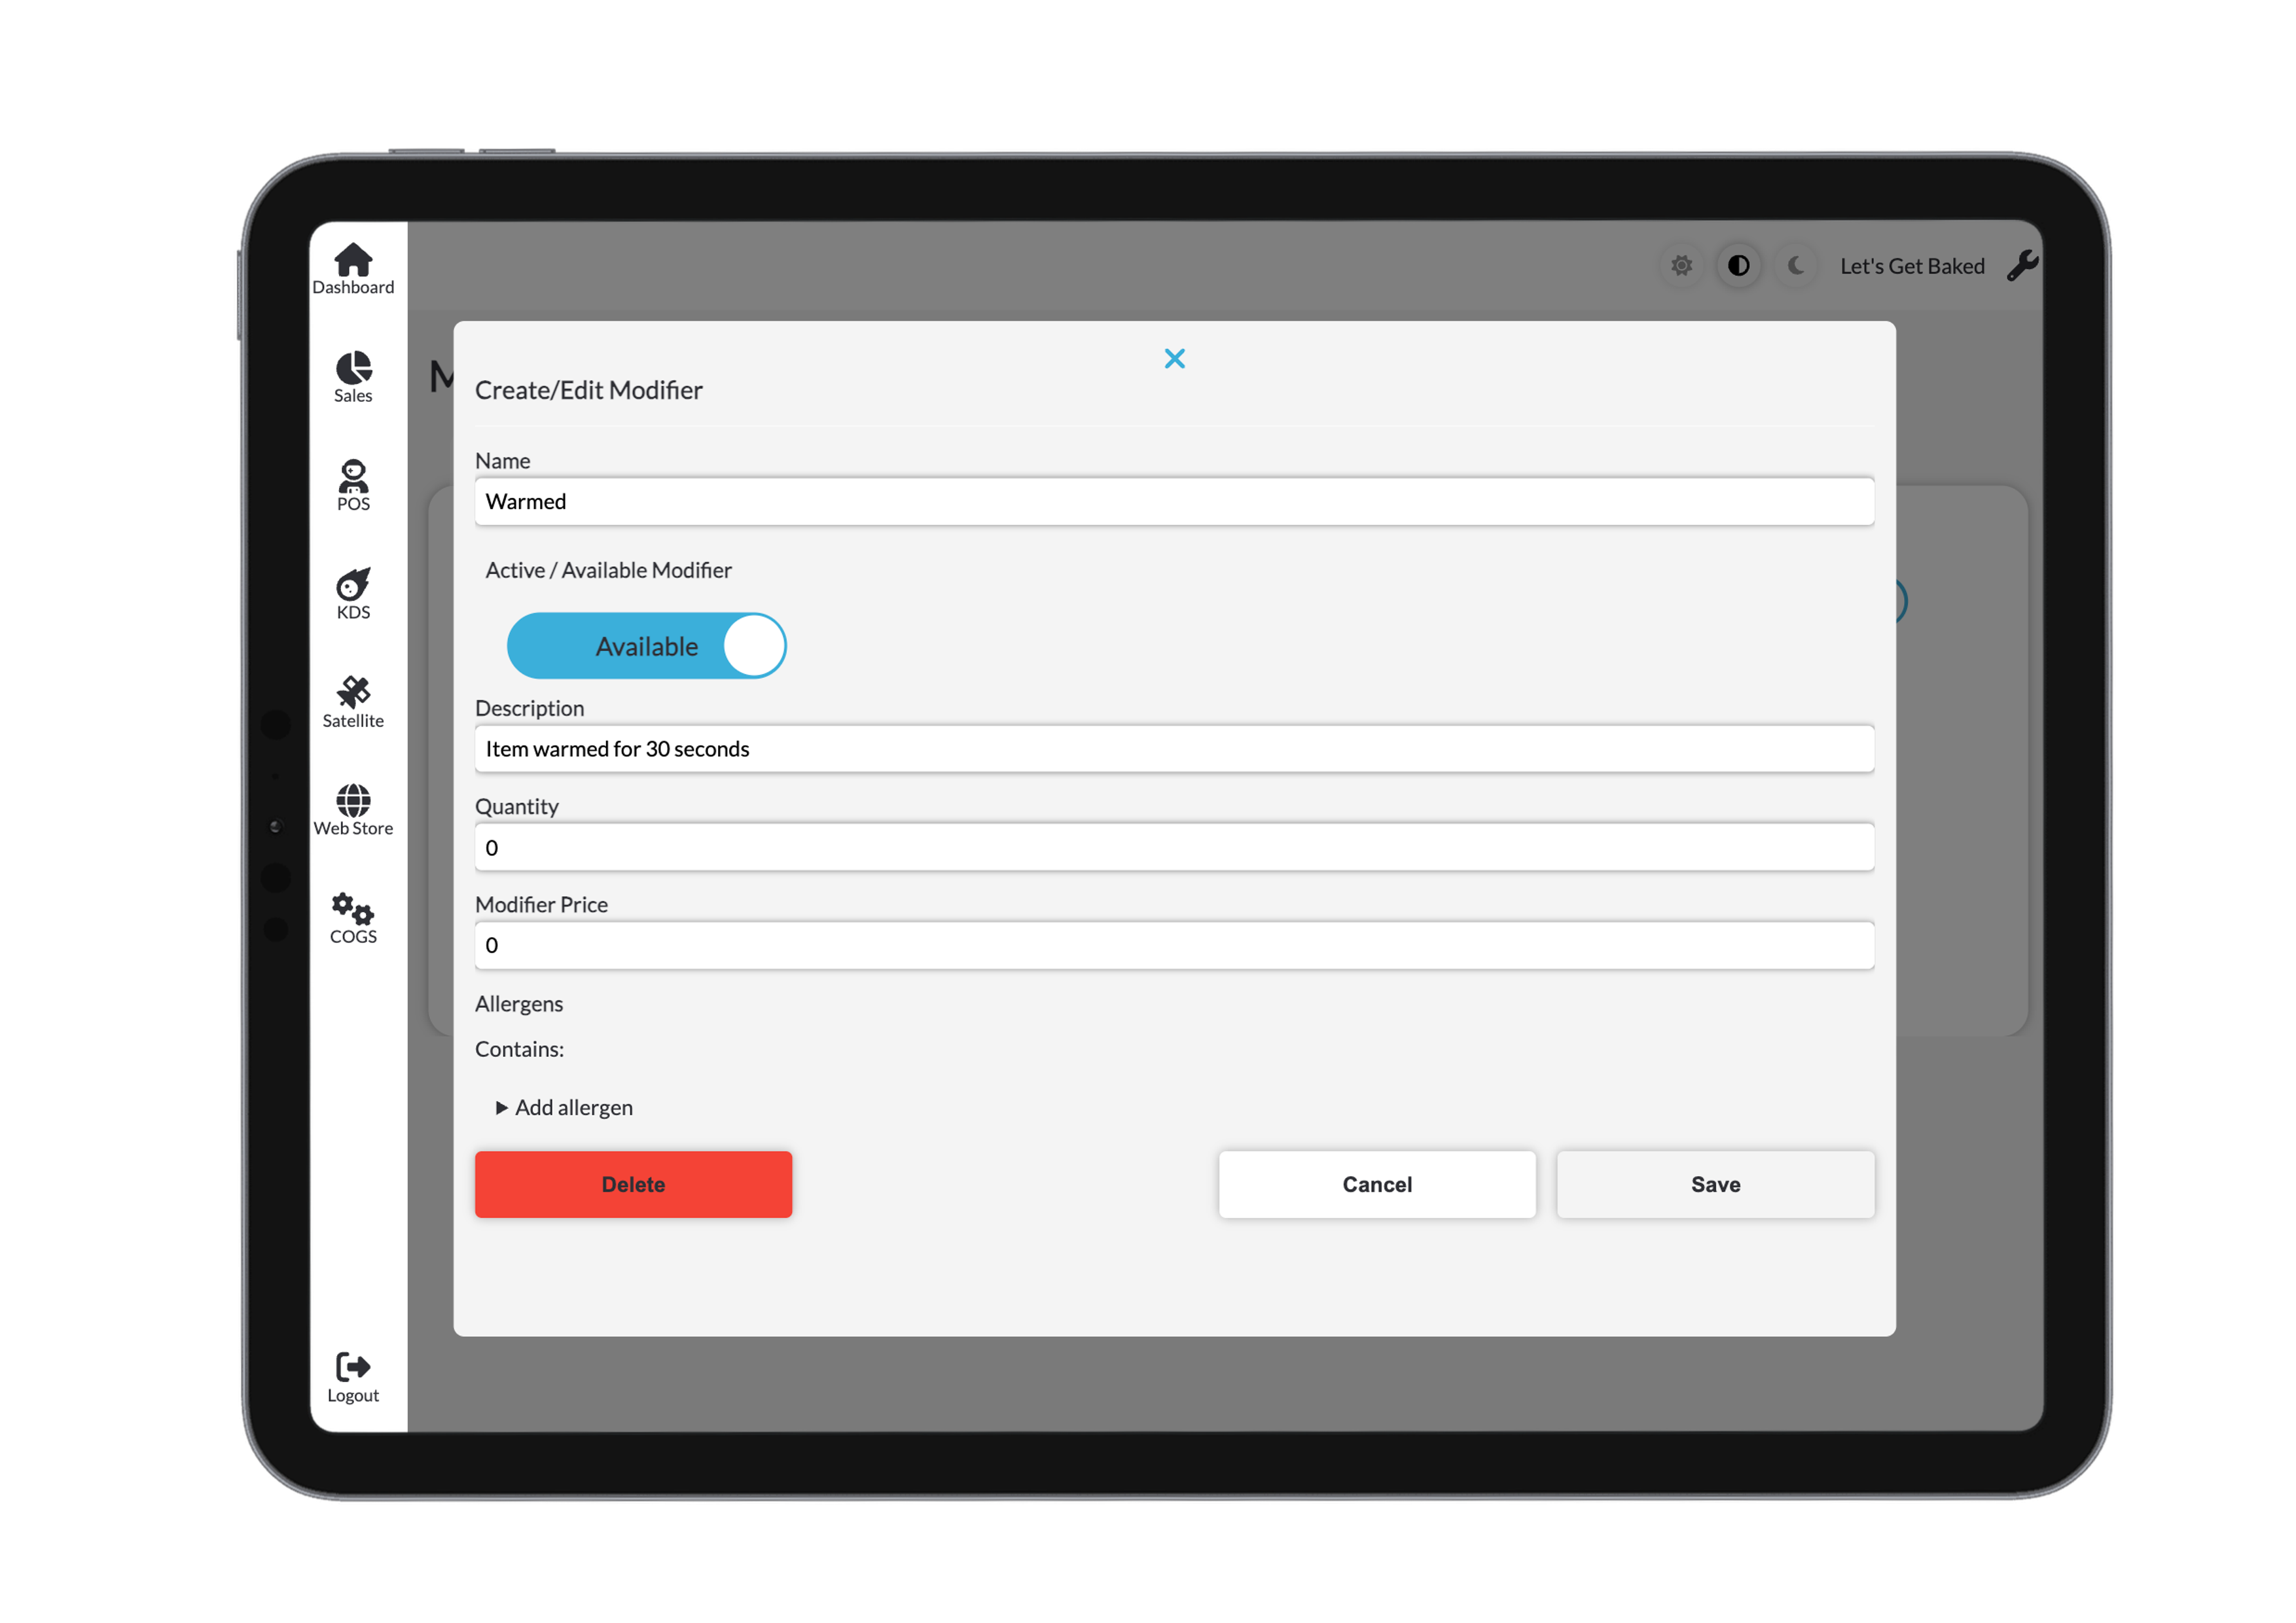
Don’t forget to assign any relevant allergens.
Then click Save, Cancel, or Delete.
Step 3: Use Modifier Set Toggles
Each modifier set includes the following toggles:
- Inventory – Track available stock
- Limit One – Restrict to one choice (e.g., milk options)
- Required – At least one option must be selected
These toggles only apply if the set is assigned to a product.
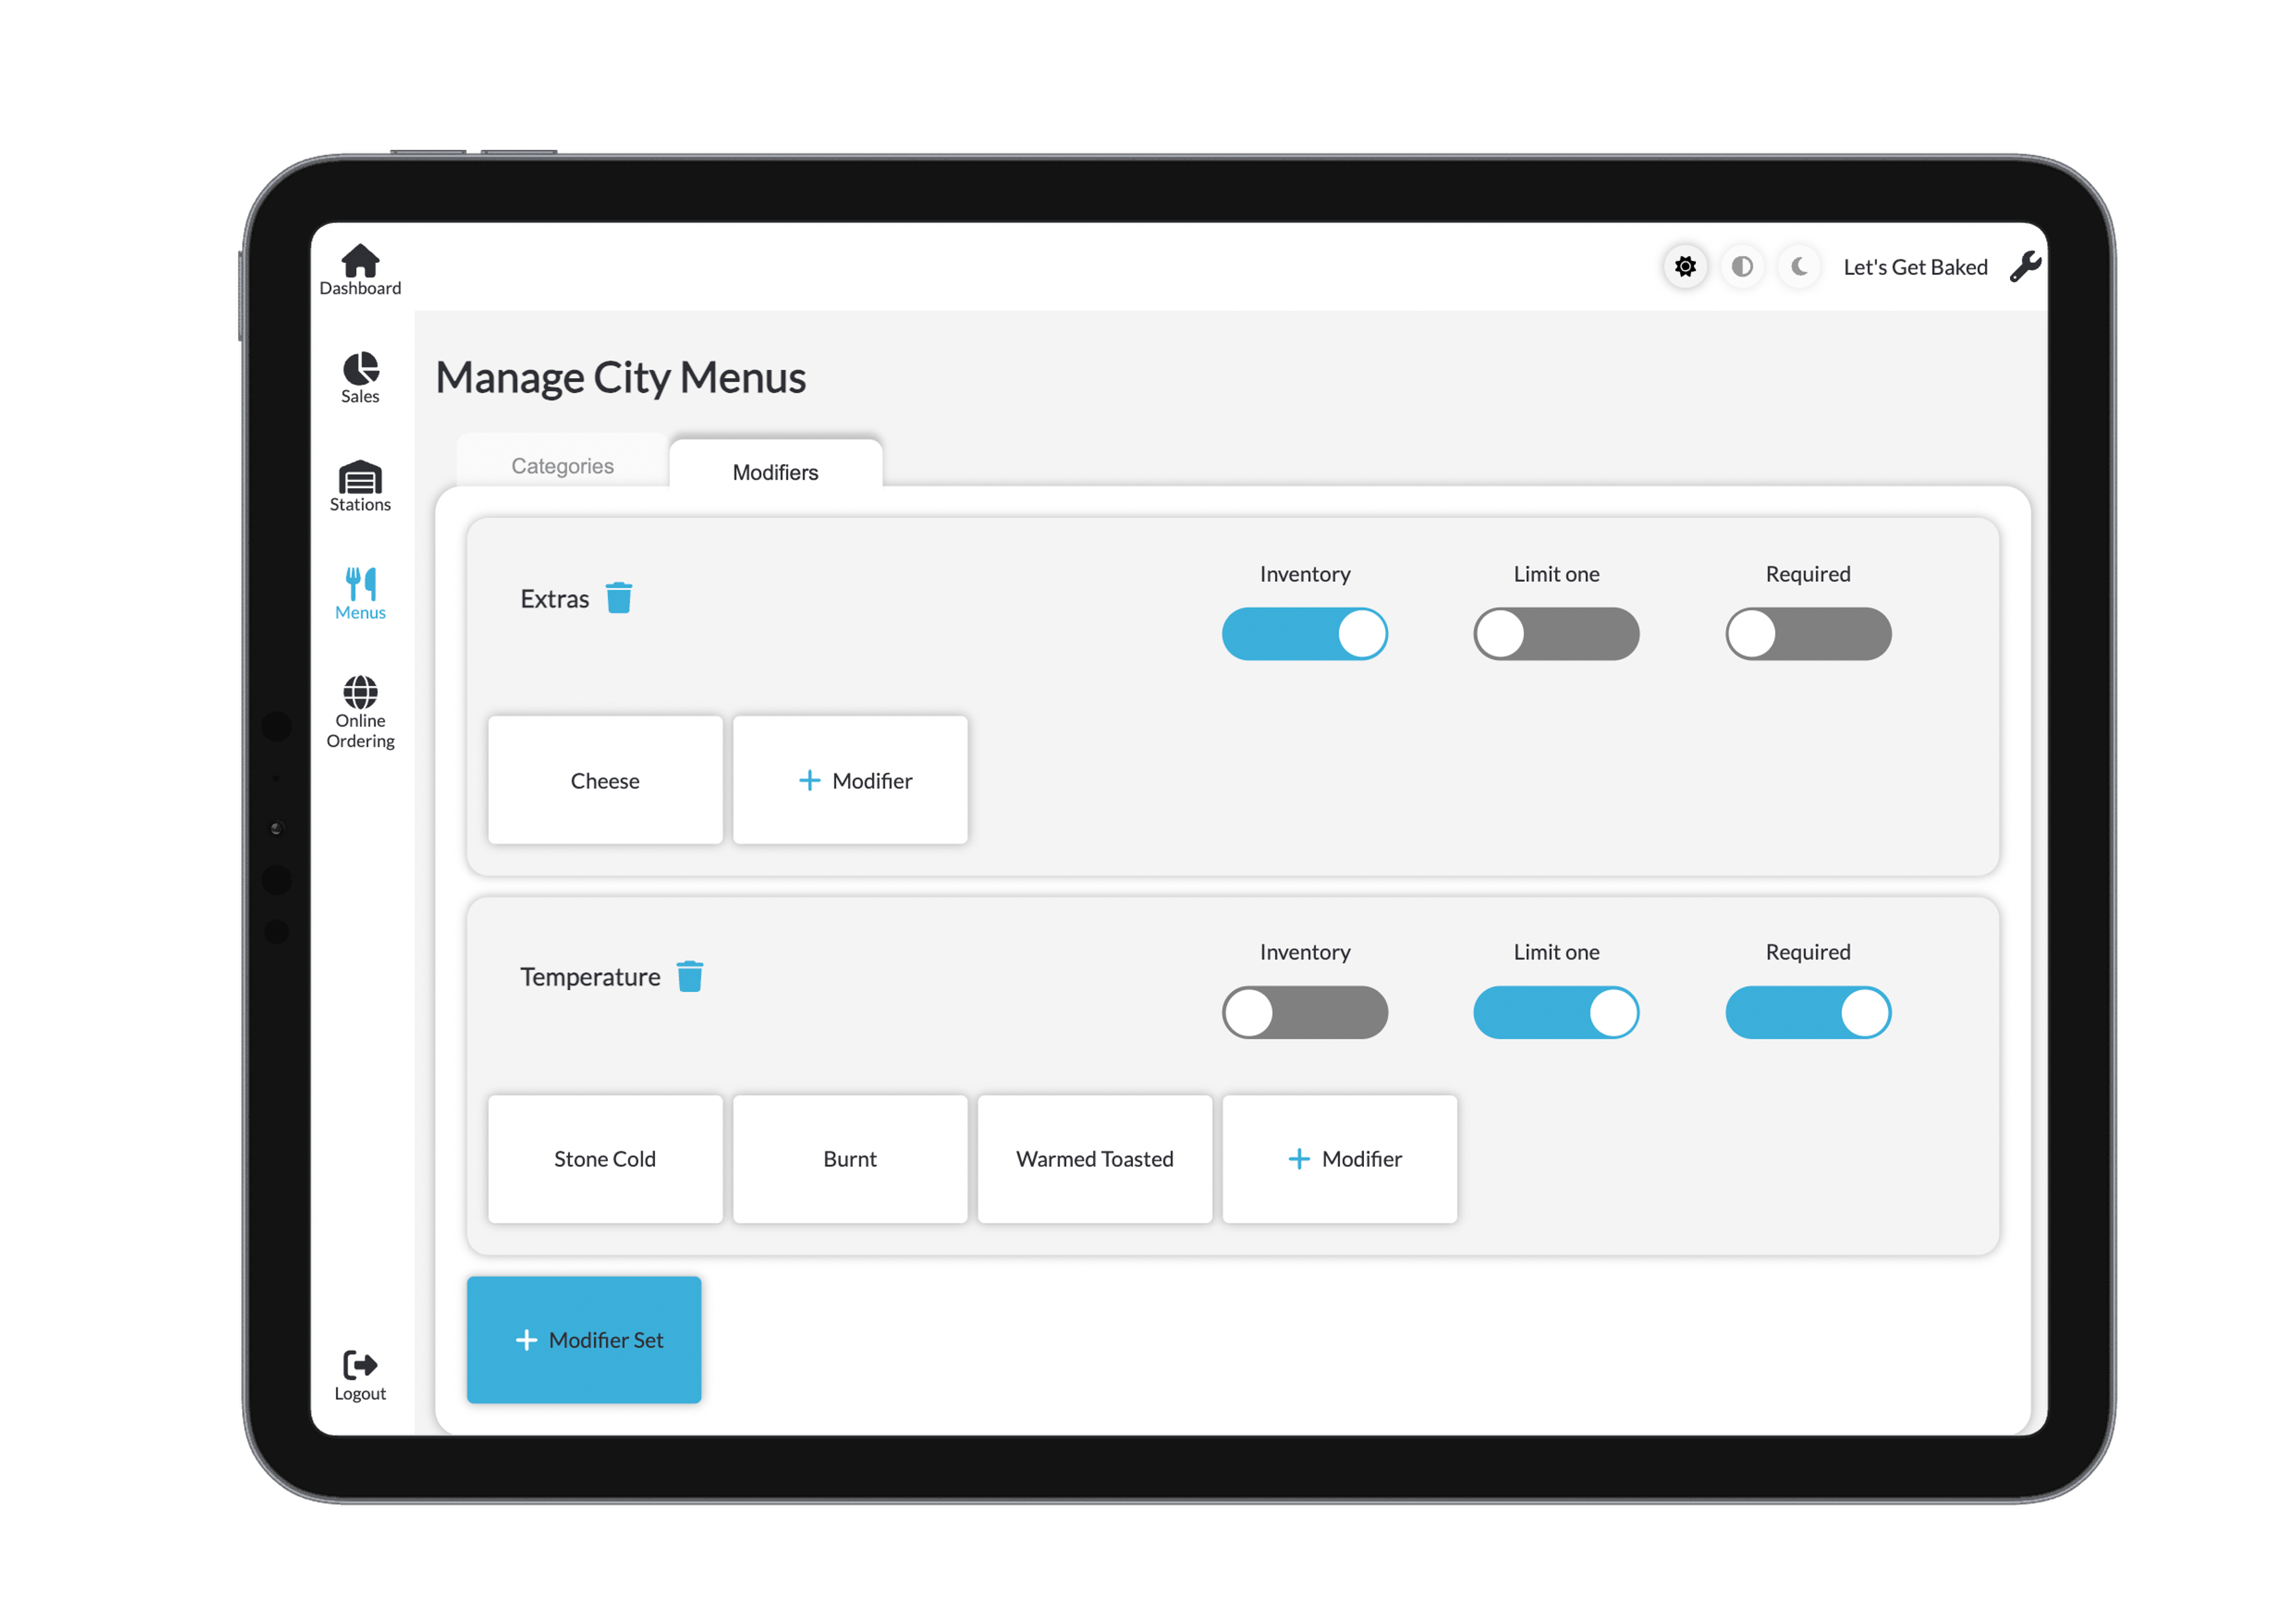
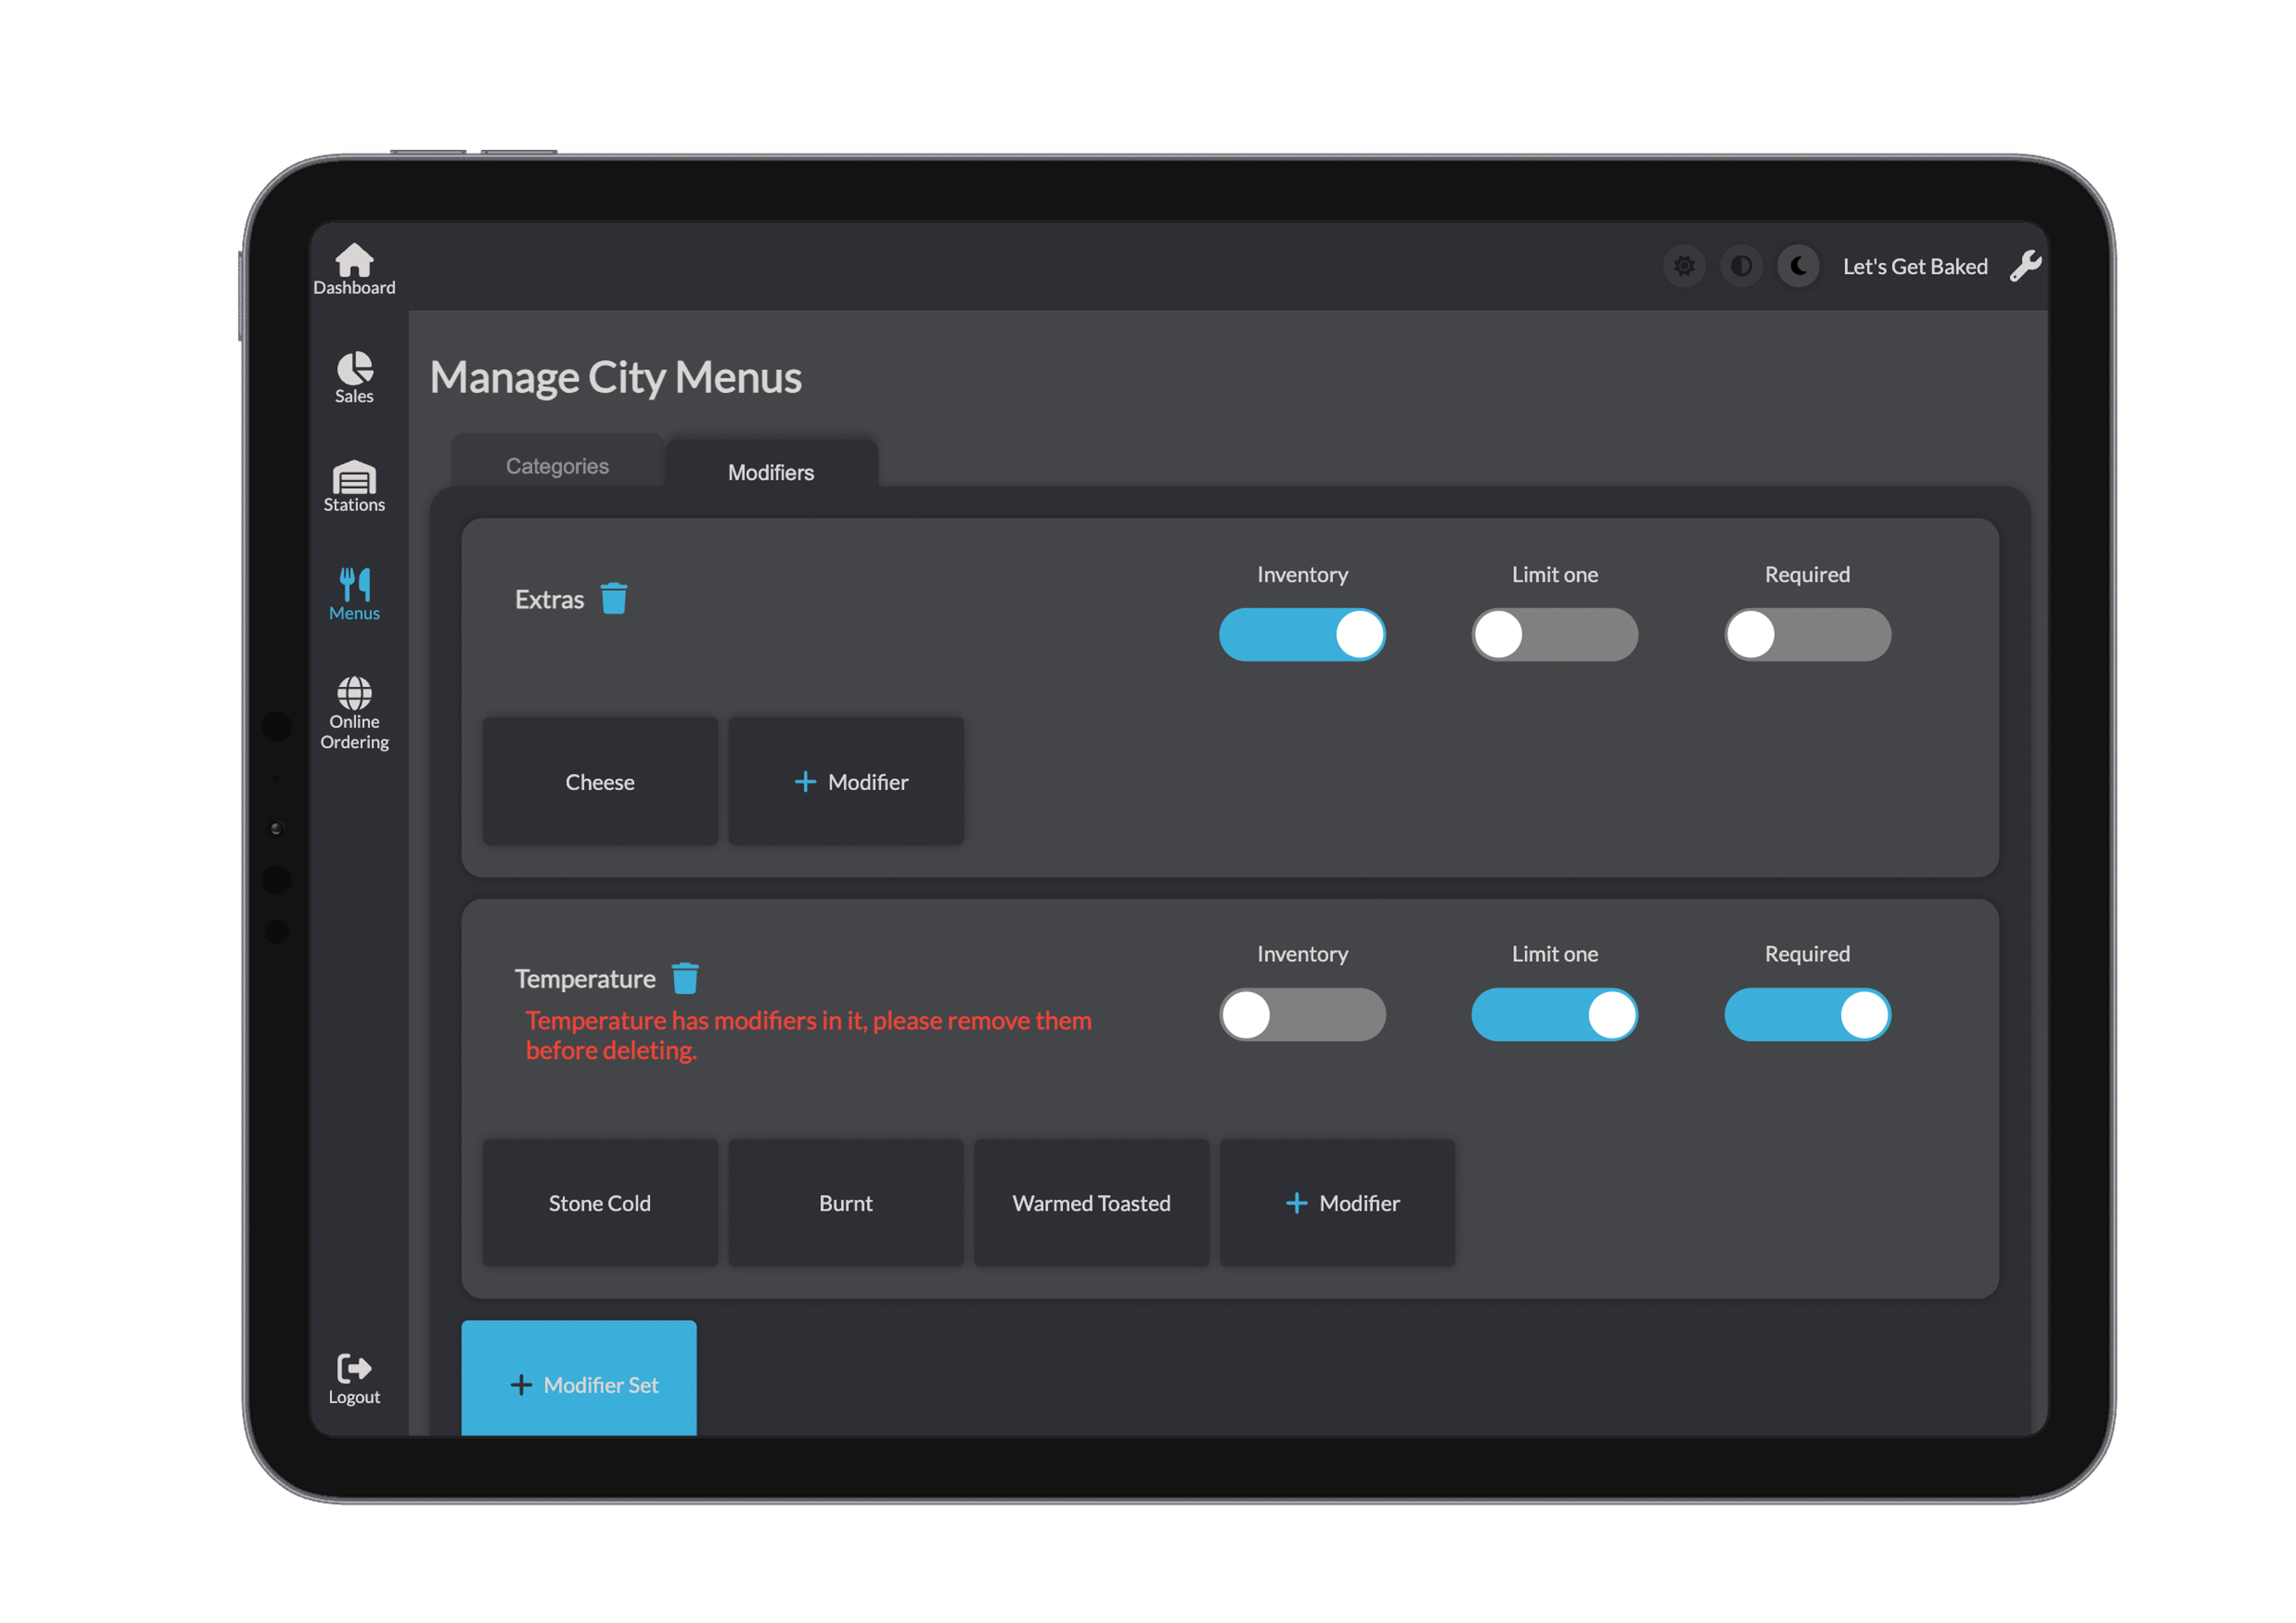
Deleting Products & Modifiers
Click the bin icon next to an item to delete it. If there are products using the modifier then you will not be allowed to delete the modifier as a precaution. 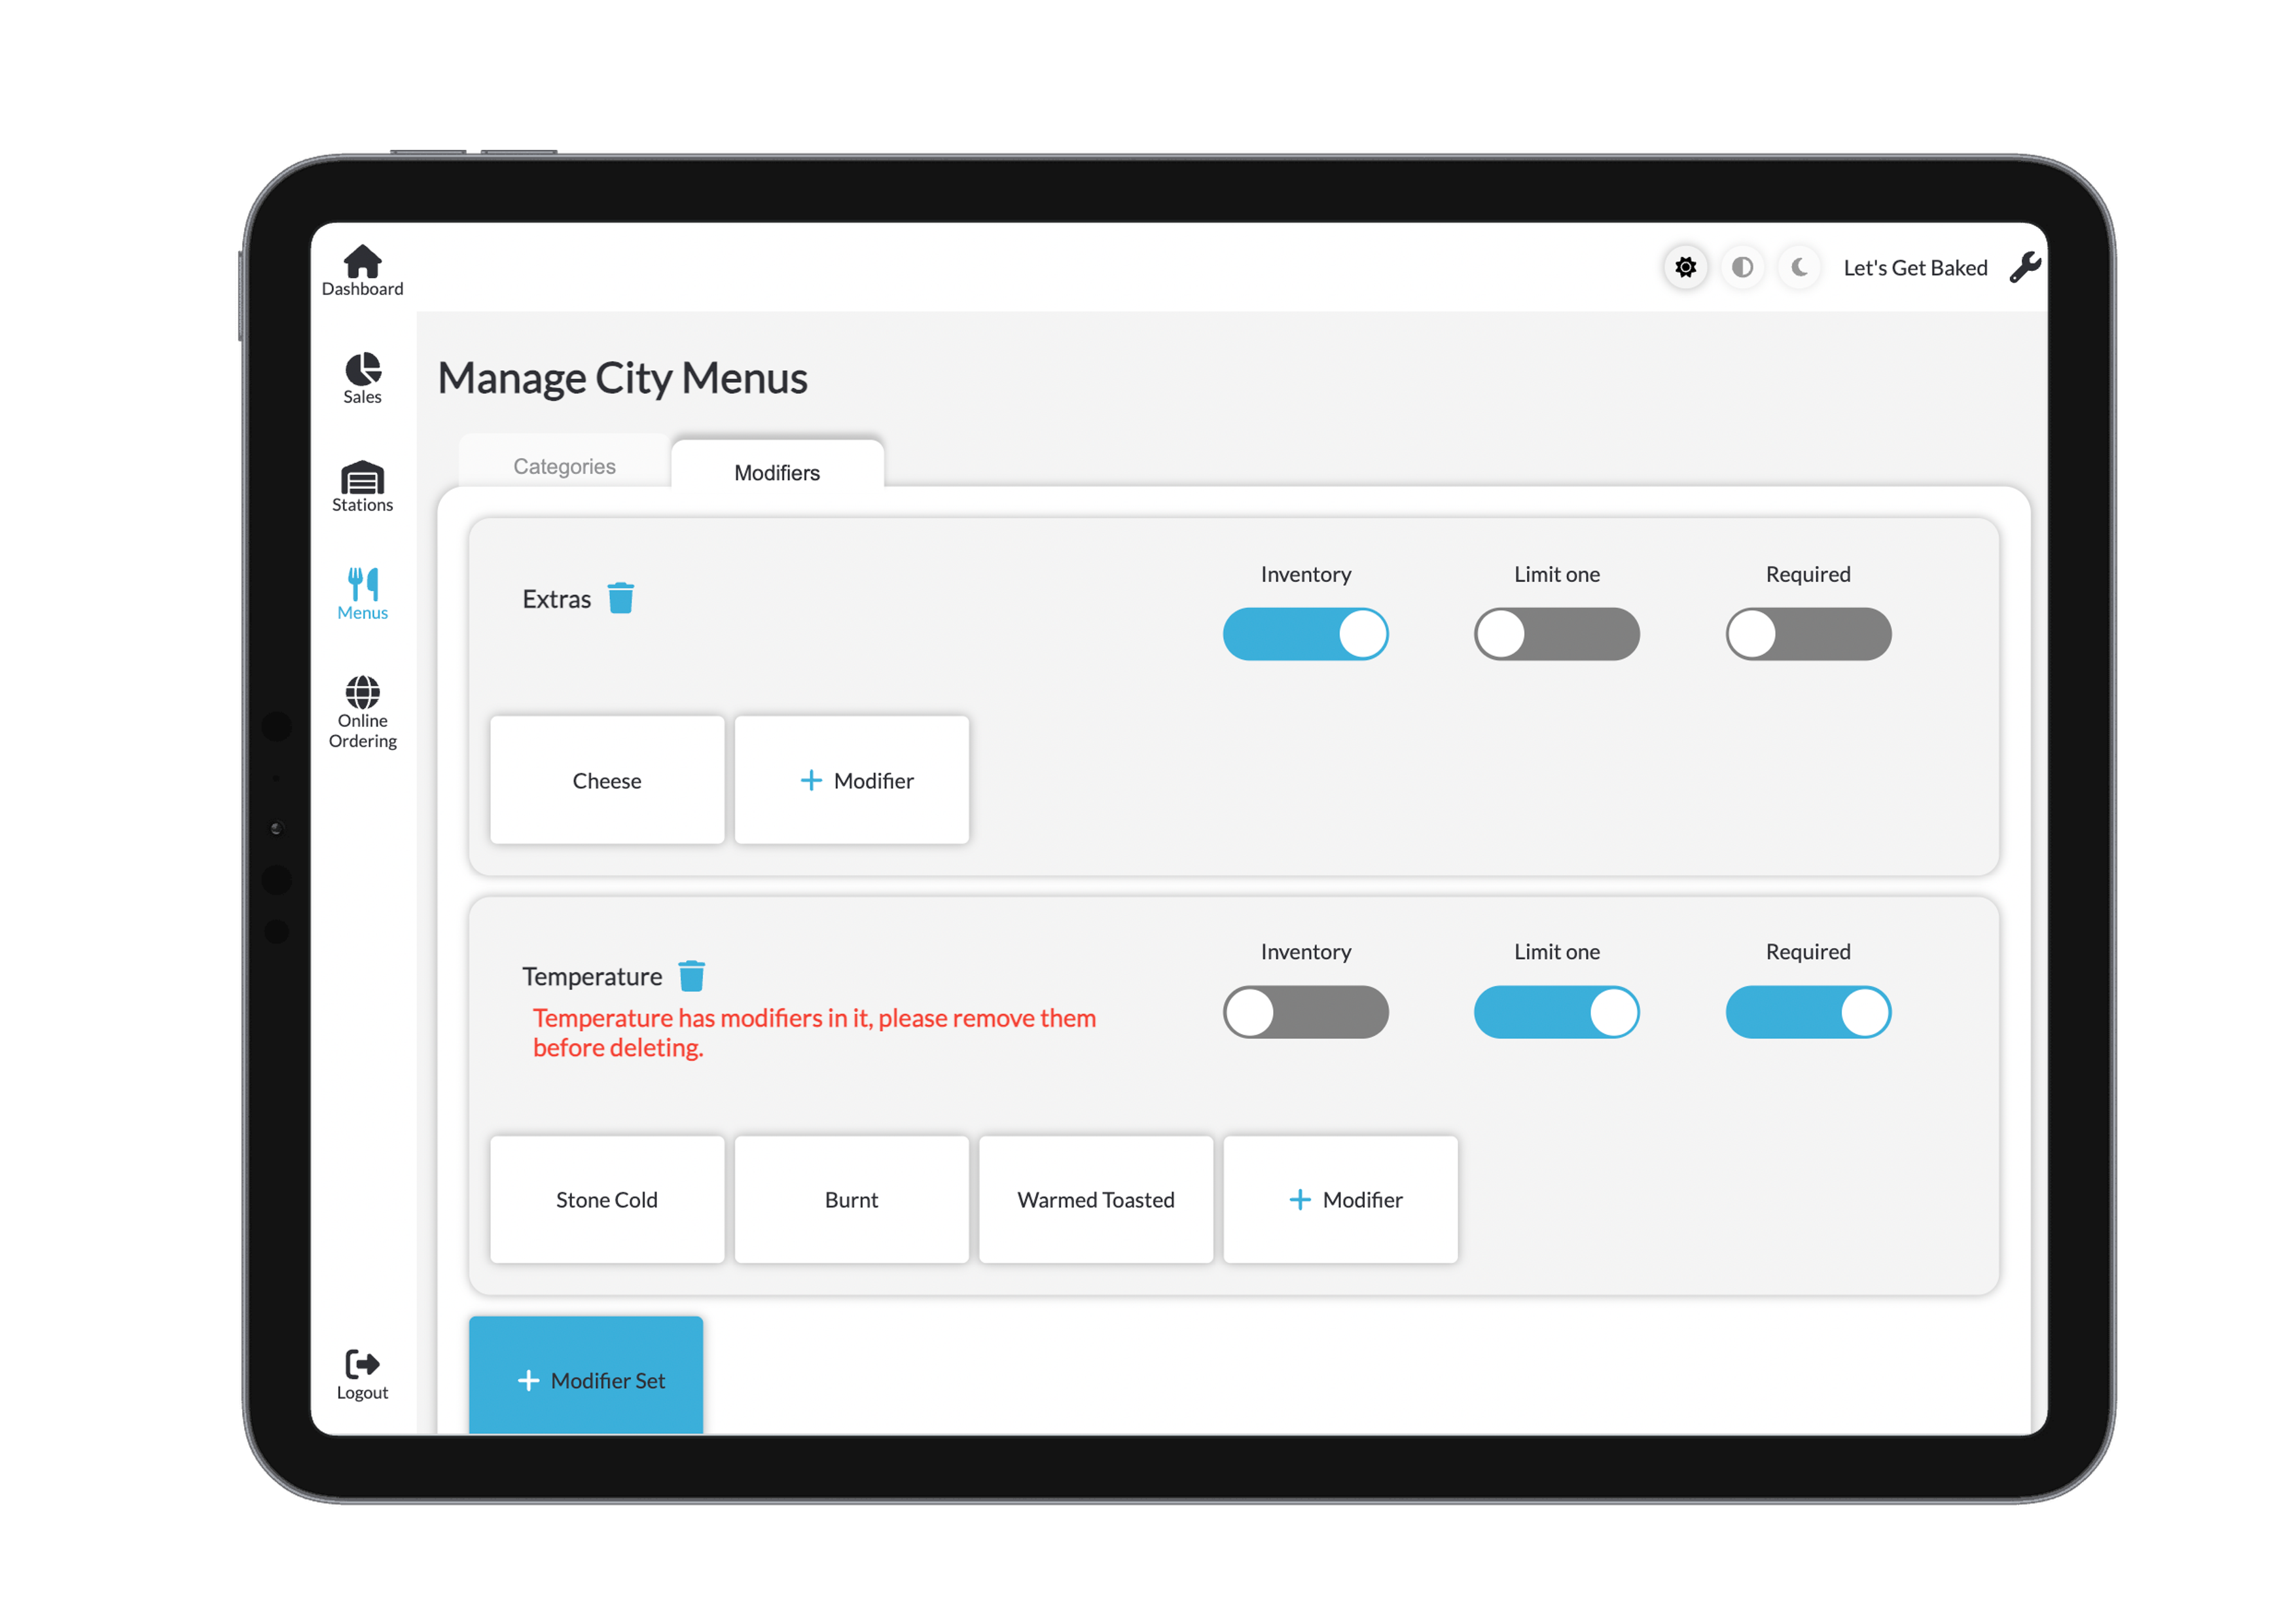
You don’t need to manually save — changes are auto-saved when actions are confirmed.