About the POS System
Tailored for hospitality and designed for effortless simplicity
Our POS system is crafted to streamline operations — from taking orders to processing payments. Our goal is to make your life easier, so you can focus on what matters.
- The intuitive design minimises the learning curve, helping staff master it quickly, even during peak hours.
- With a clean, user-friendly interface, navigating menus, customising orders, and handling payments becomes second nature.
- Every feature is designed for ease of use, ensuring smooth workflows and reduced errors.
Key Features
- Creating and processing a simple order
- Accessing additional features while creating orders
- Troubleshooting
When logging a device into a station, a safeguard is in place to prevent multiple logins. Each station can only be accessed from one device at a time. If you're having trouble logging in, check whether the station is already logged in on another device.
Creating a Simple Order
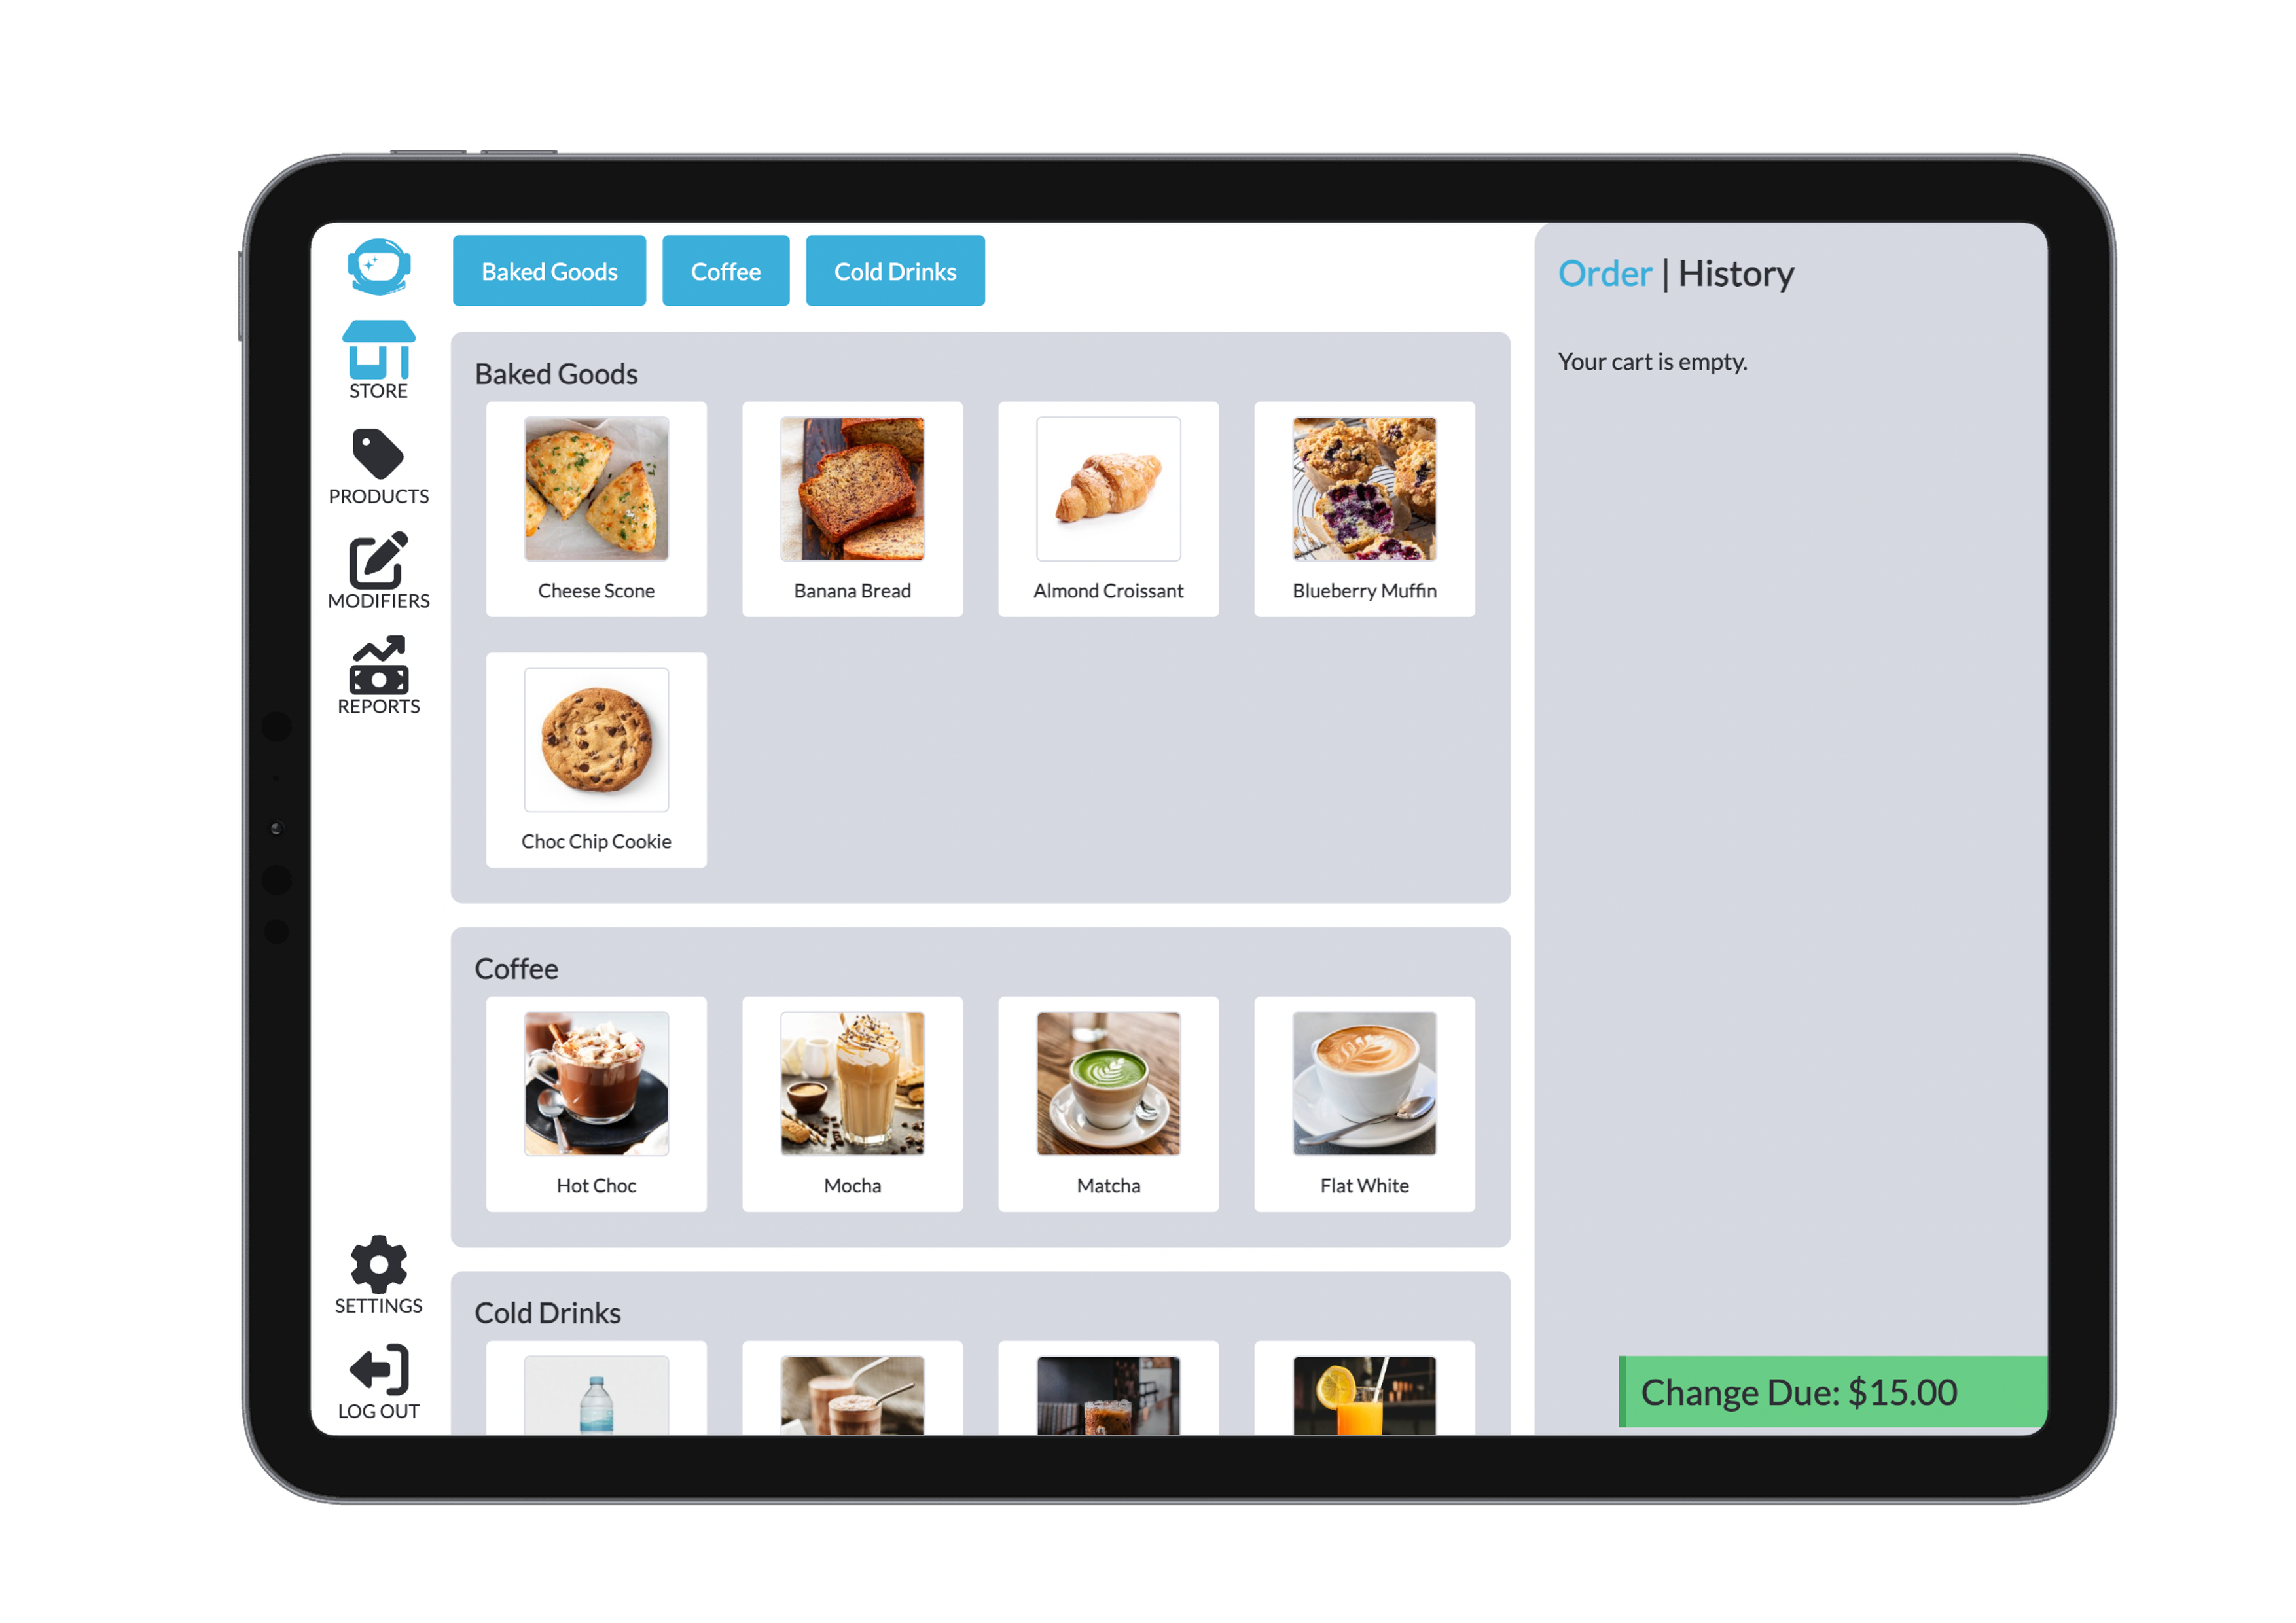
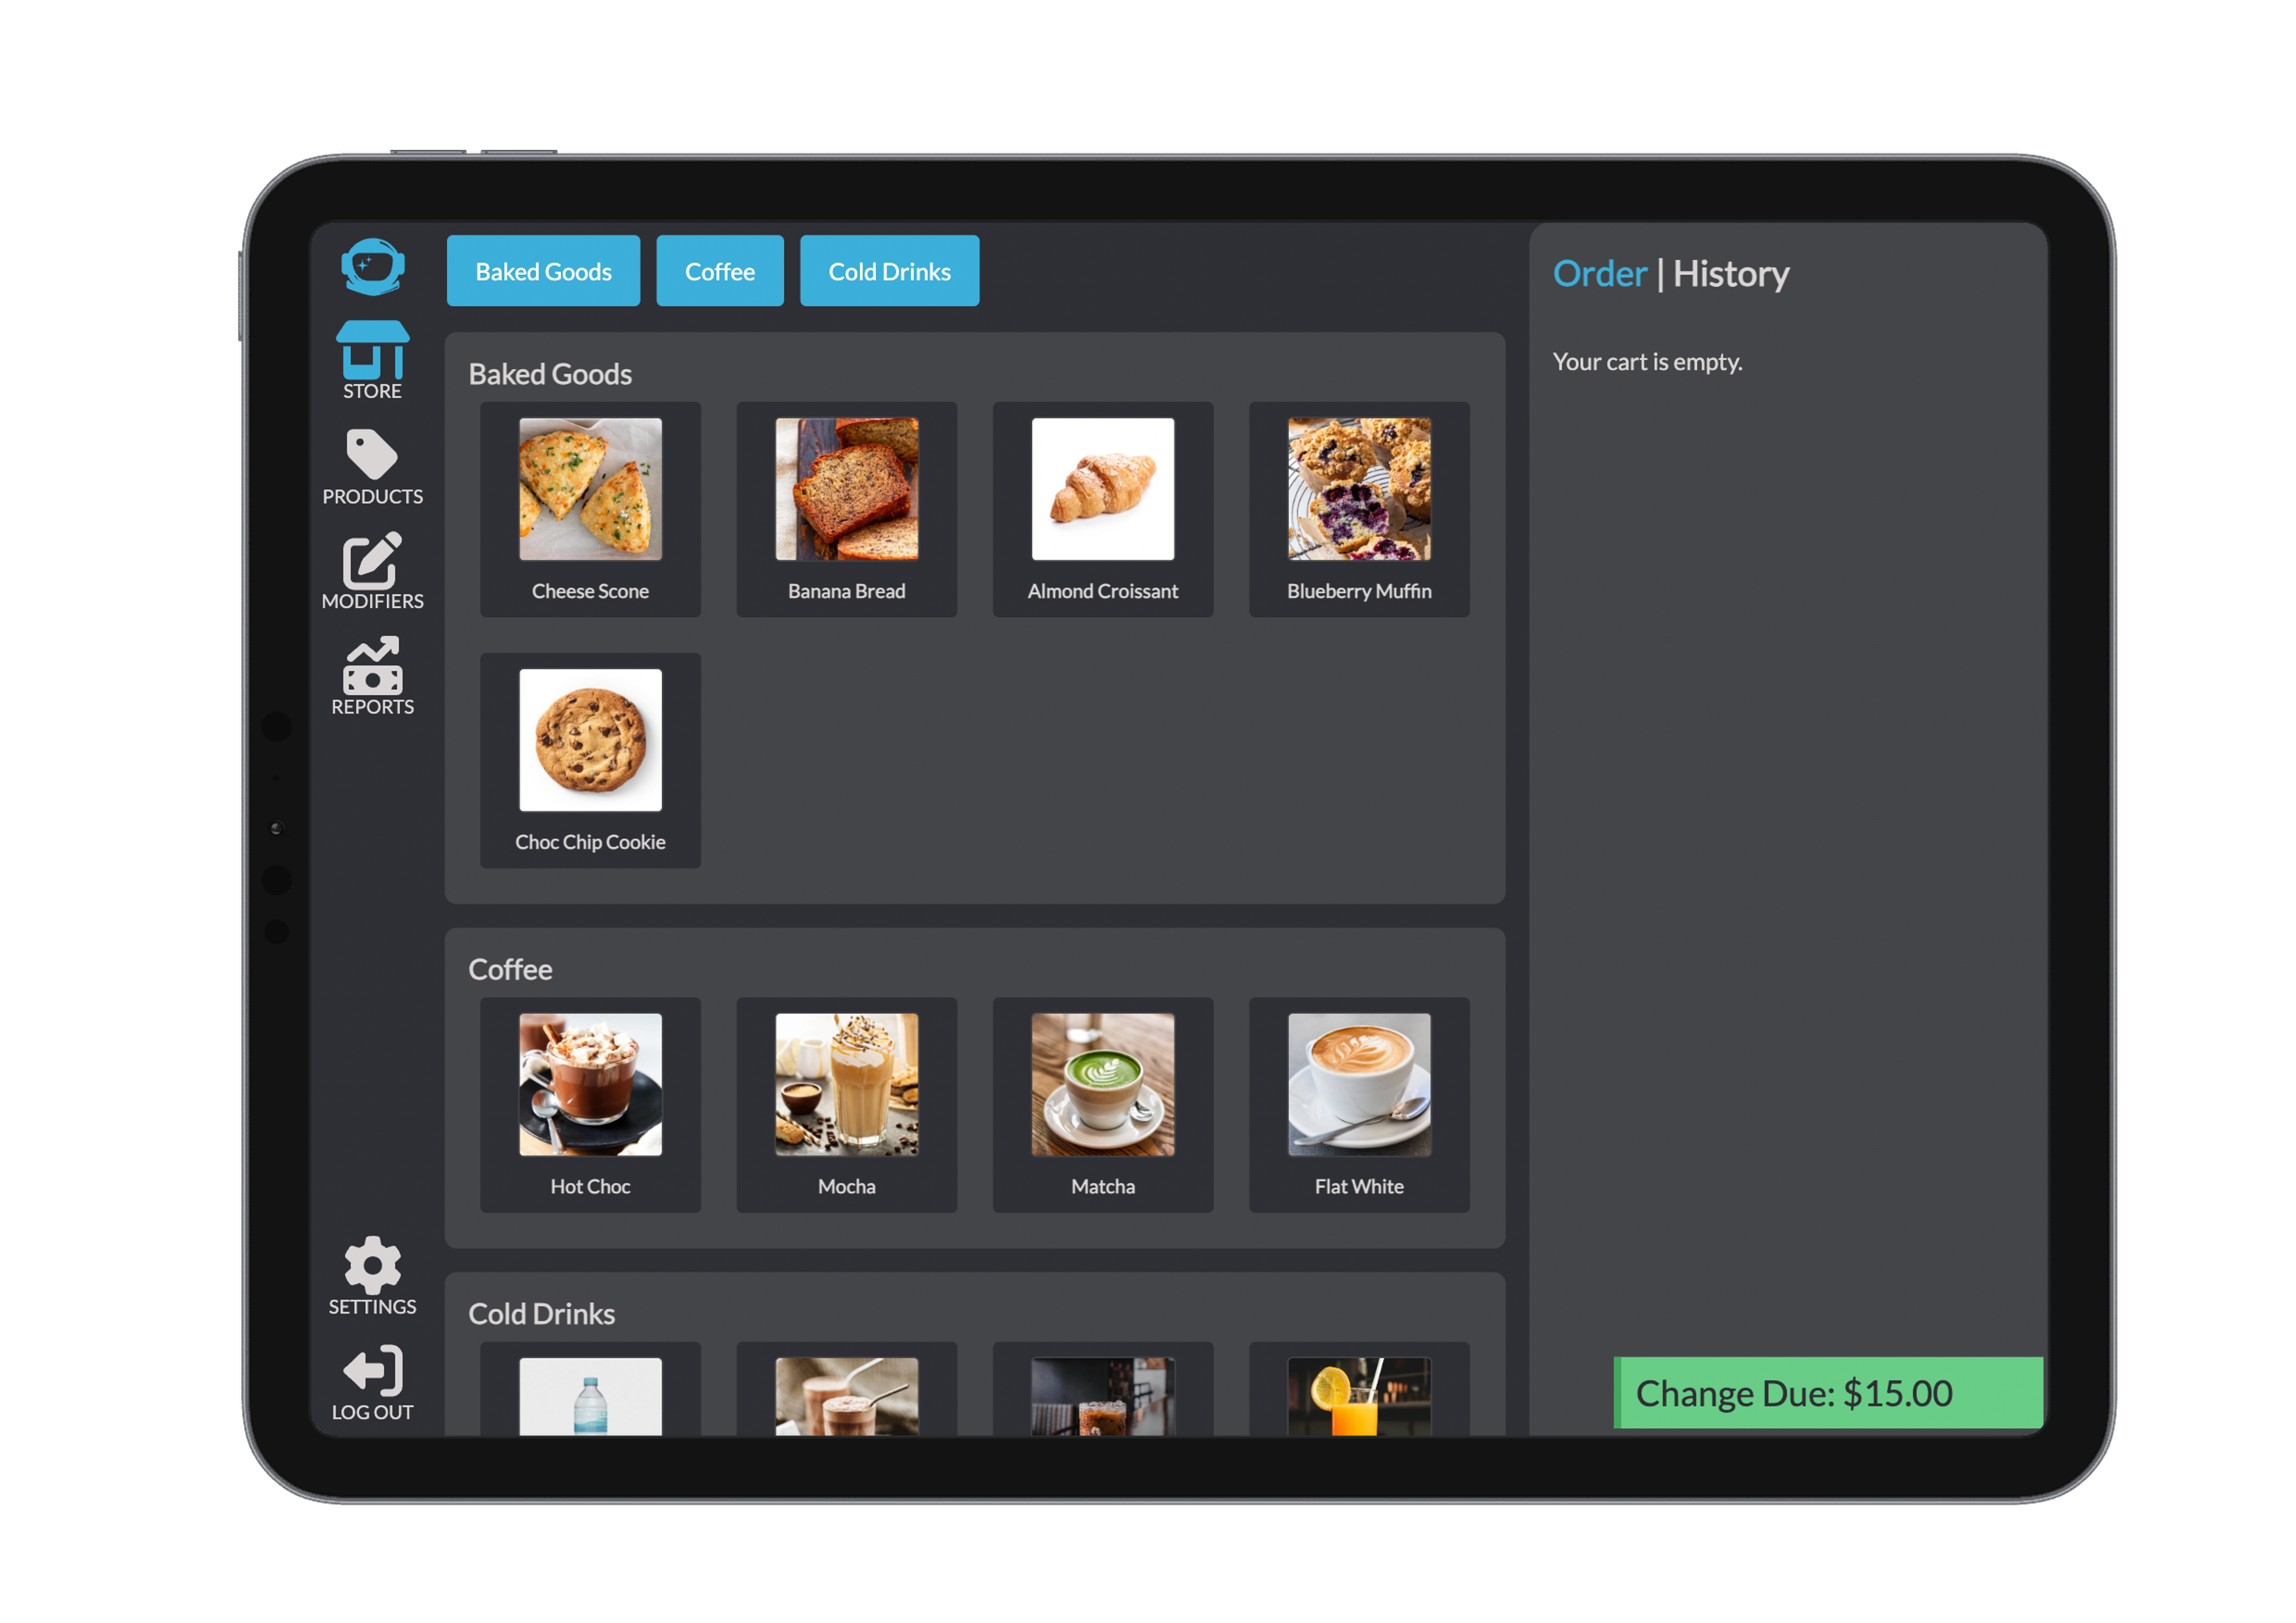
1. Start an Order
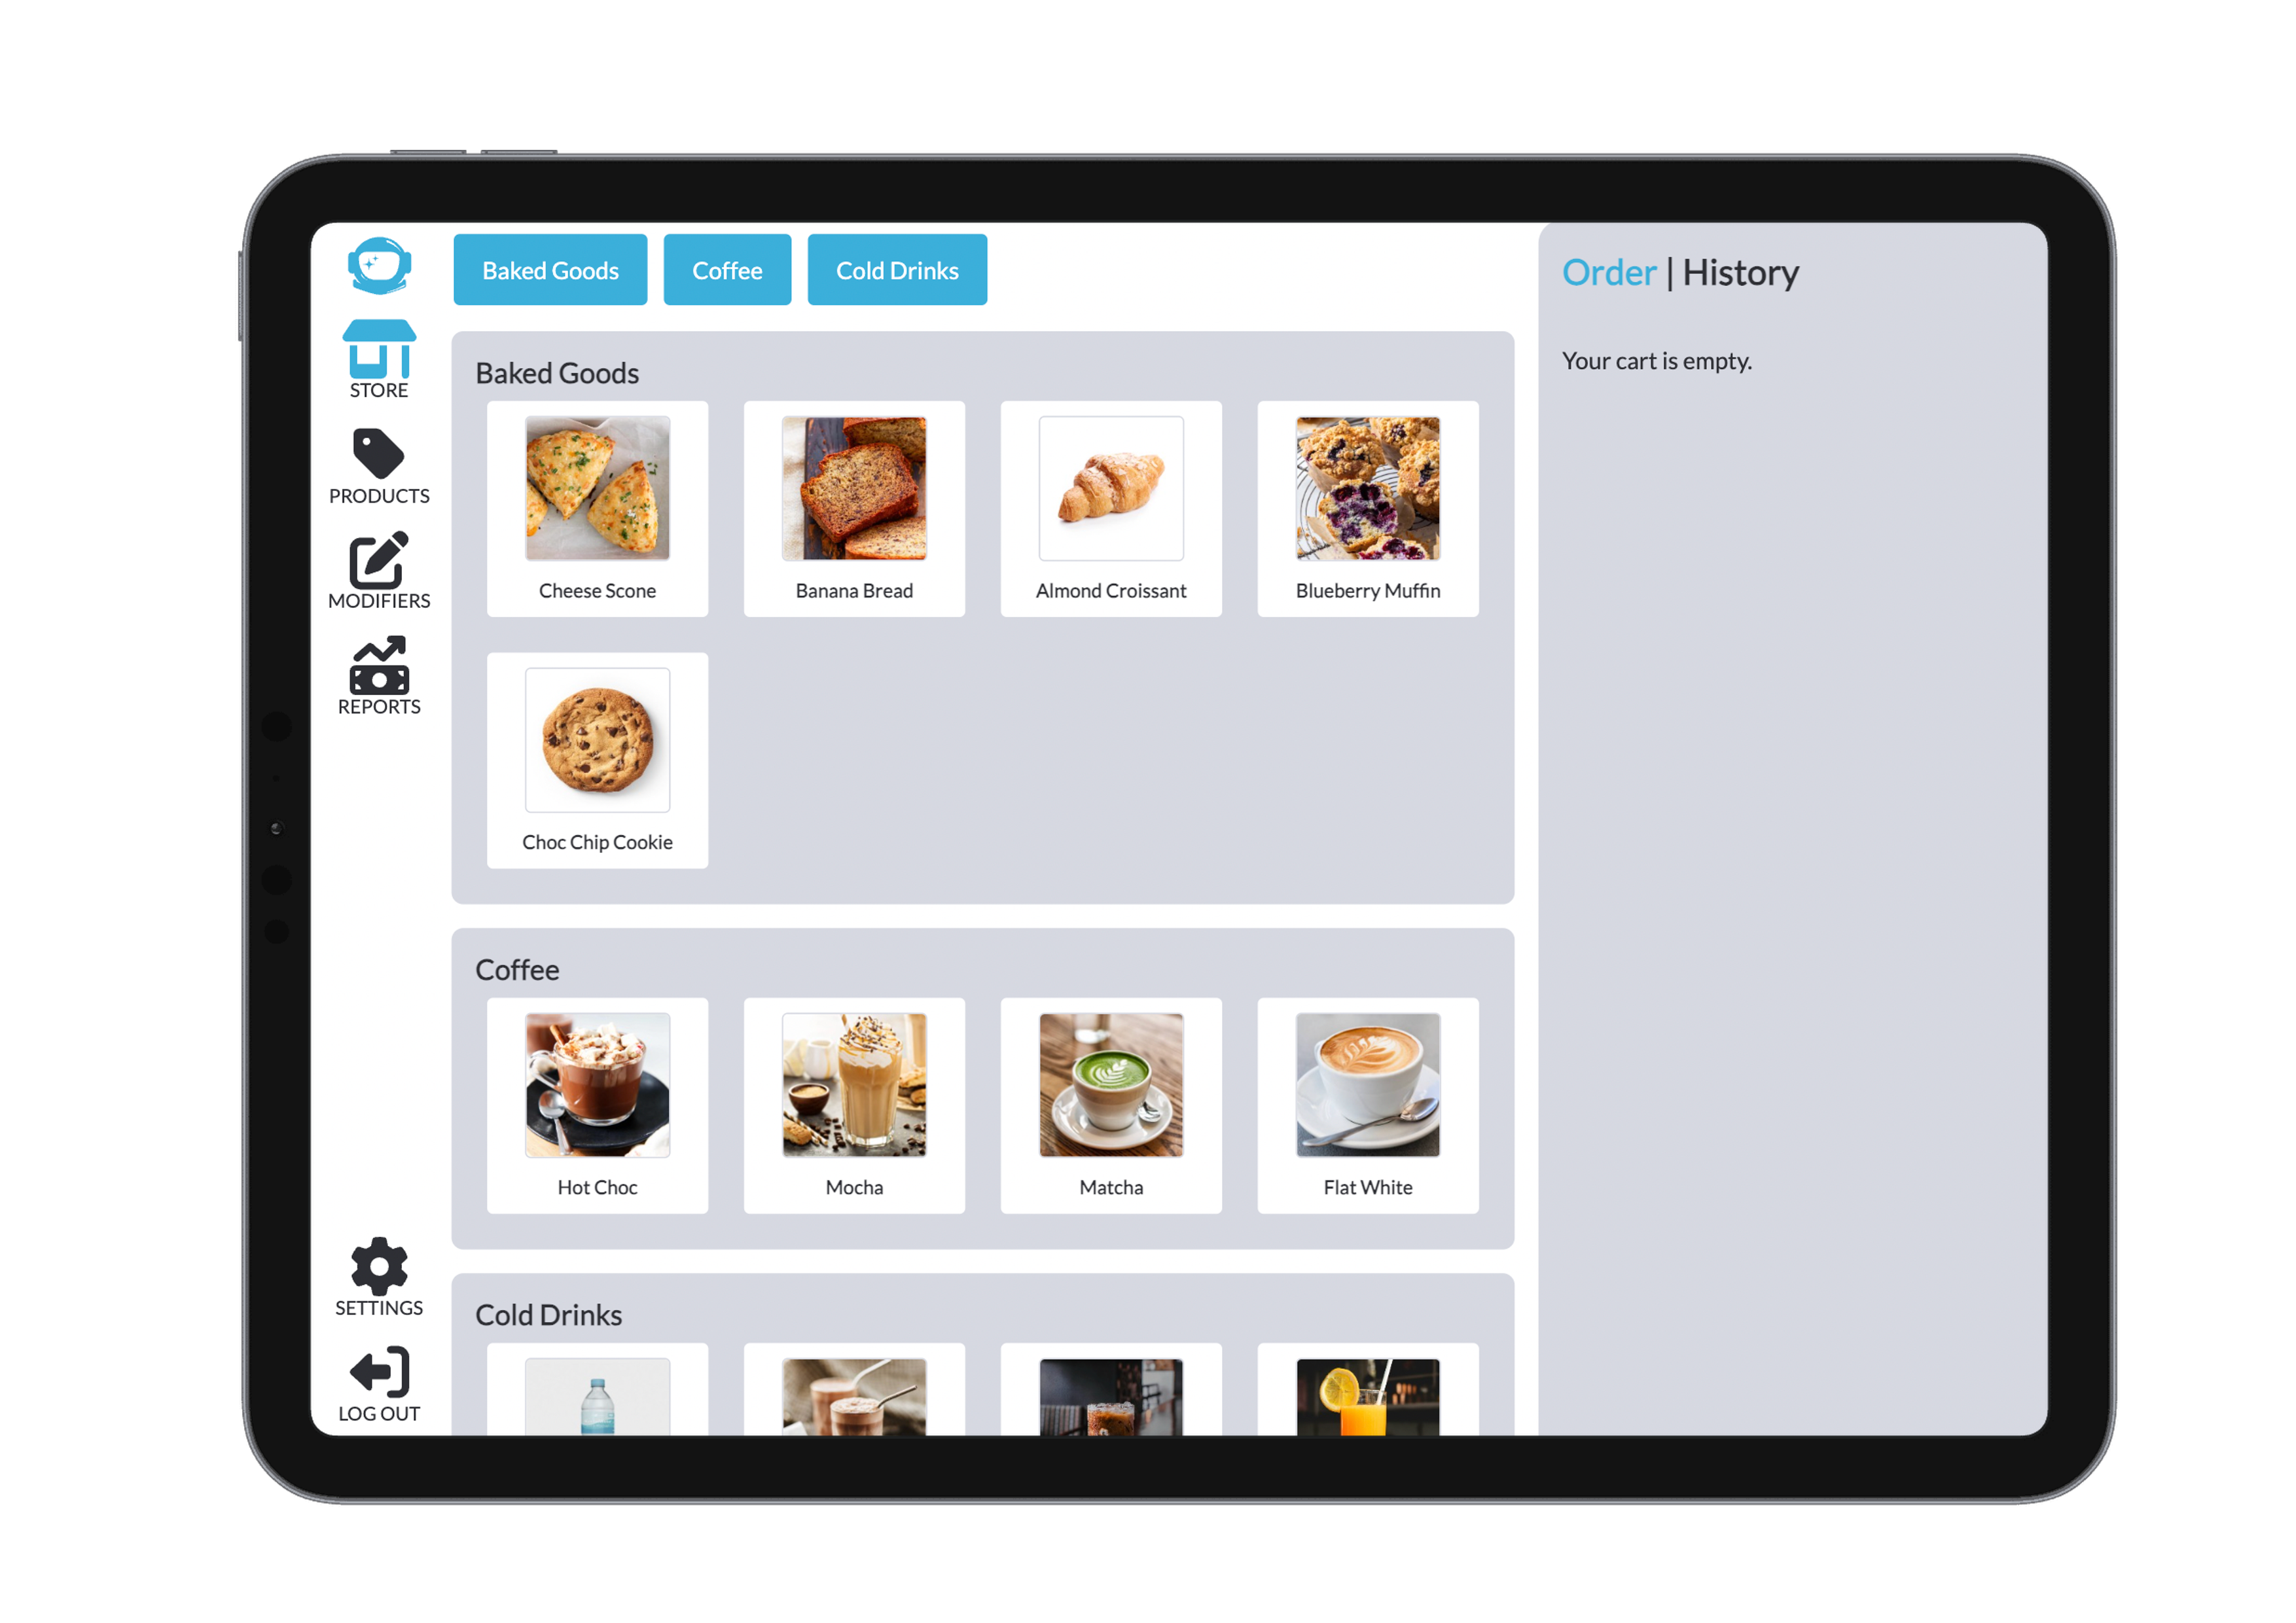
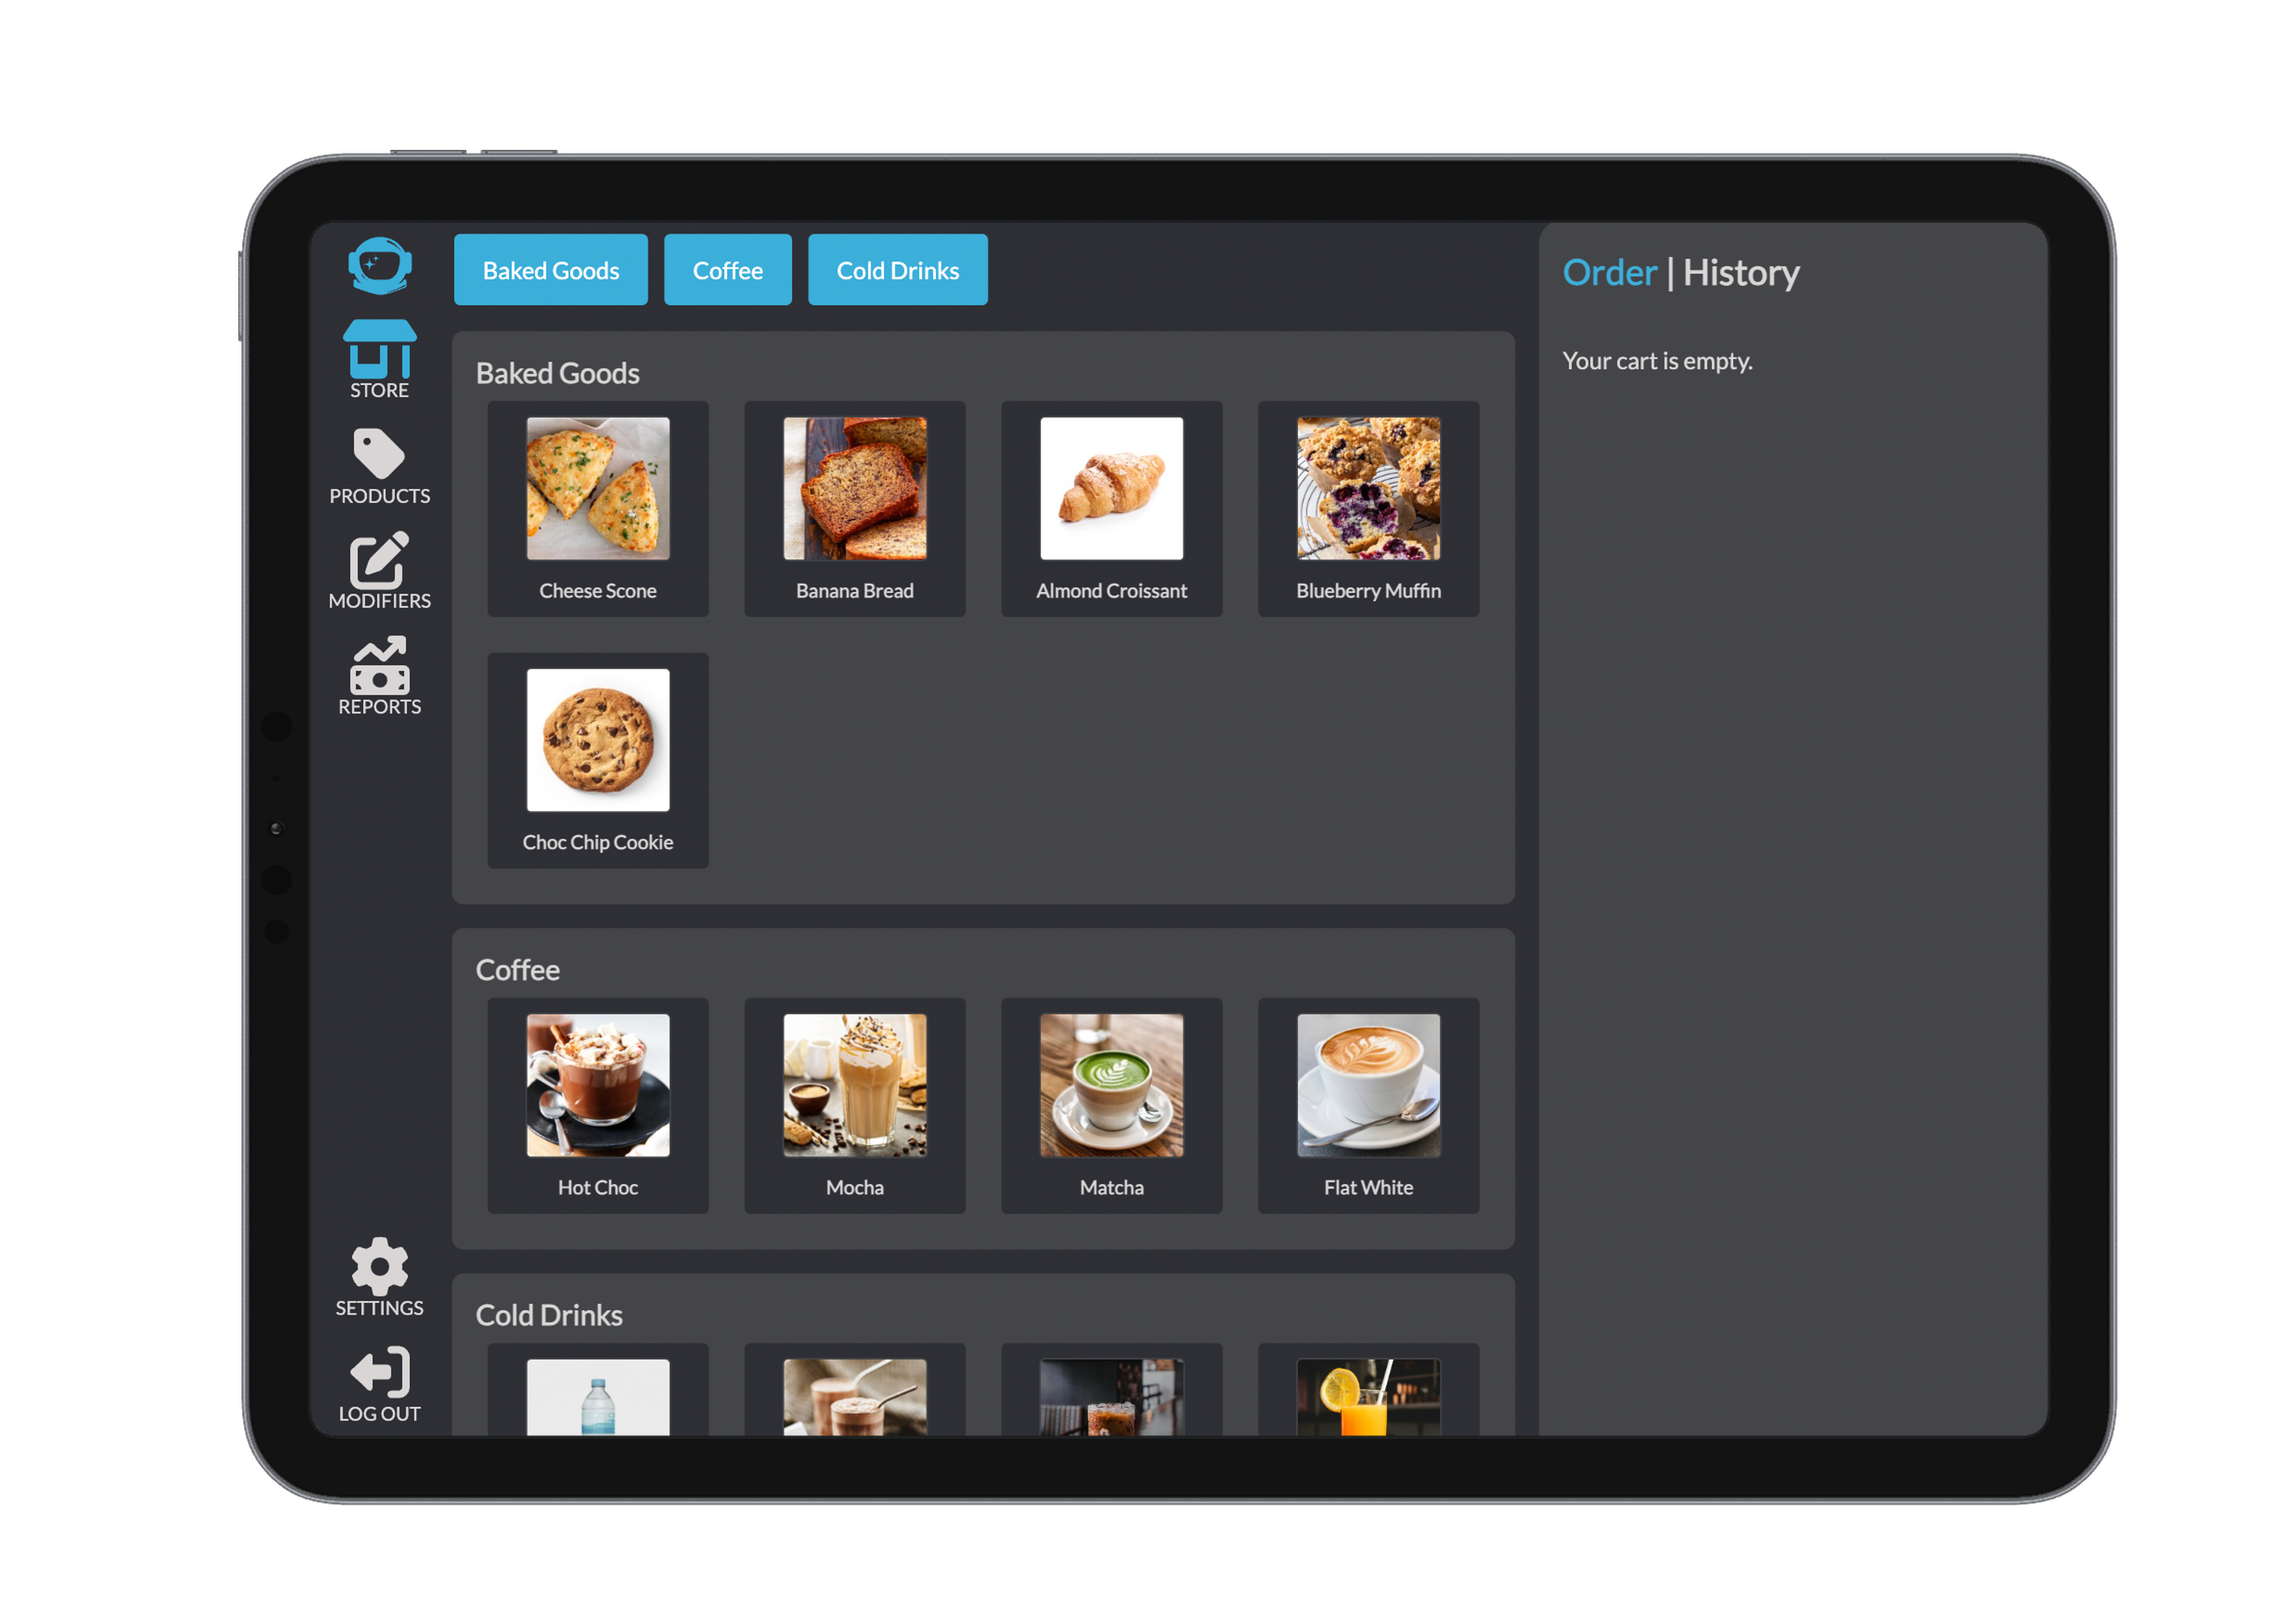
At the top of the interface, a scroll bar lets you quickly switch between product categories. Click on a product to bring up a pop-up window with configuration options such as modifiers and extras.
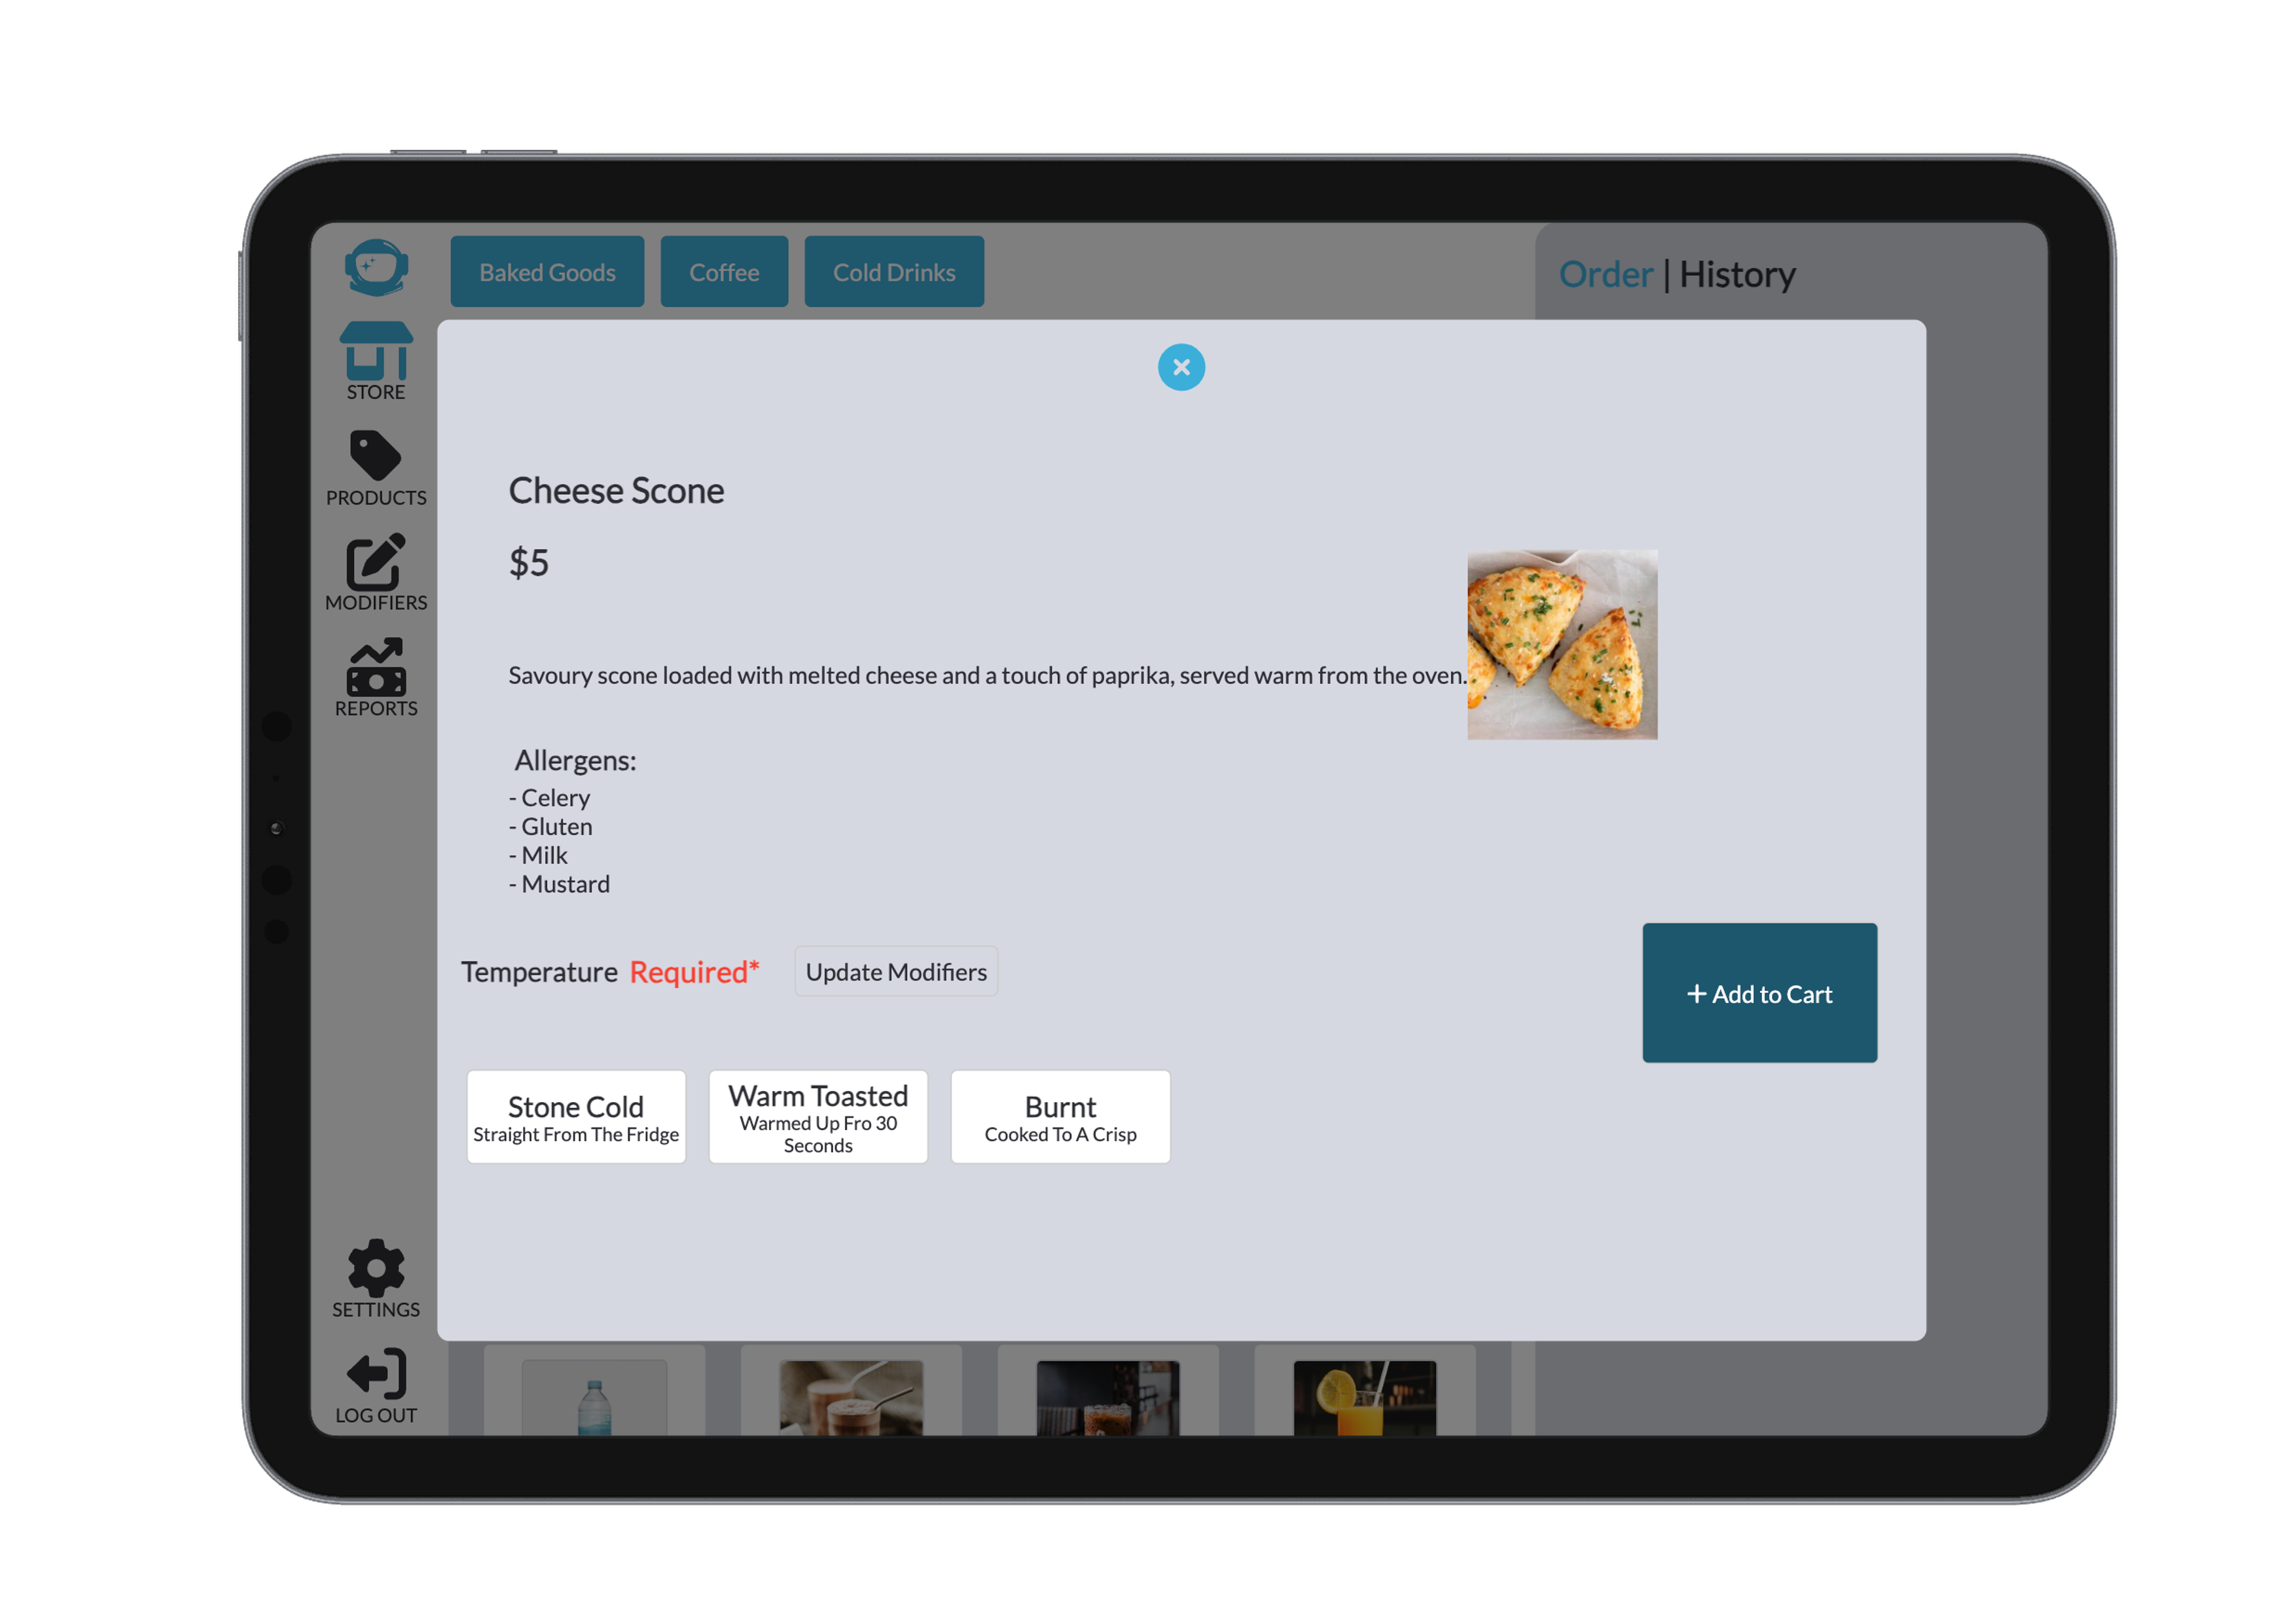

An item that ha no modifiers avaliable will be automatically added to cart. An Item with a custom price, such as our custom price category or a product that has chosen to be a custom price, will pop up with a key pad to input the chosen price. This will add the product to cart with the specified price and will be stored in the database under a custom product or a custom price of the chosen product.
2. Add to Cart
After selecting modifiers and extras, click Add to Cart. This reduces the available inventory and adds the item to the cart (visible on the right).
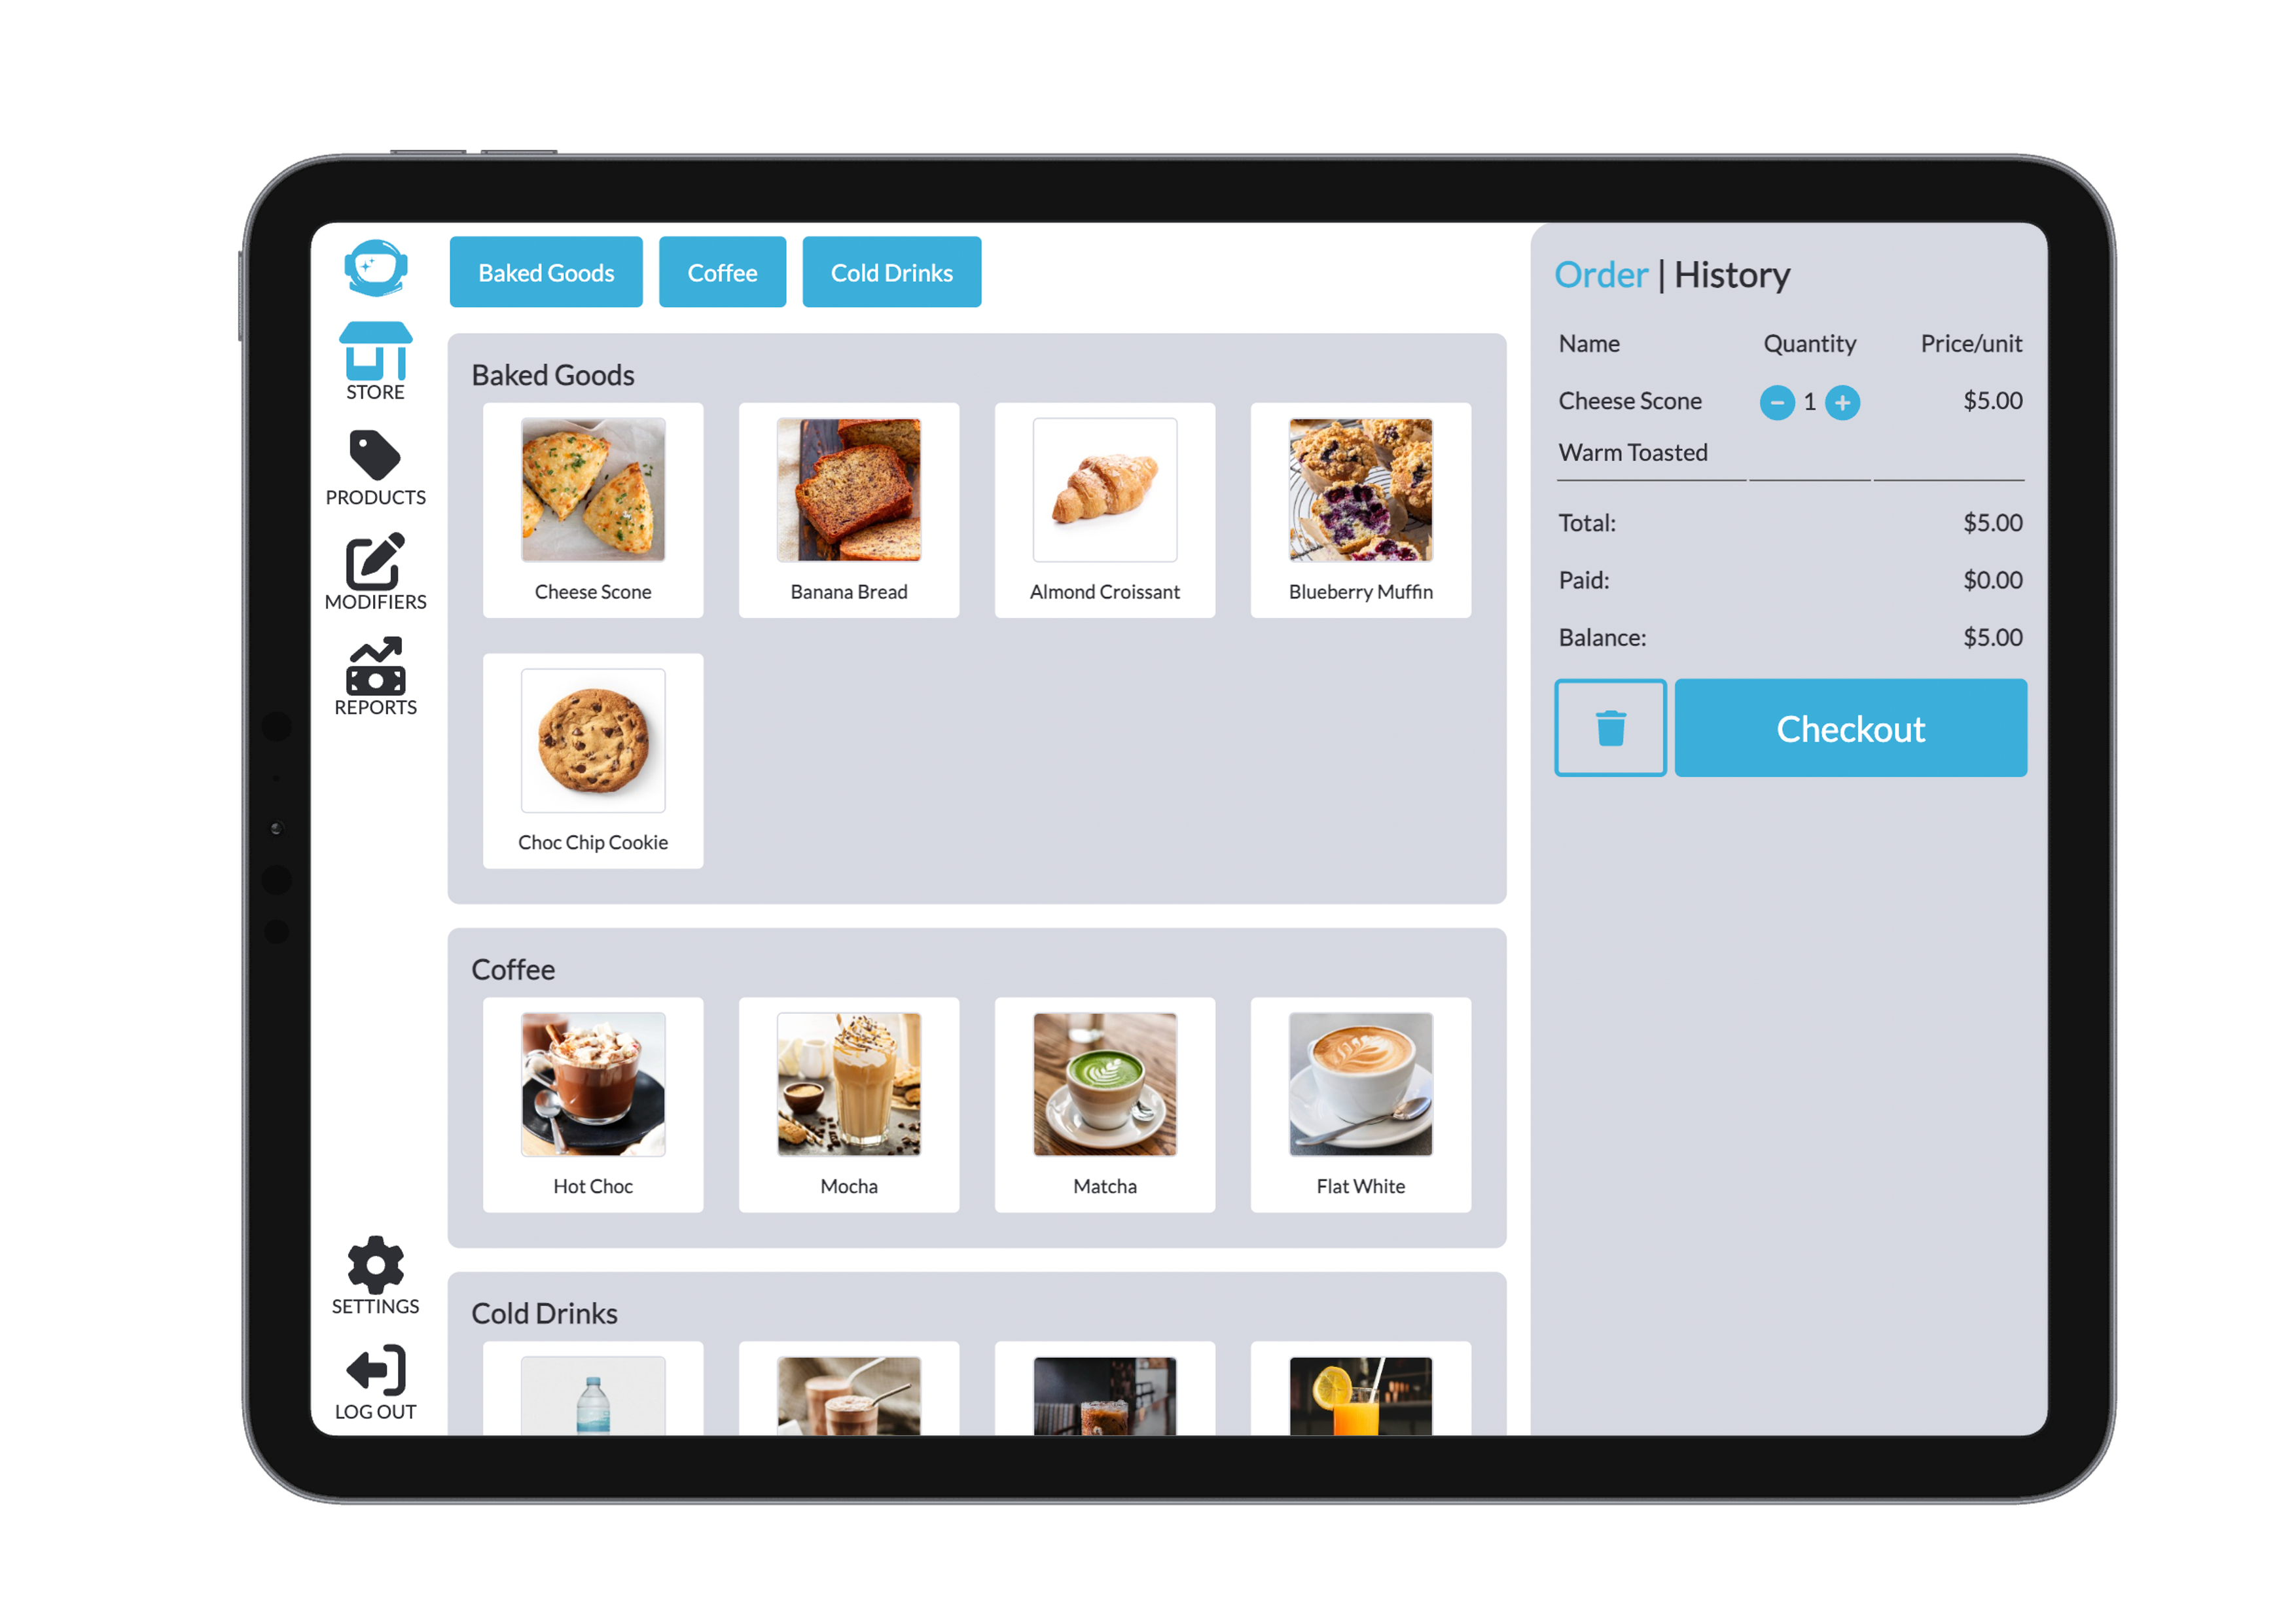
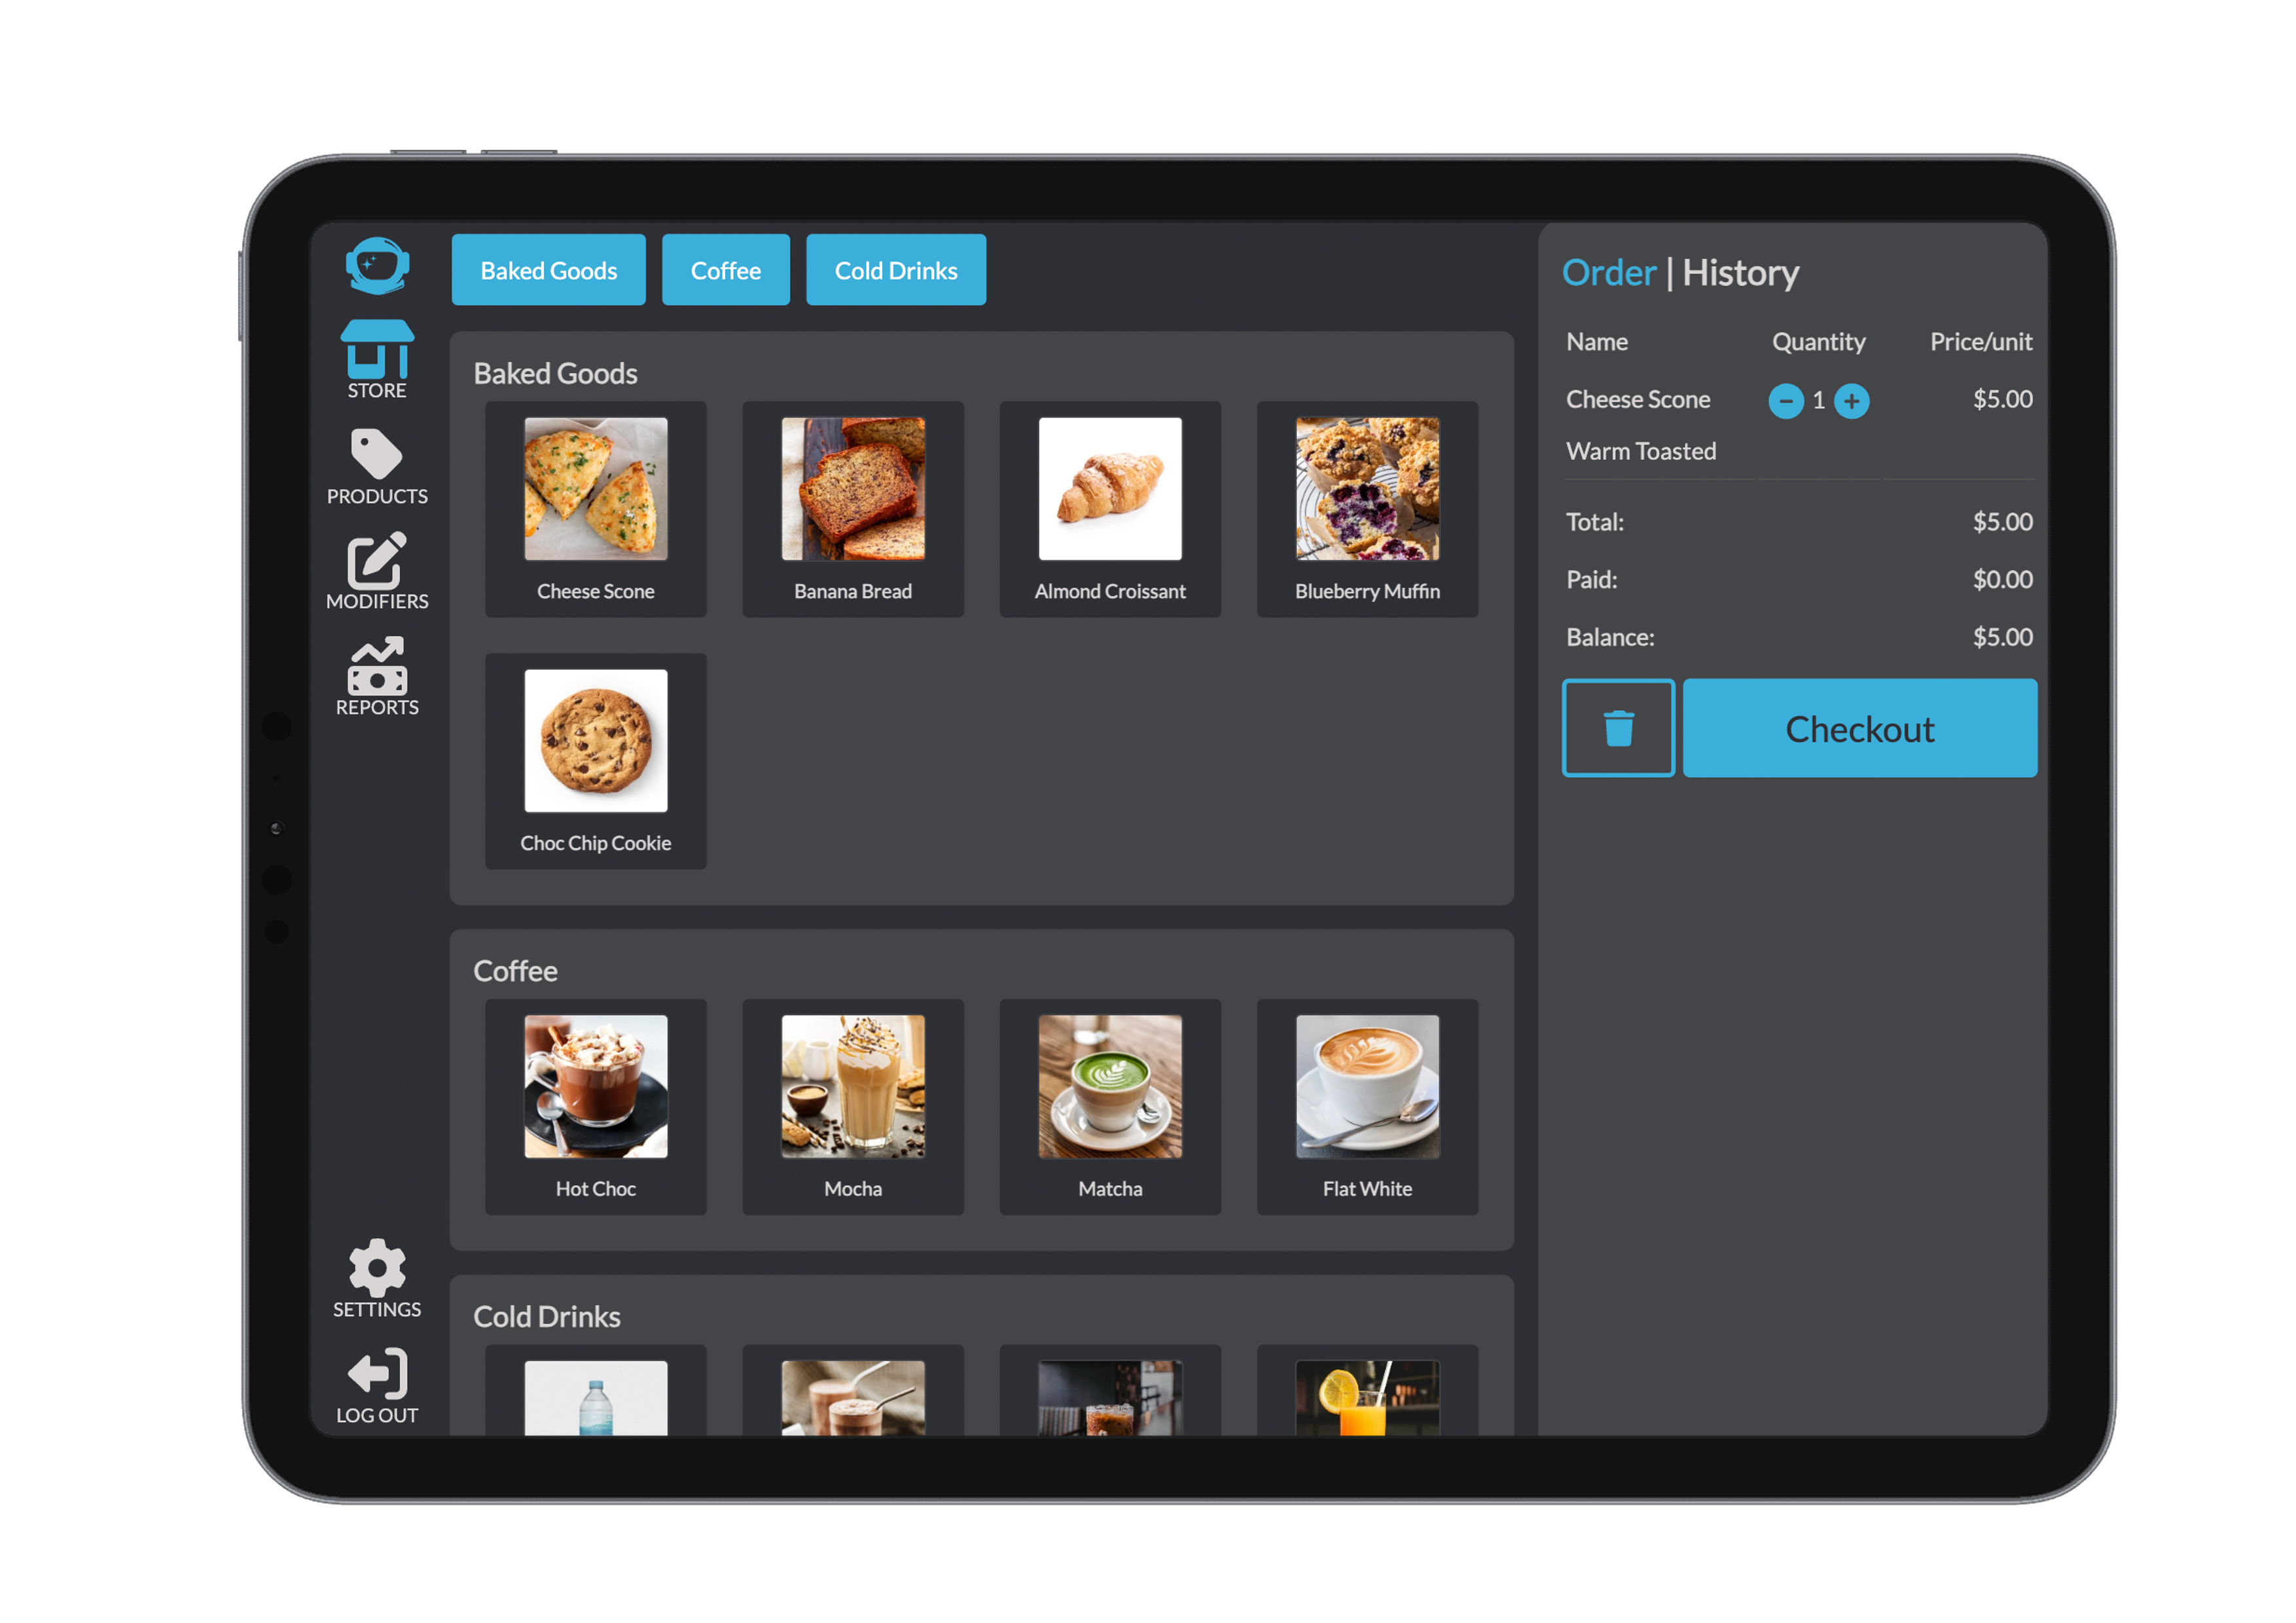
In the cart:
- Each item shows its name, unit price, and selected modifiers.
- Use the plus and minus buttons to change quantities.
- Clicking an item reopens its configuration for adjustments.
The trash bin icon clears the entire cart of all producst and modifiers
3. Checkout
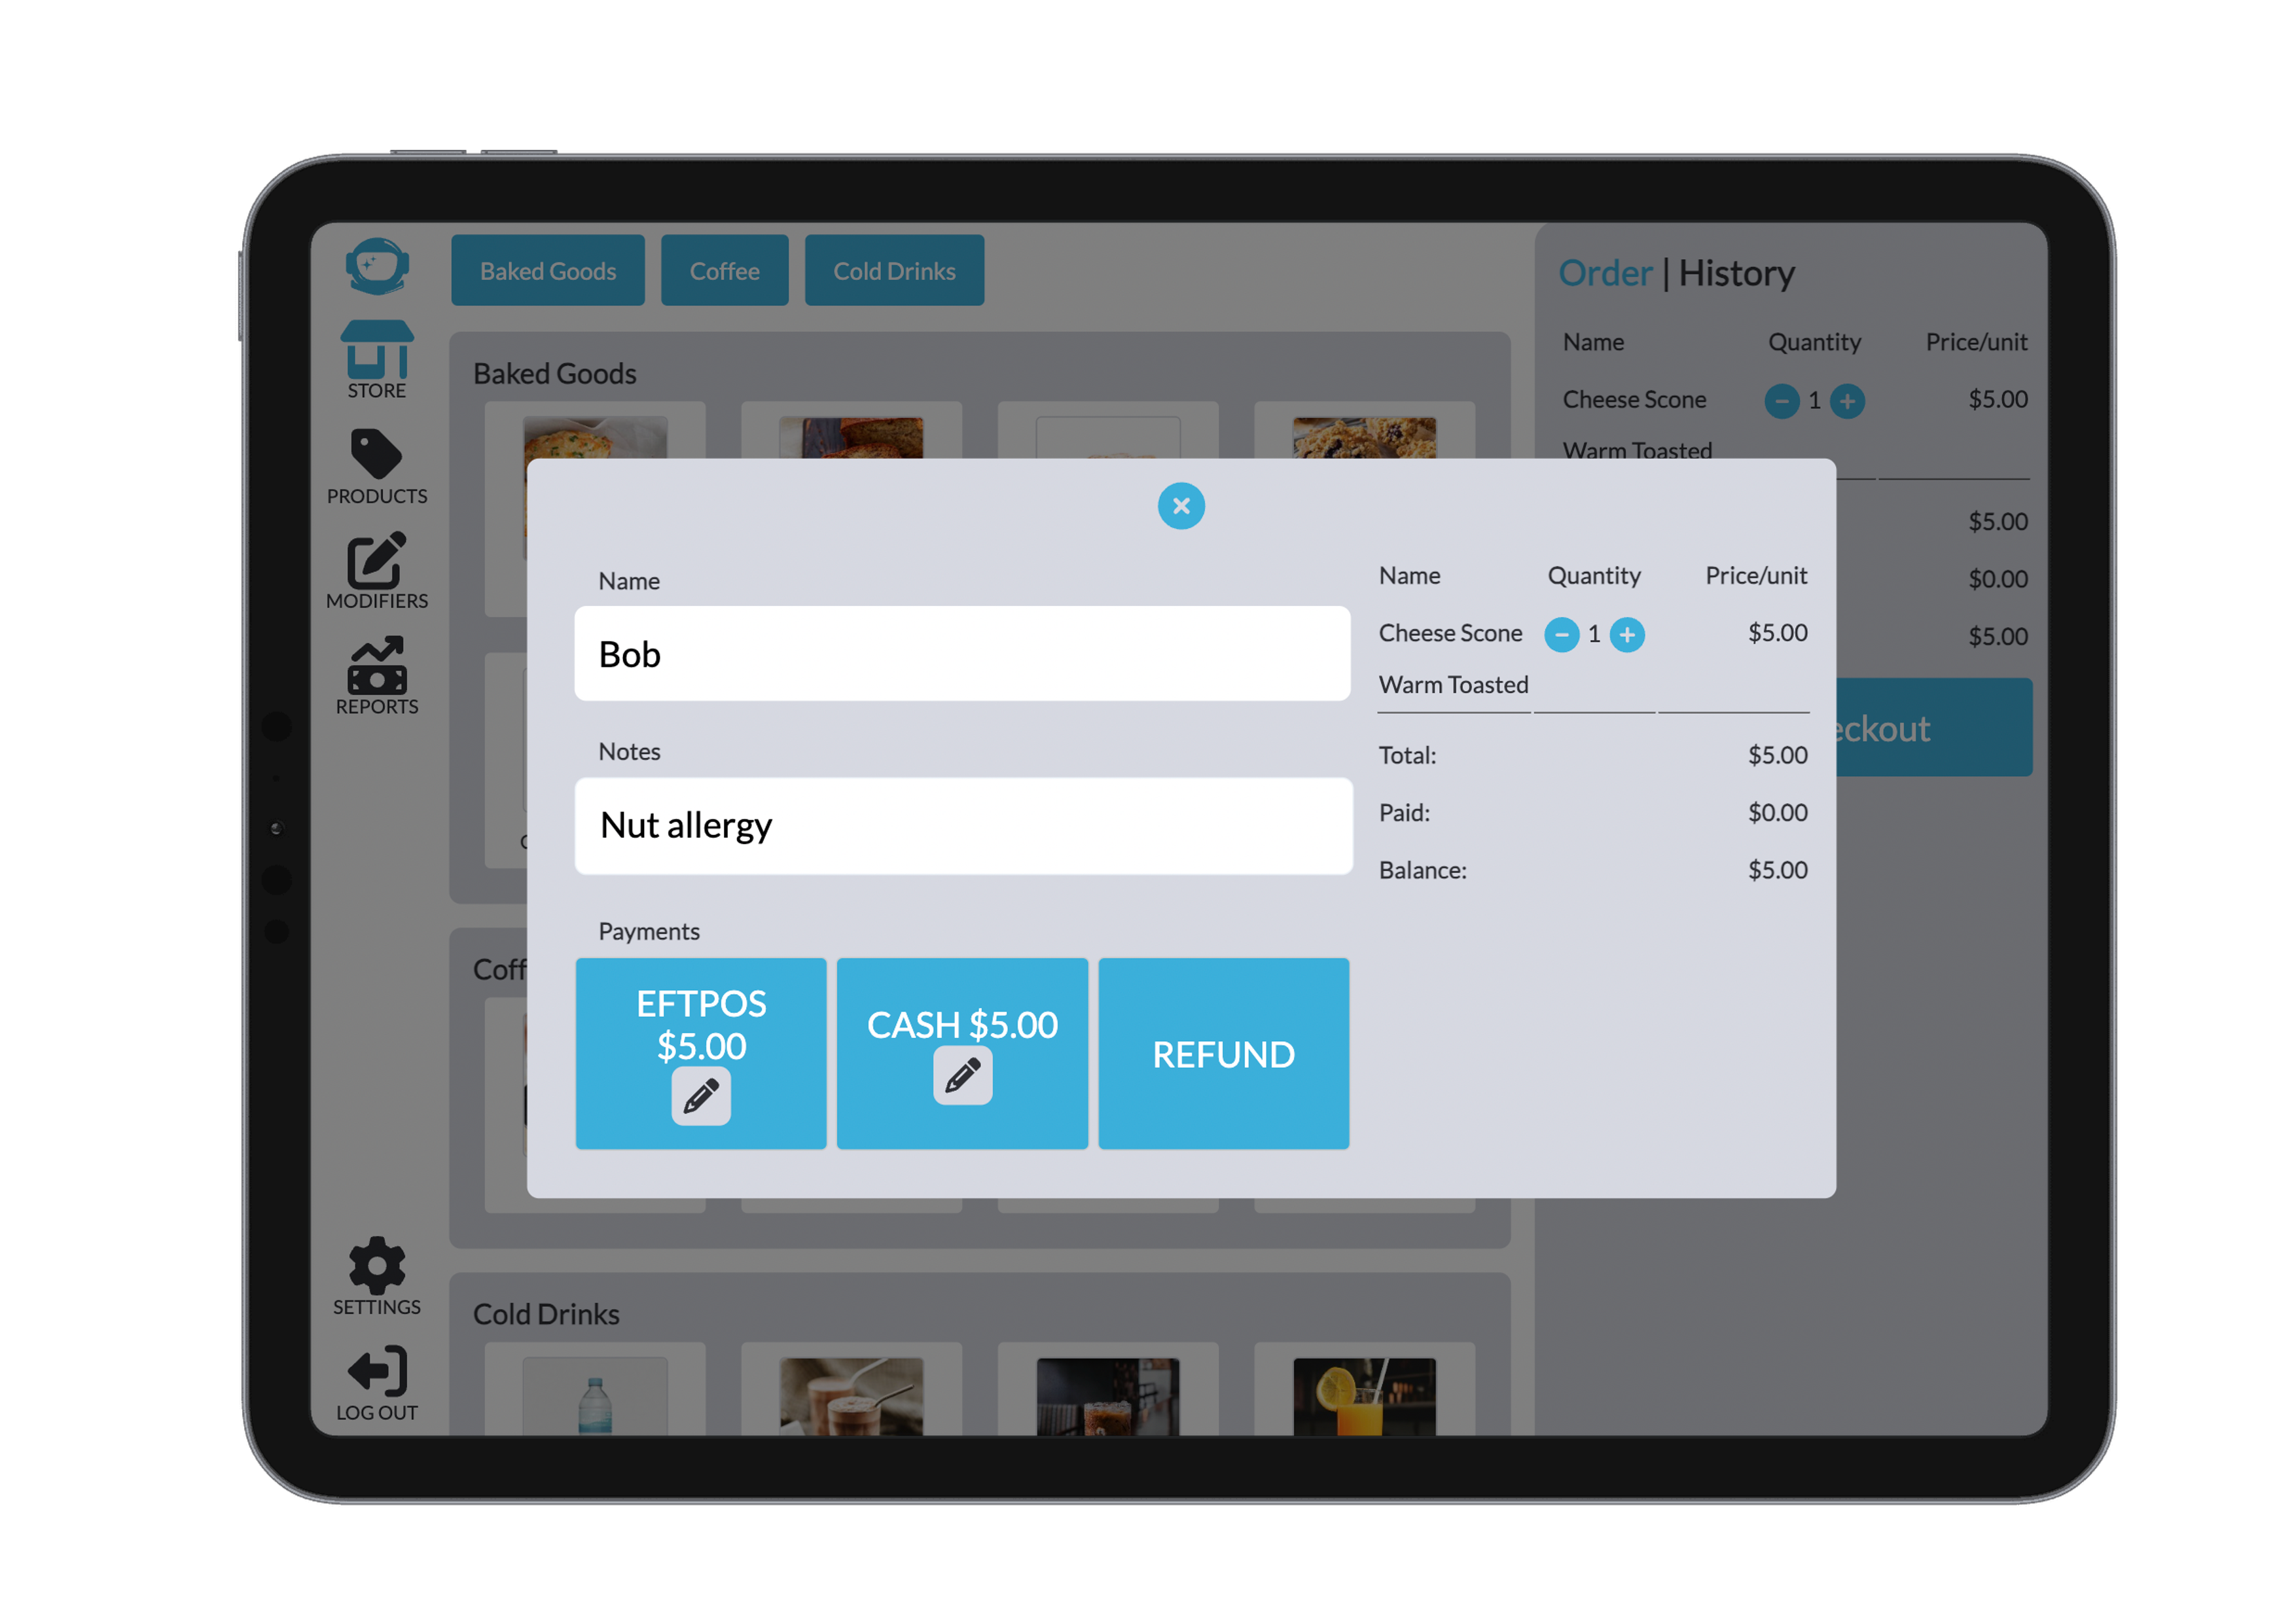
Click Checkout to proceed. You'll be prompted to enter the customer’s name and any notes.

WARNING
Fields marked as required must be filled, or the system will prompt you to fill these out before allowing you to continuing. You can change the settings for what is required in settings on POS or Bridge.
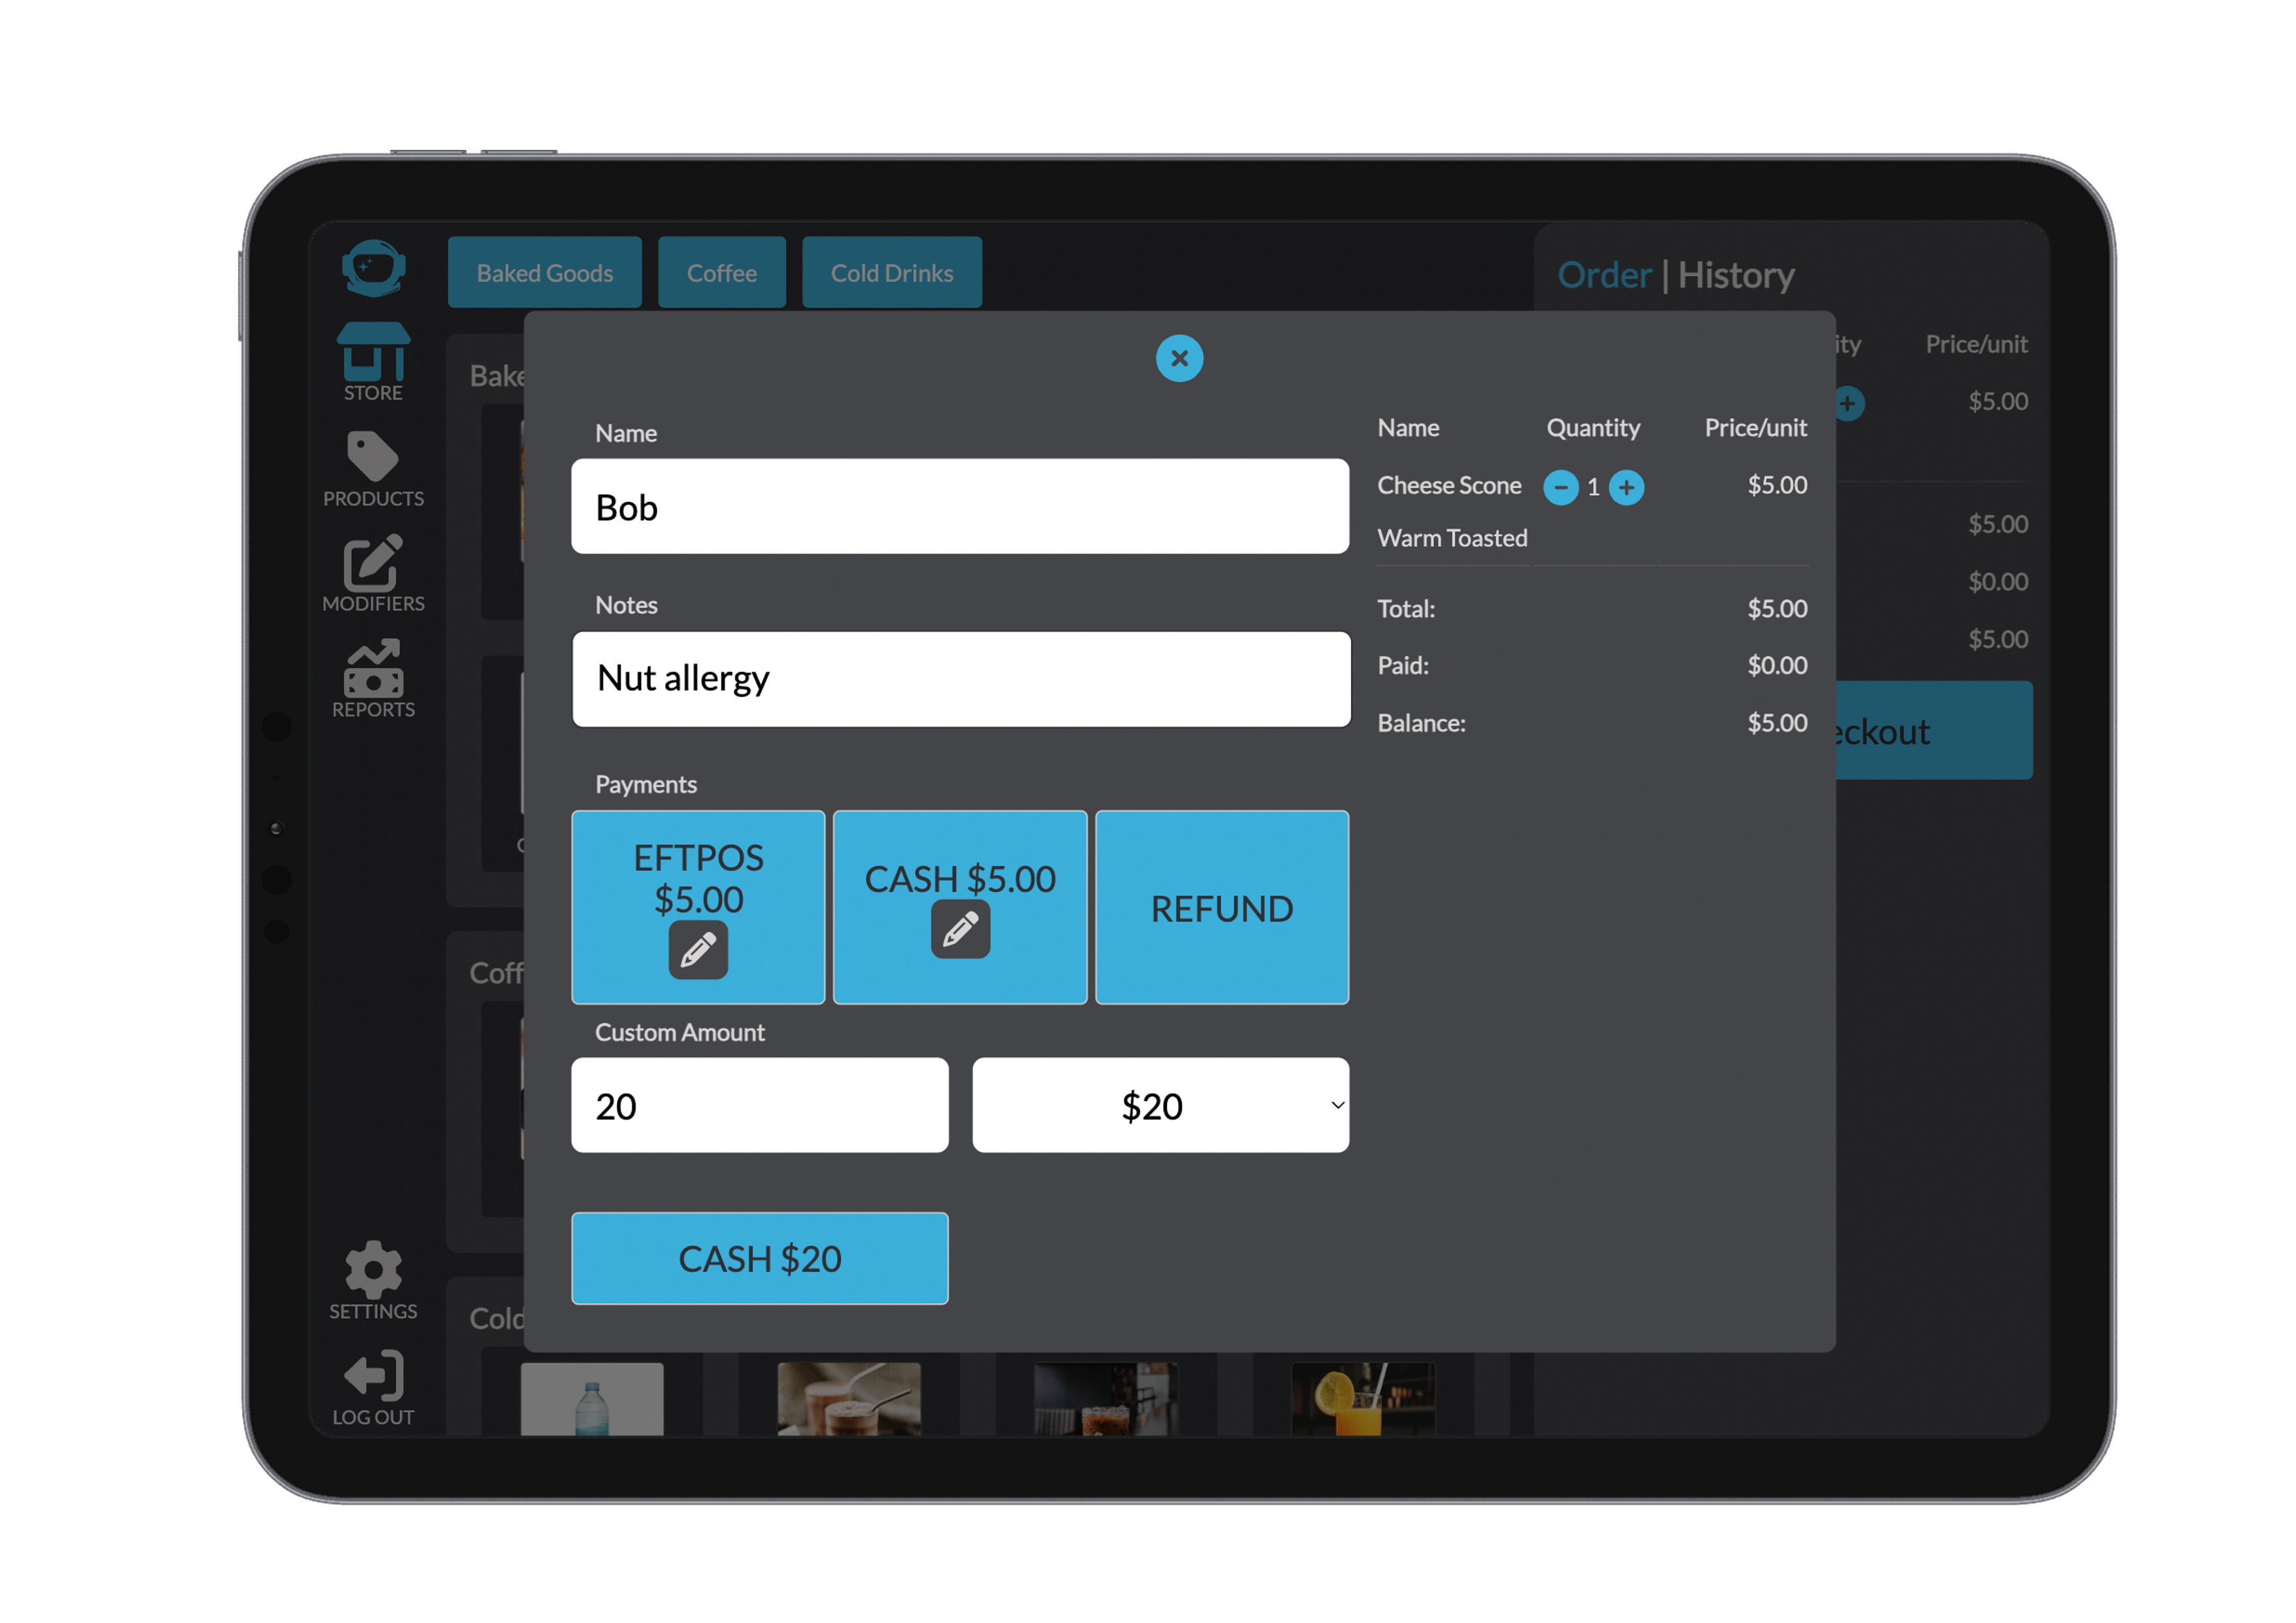
4. Payment
- Select delivery and payment methods.
- The right-side order bar shows a real-time summary.
- See our vouchers section to learn more about paying with a voucher.
- For partial payments, click the pencil icon to enter a custom amount.
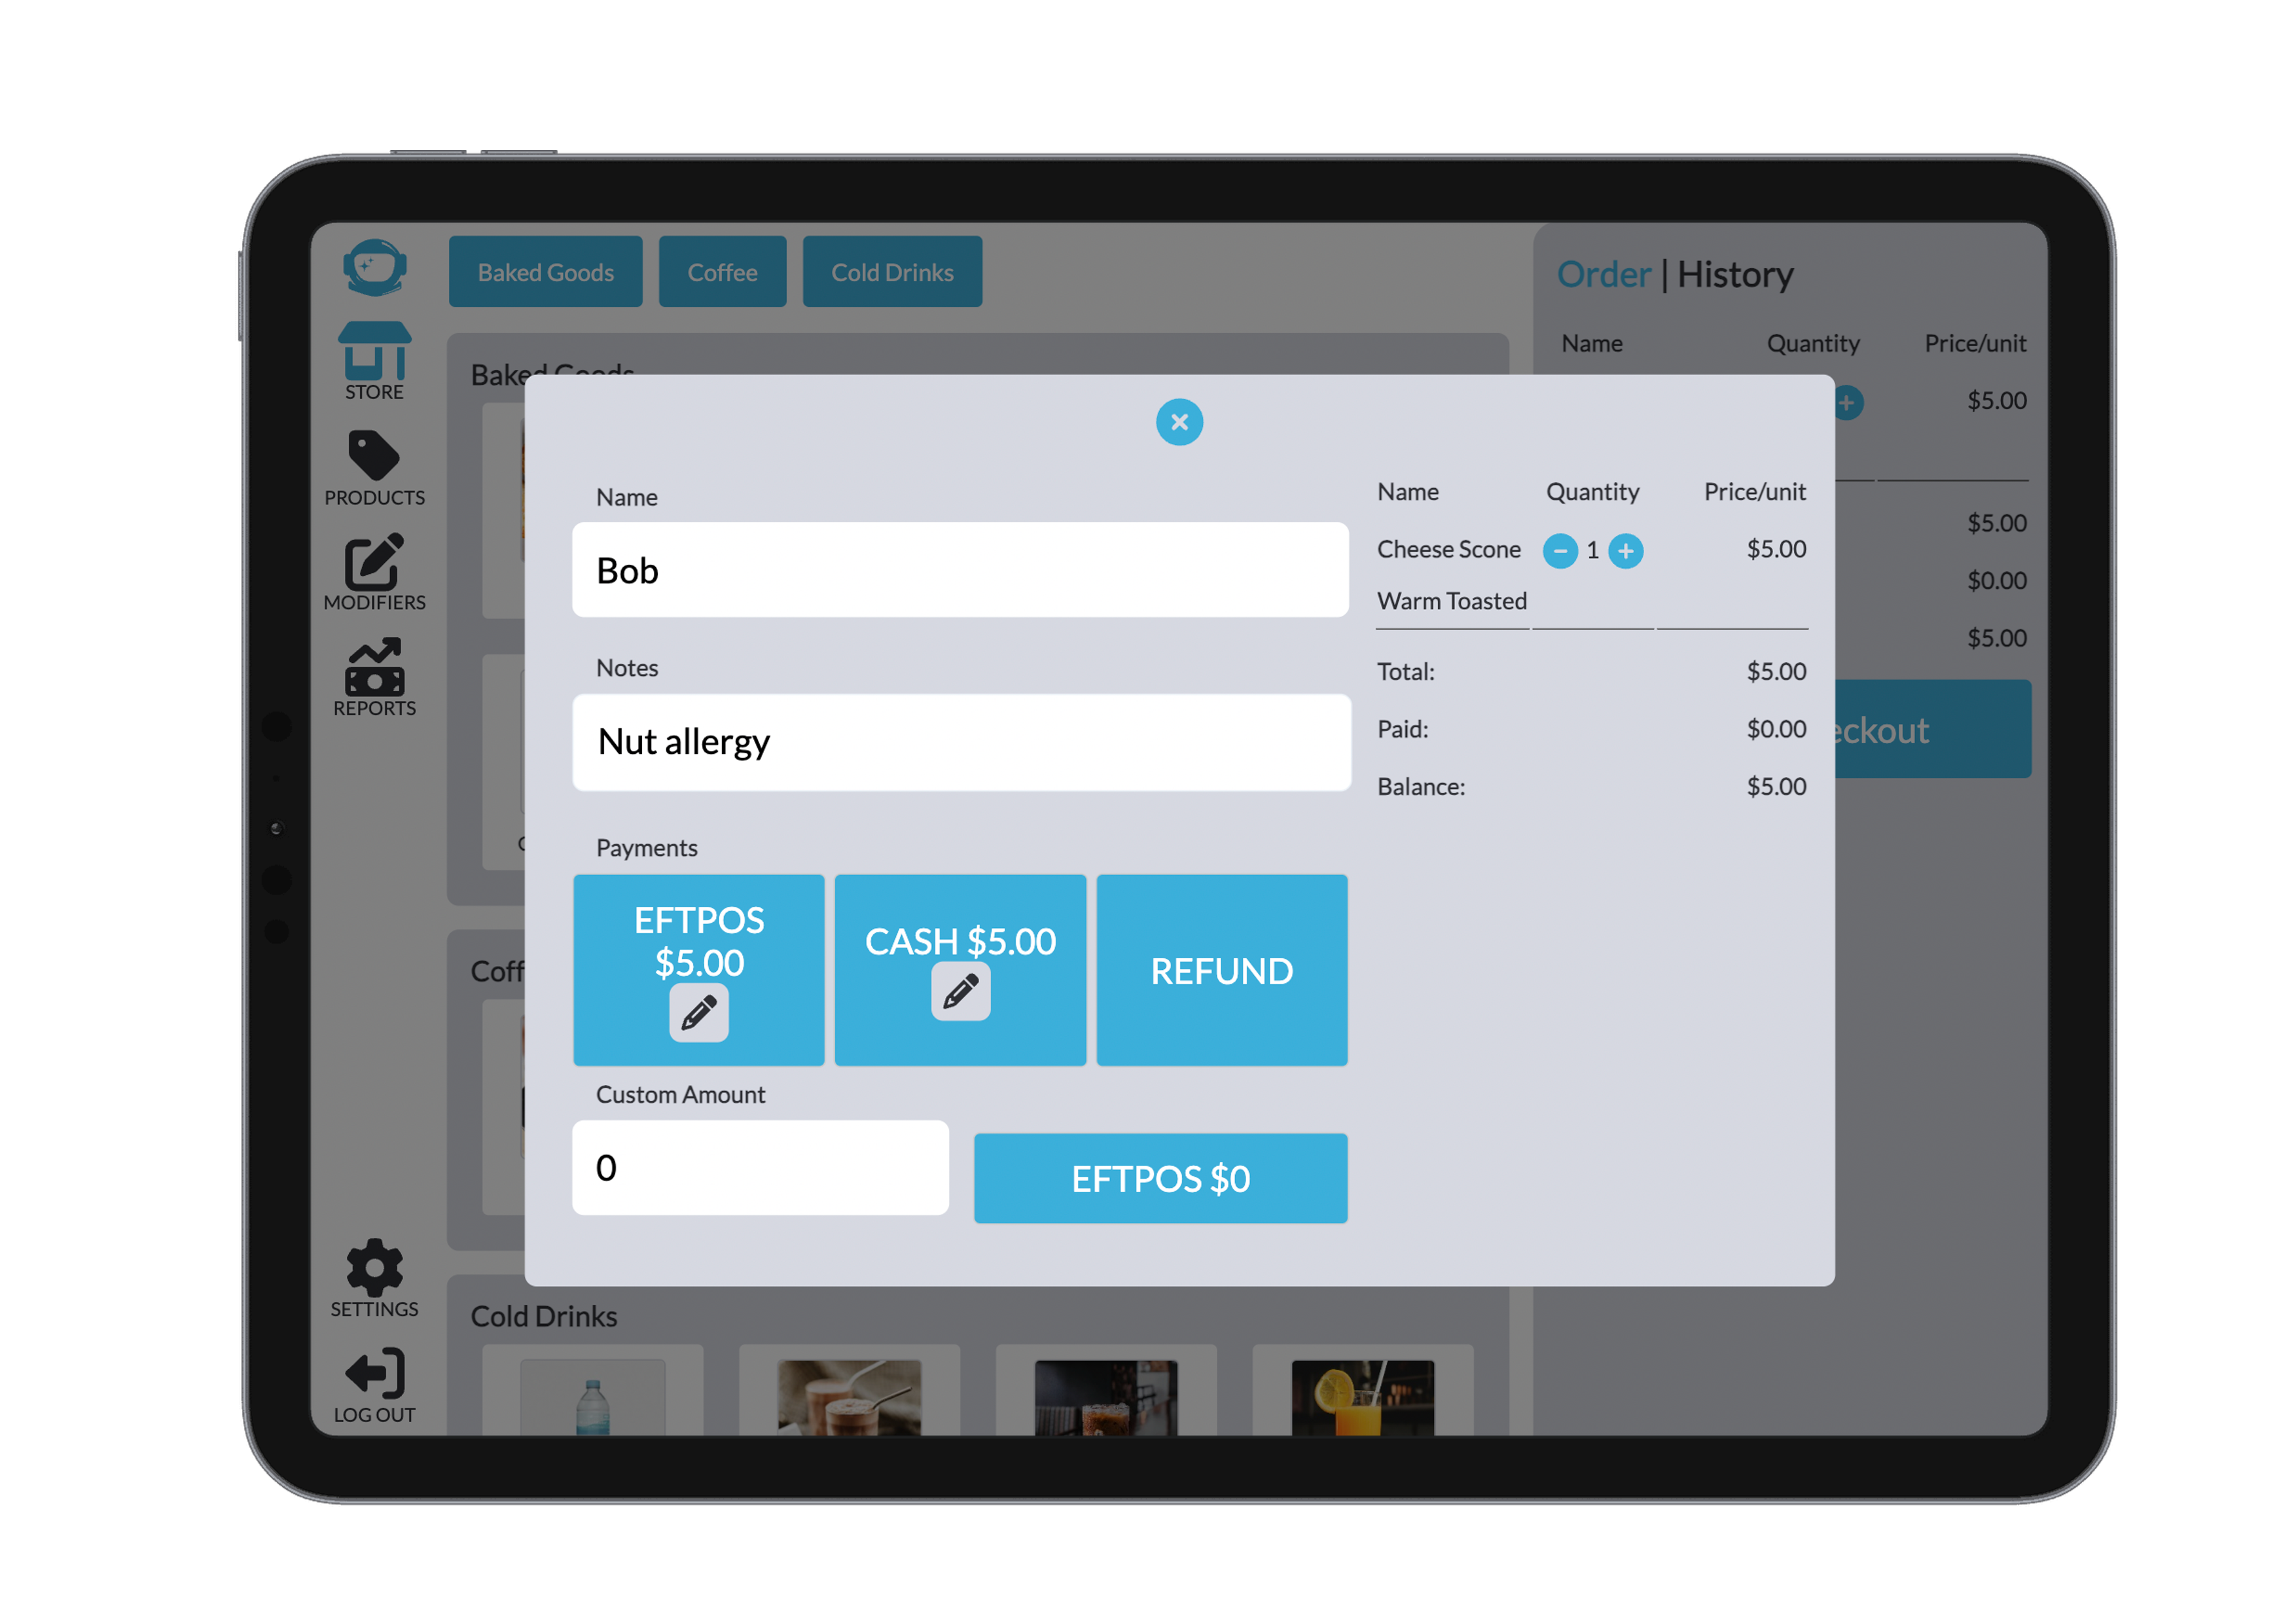
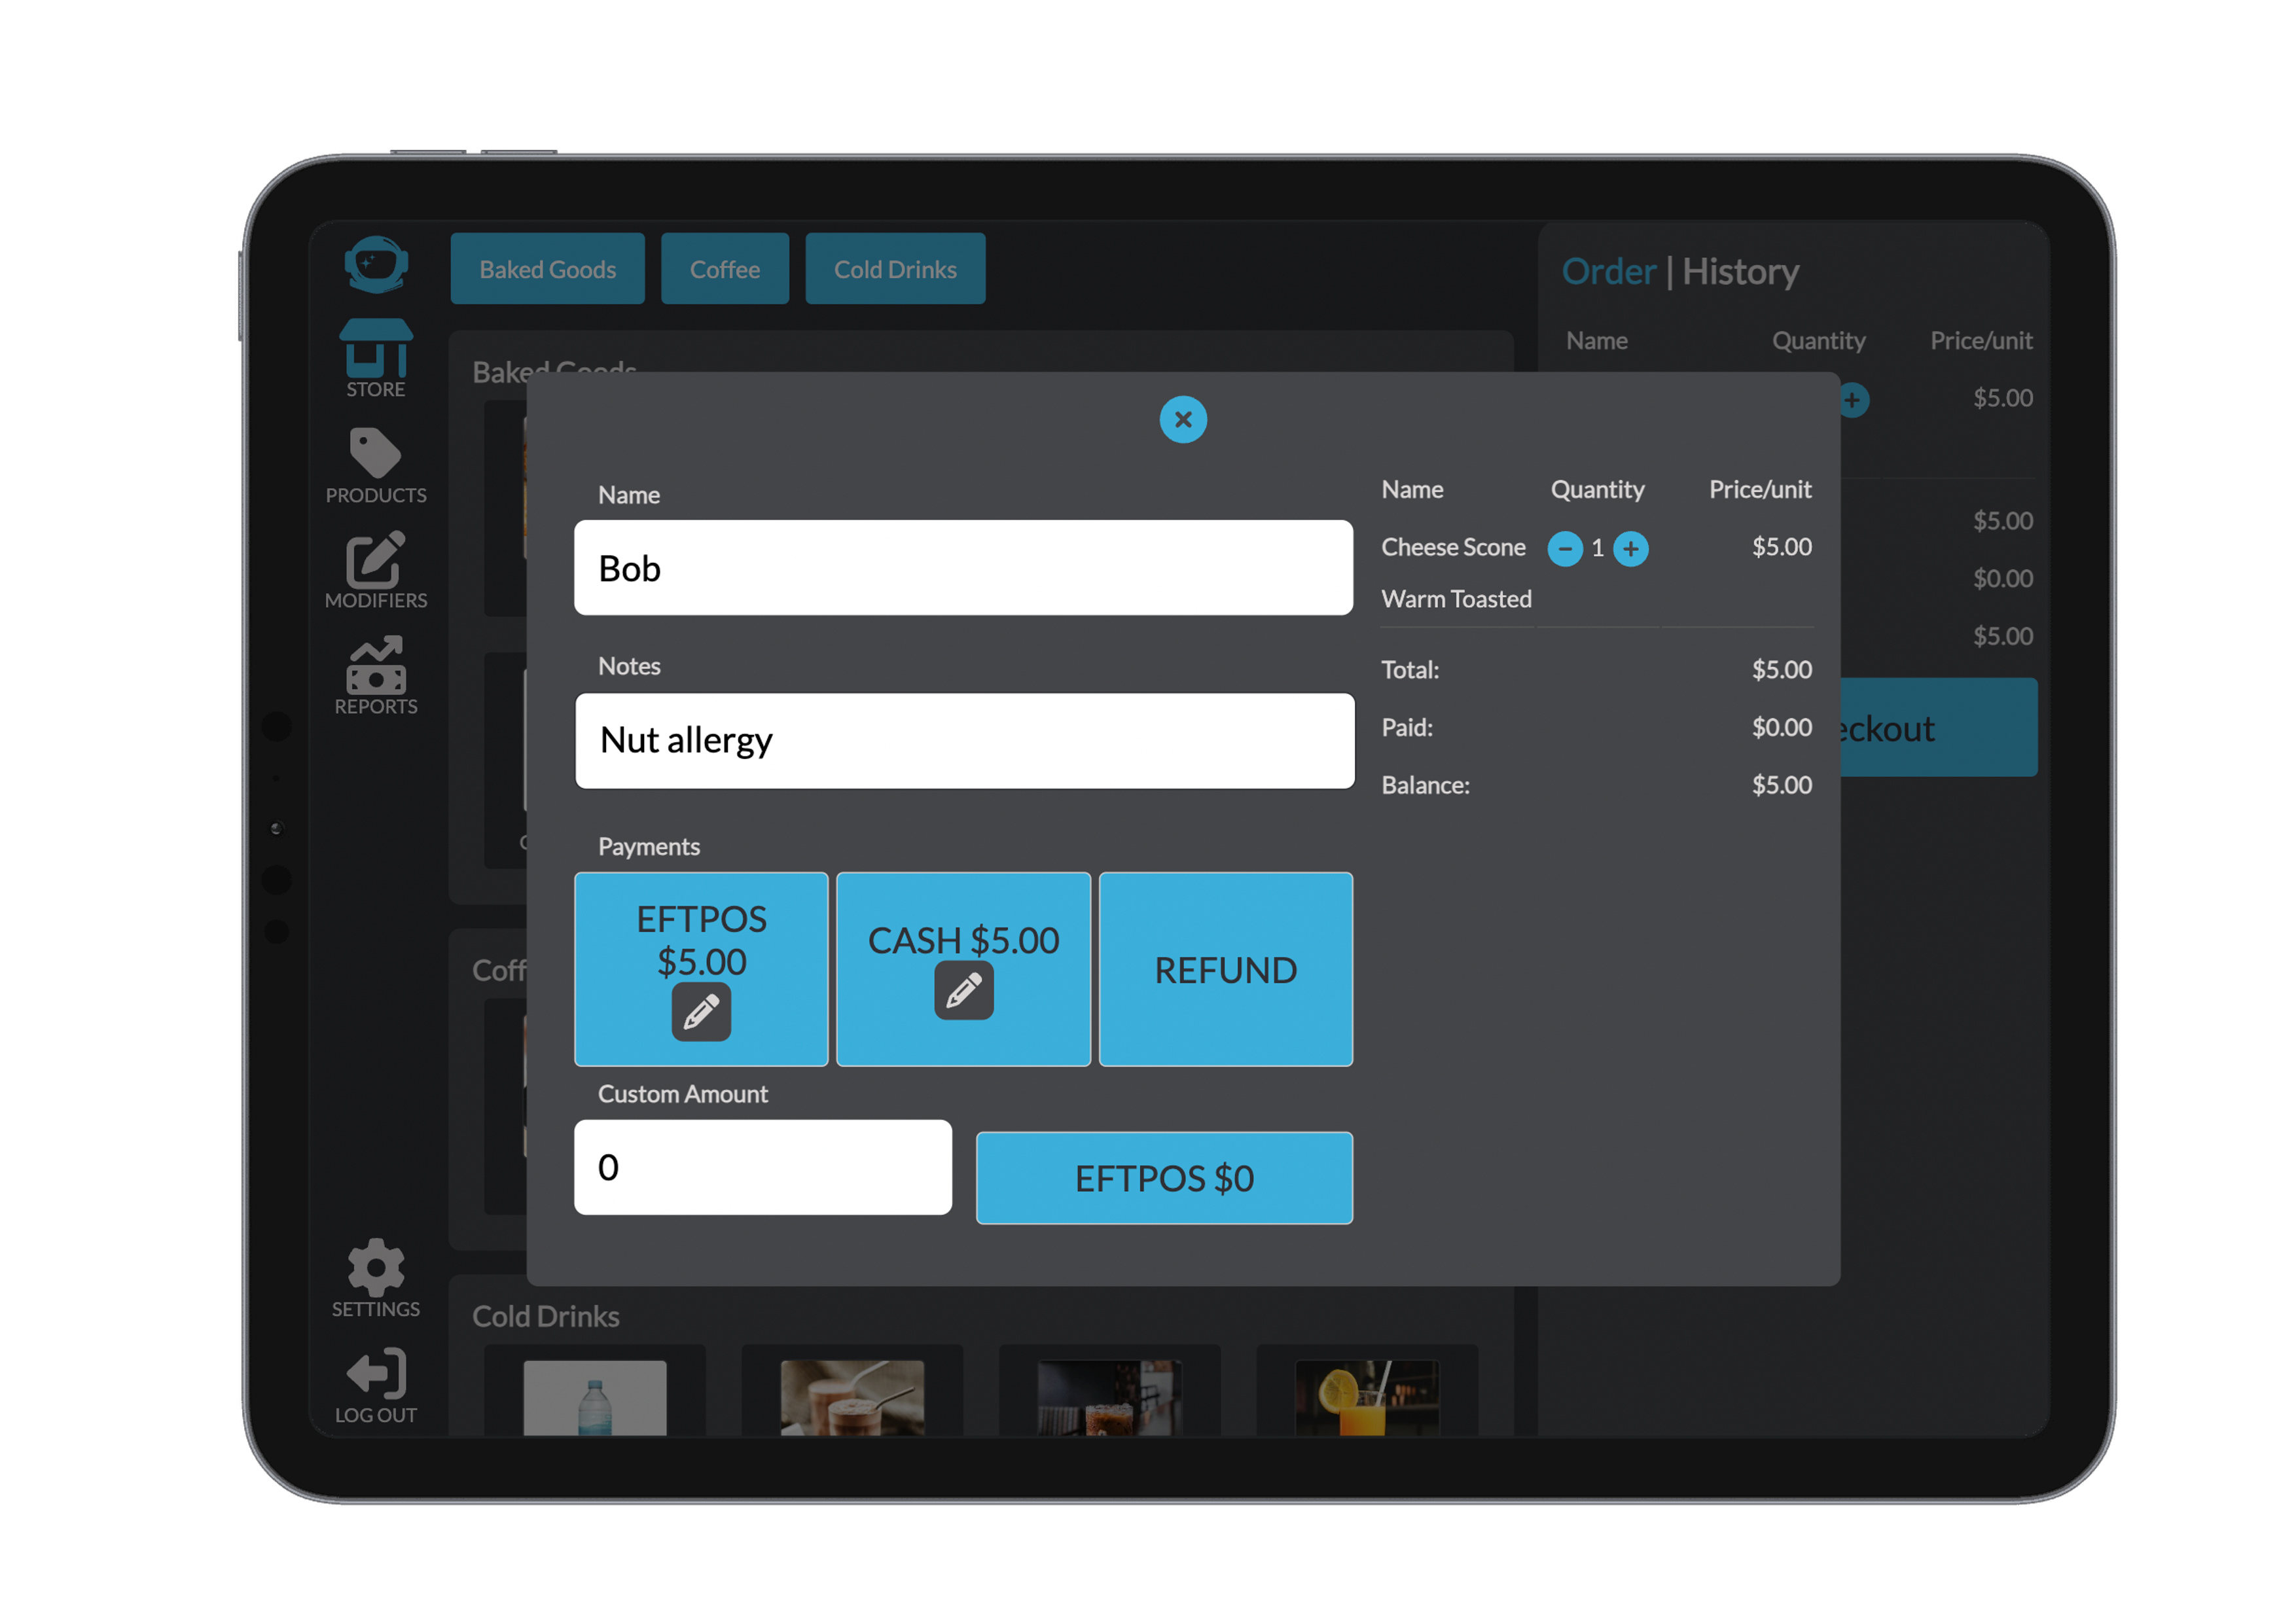
For cash payments, enter the tendered amount. The system calculates and displays the change due. 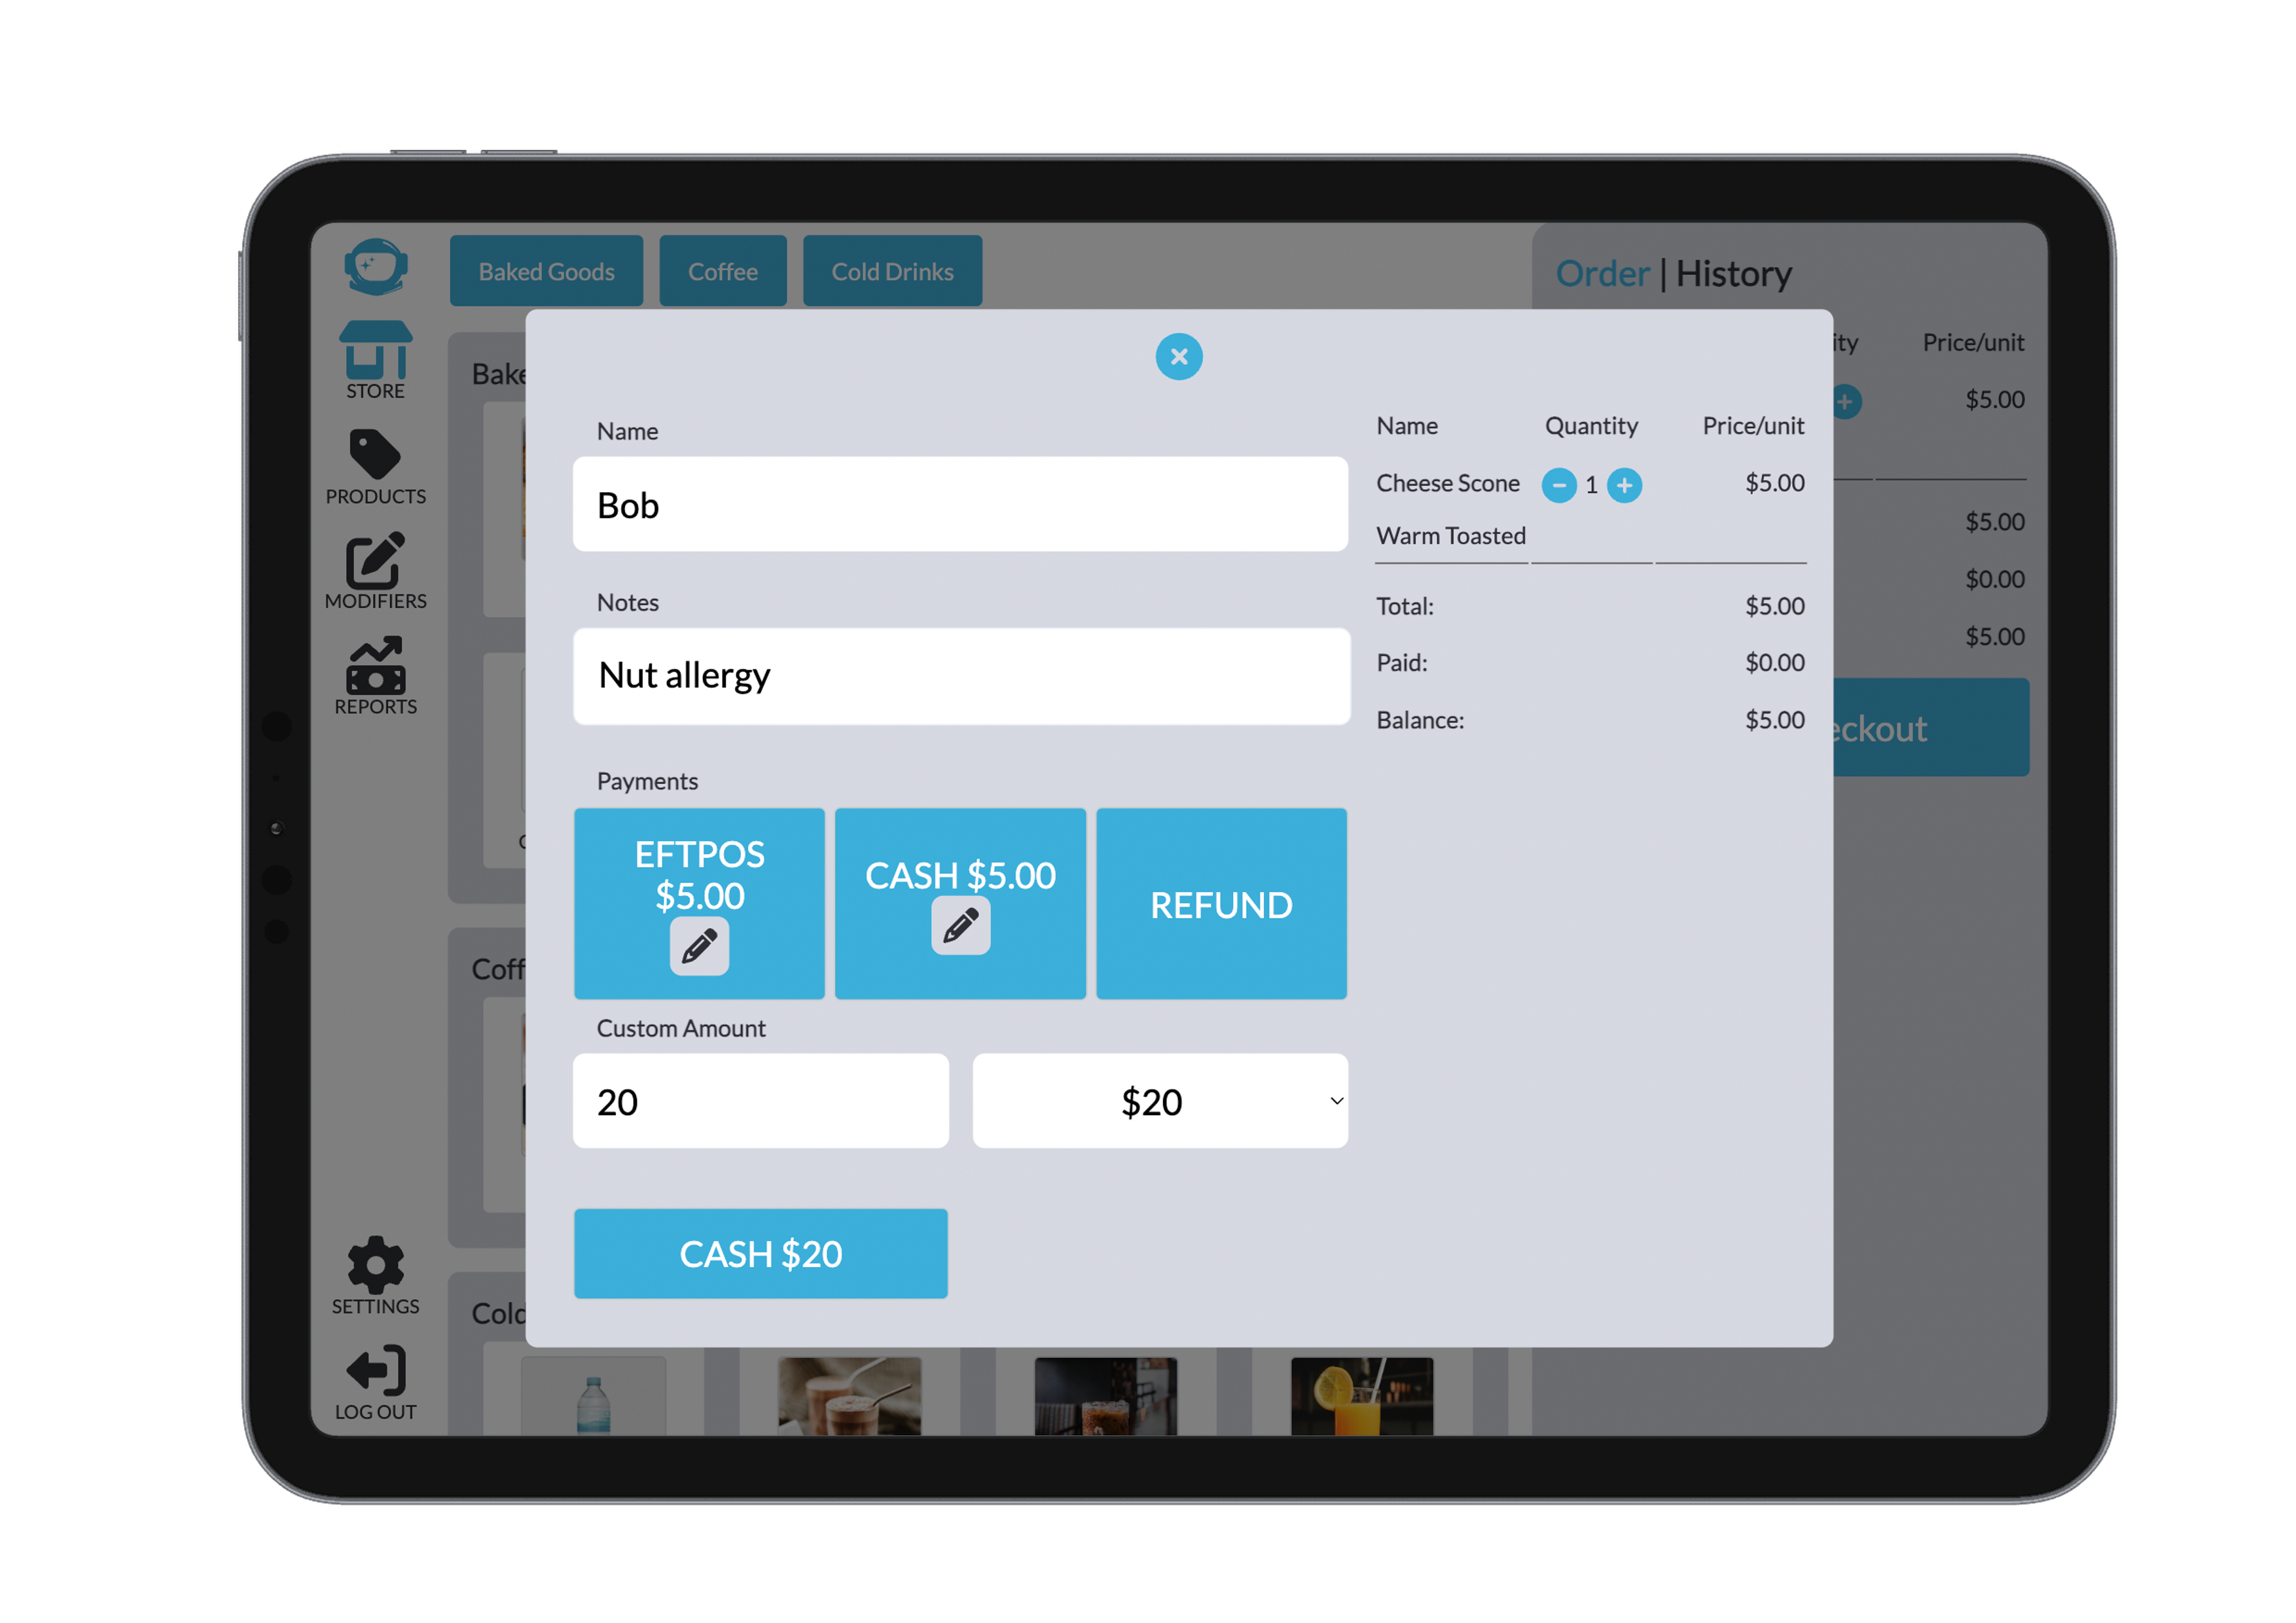
Click Complete Transaction to finalise the order. If an error occurs or the customer changes their mind, click Cancel Last Payment to reverse the last entry.
The order is then automatically sent to the Kitchen Display System (KDS) for preparation.
Additional Features During Order Creation
You can update modifiers at any time before completing the order. Clicking the back button returns you to where you came from and keeps everything from the cart the same.
Recall from History
1. Access Order History
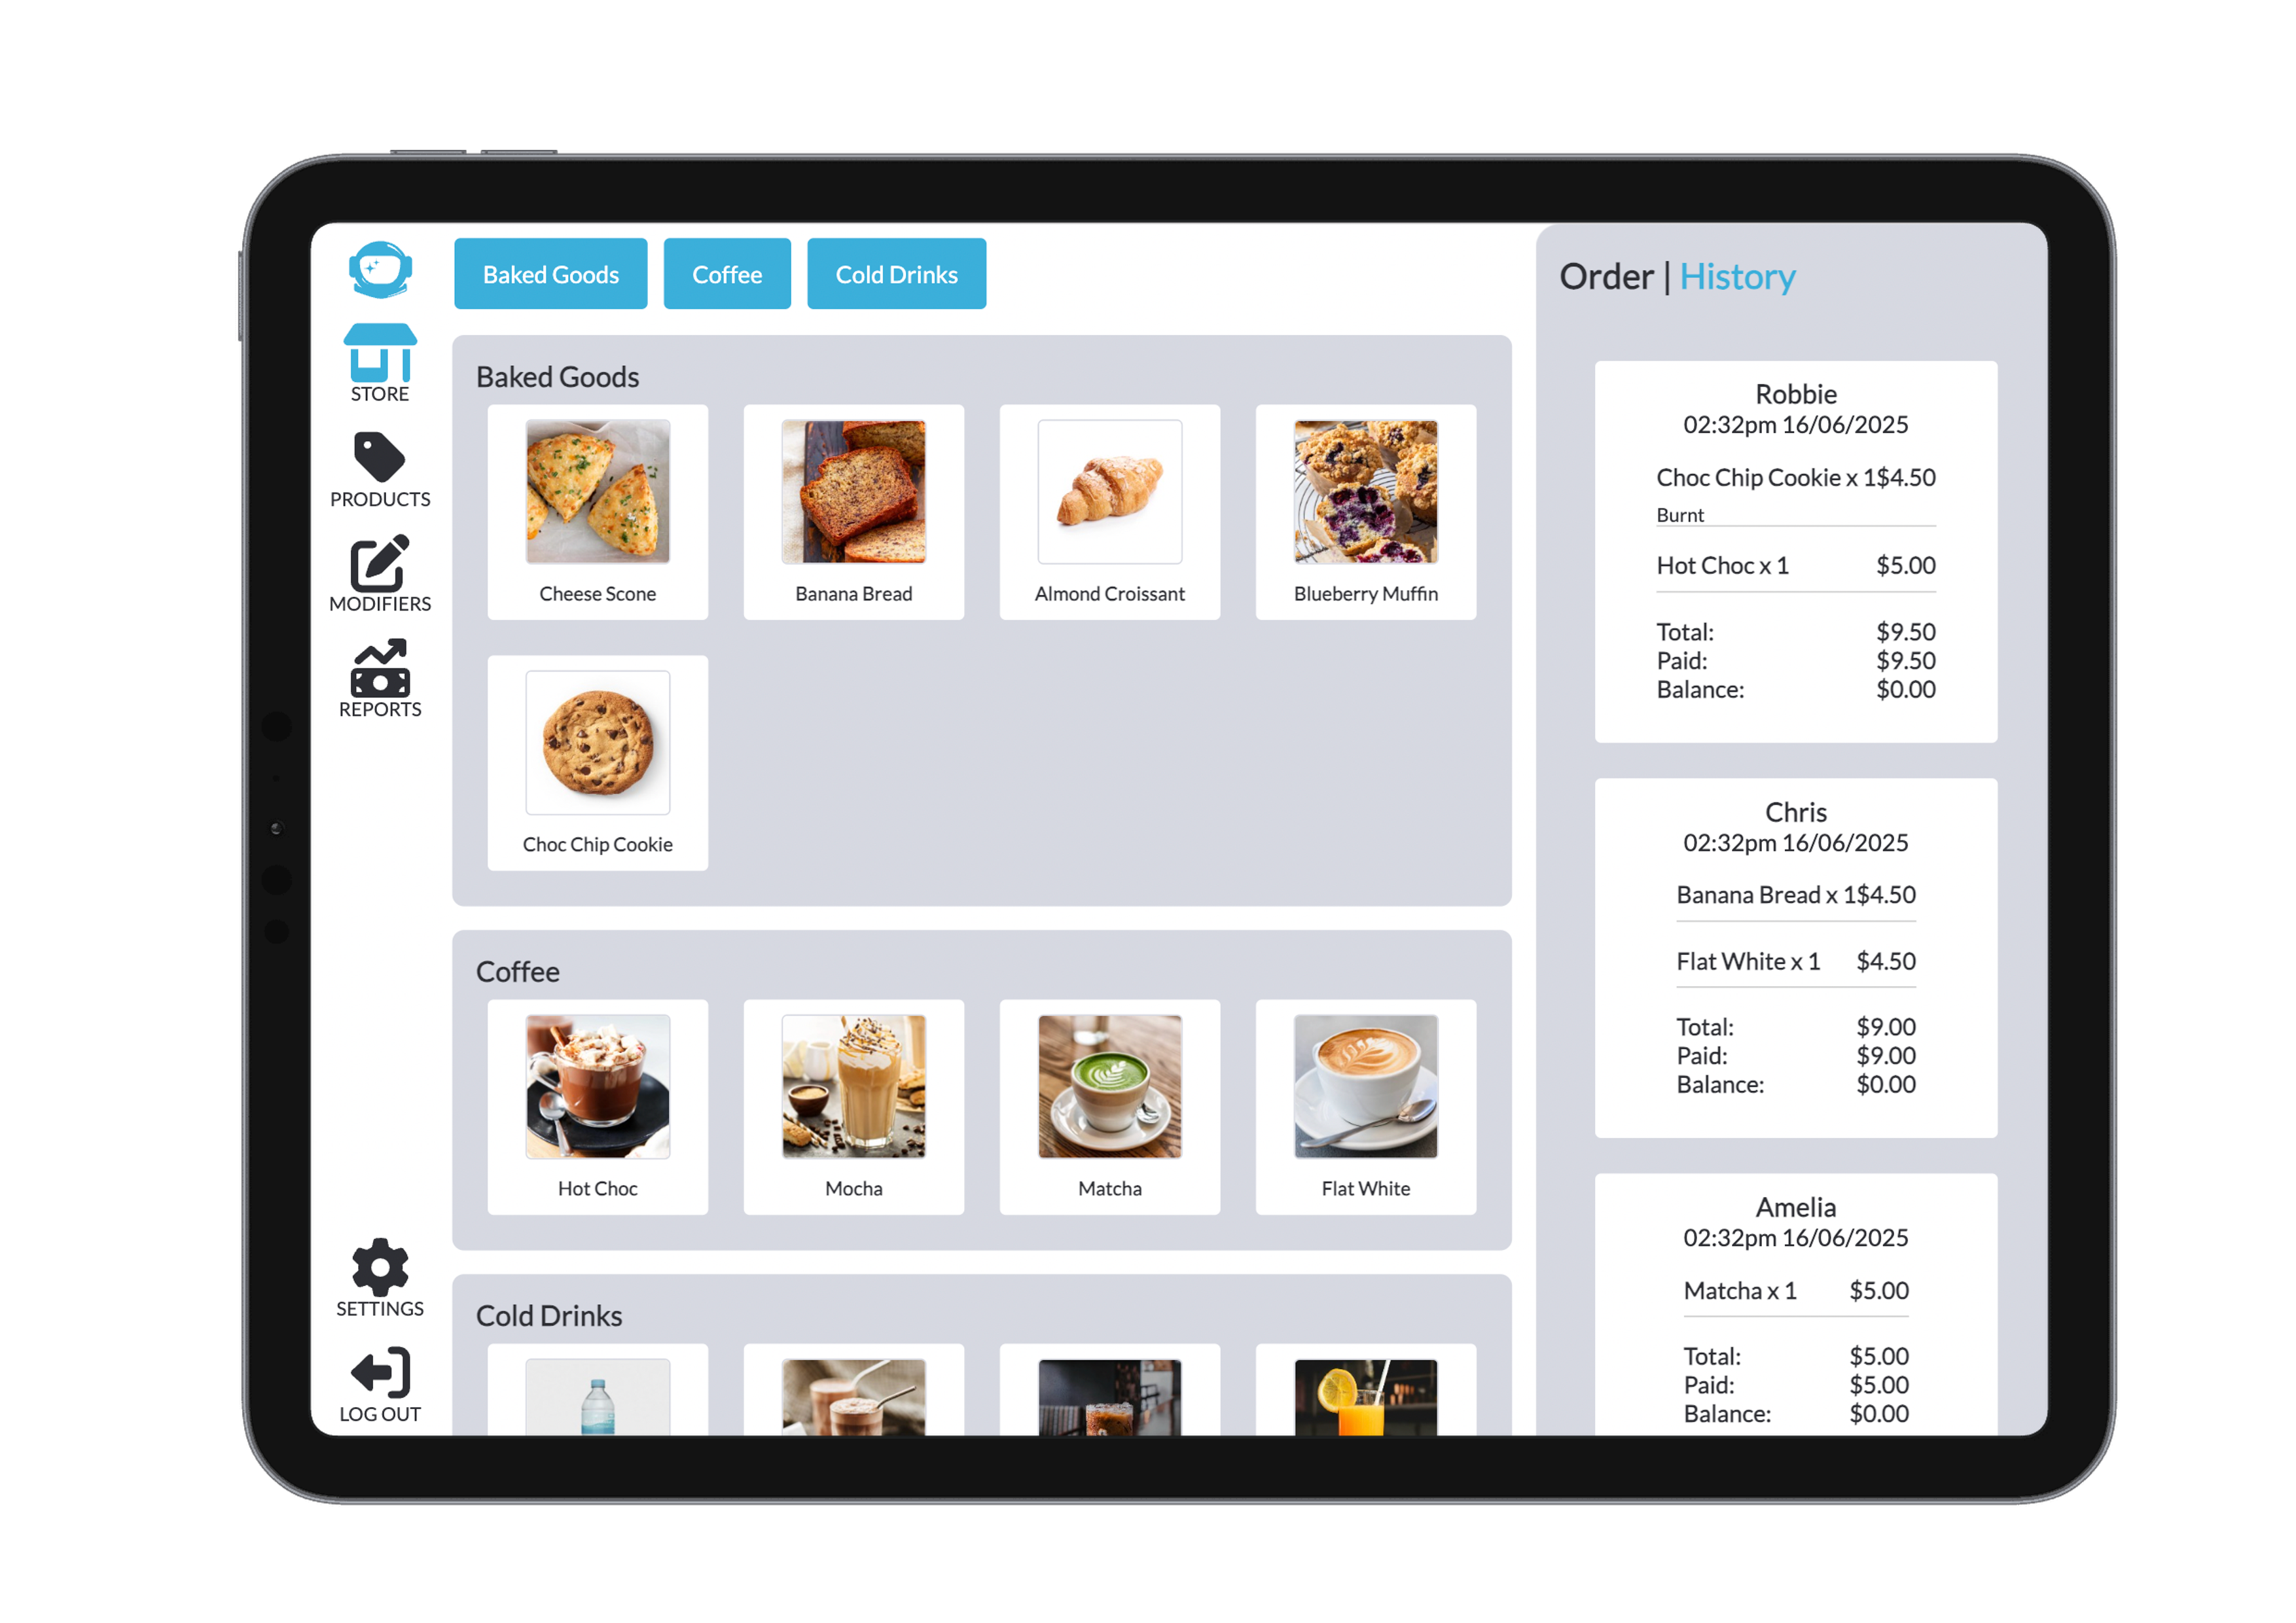
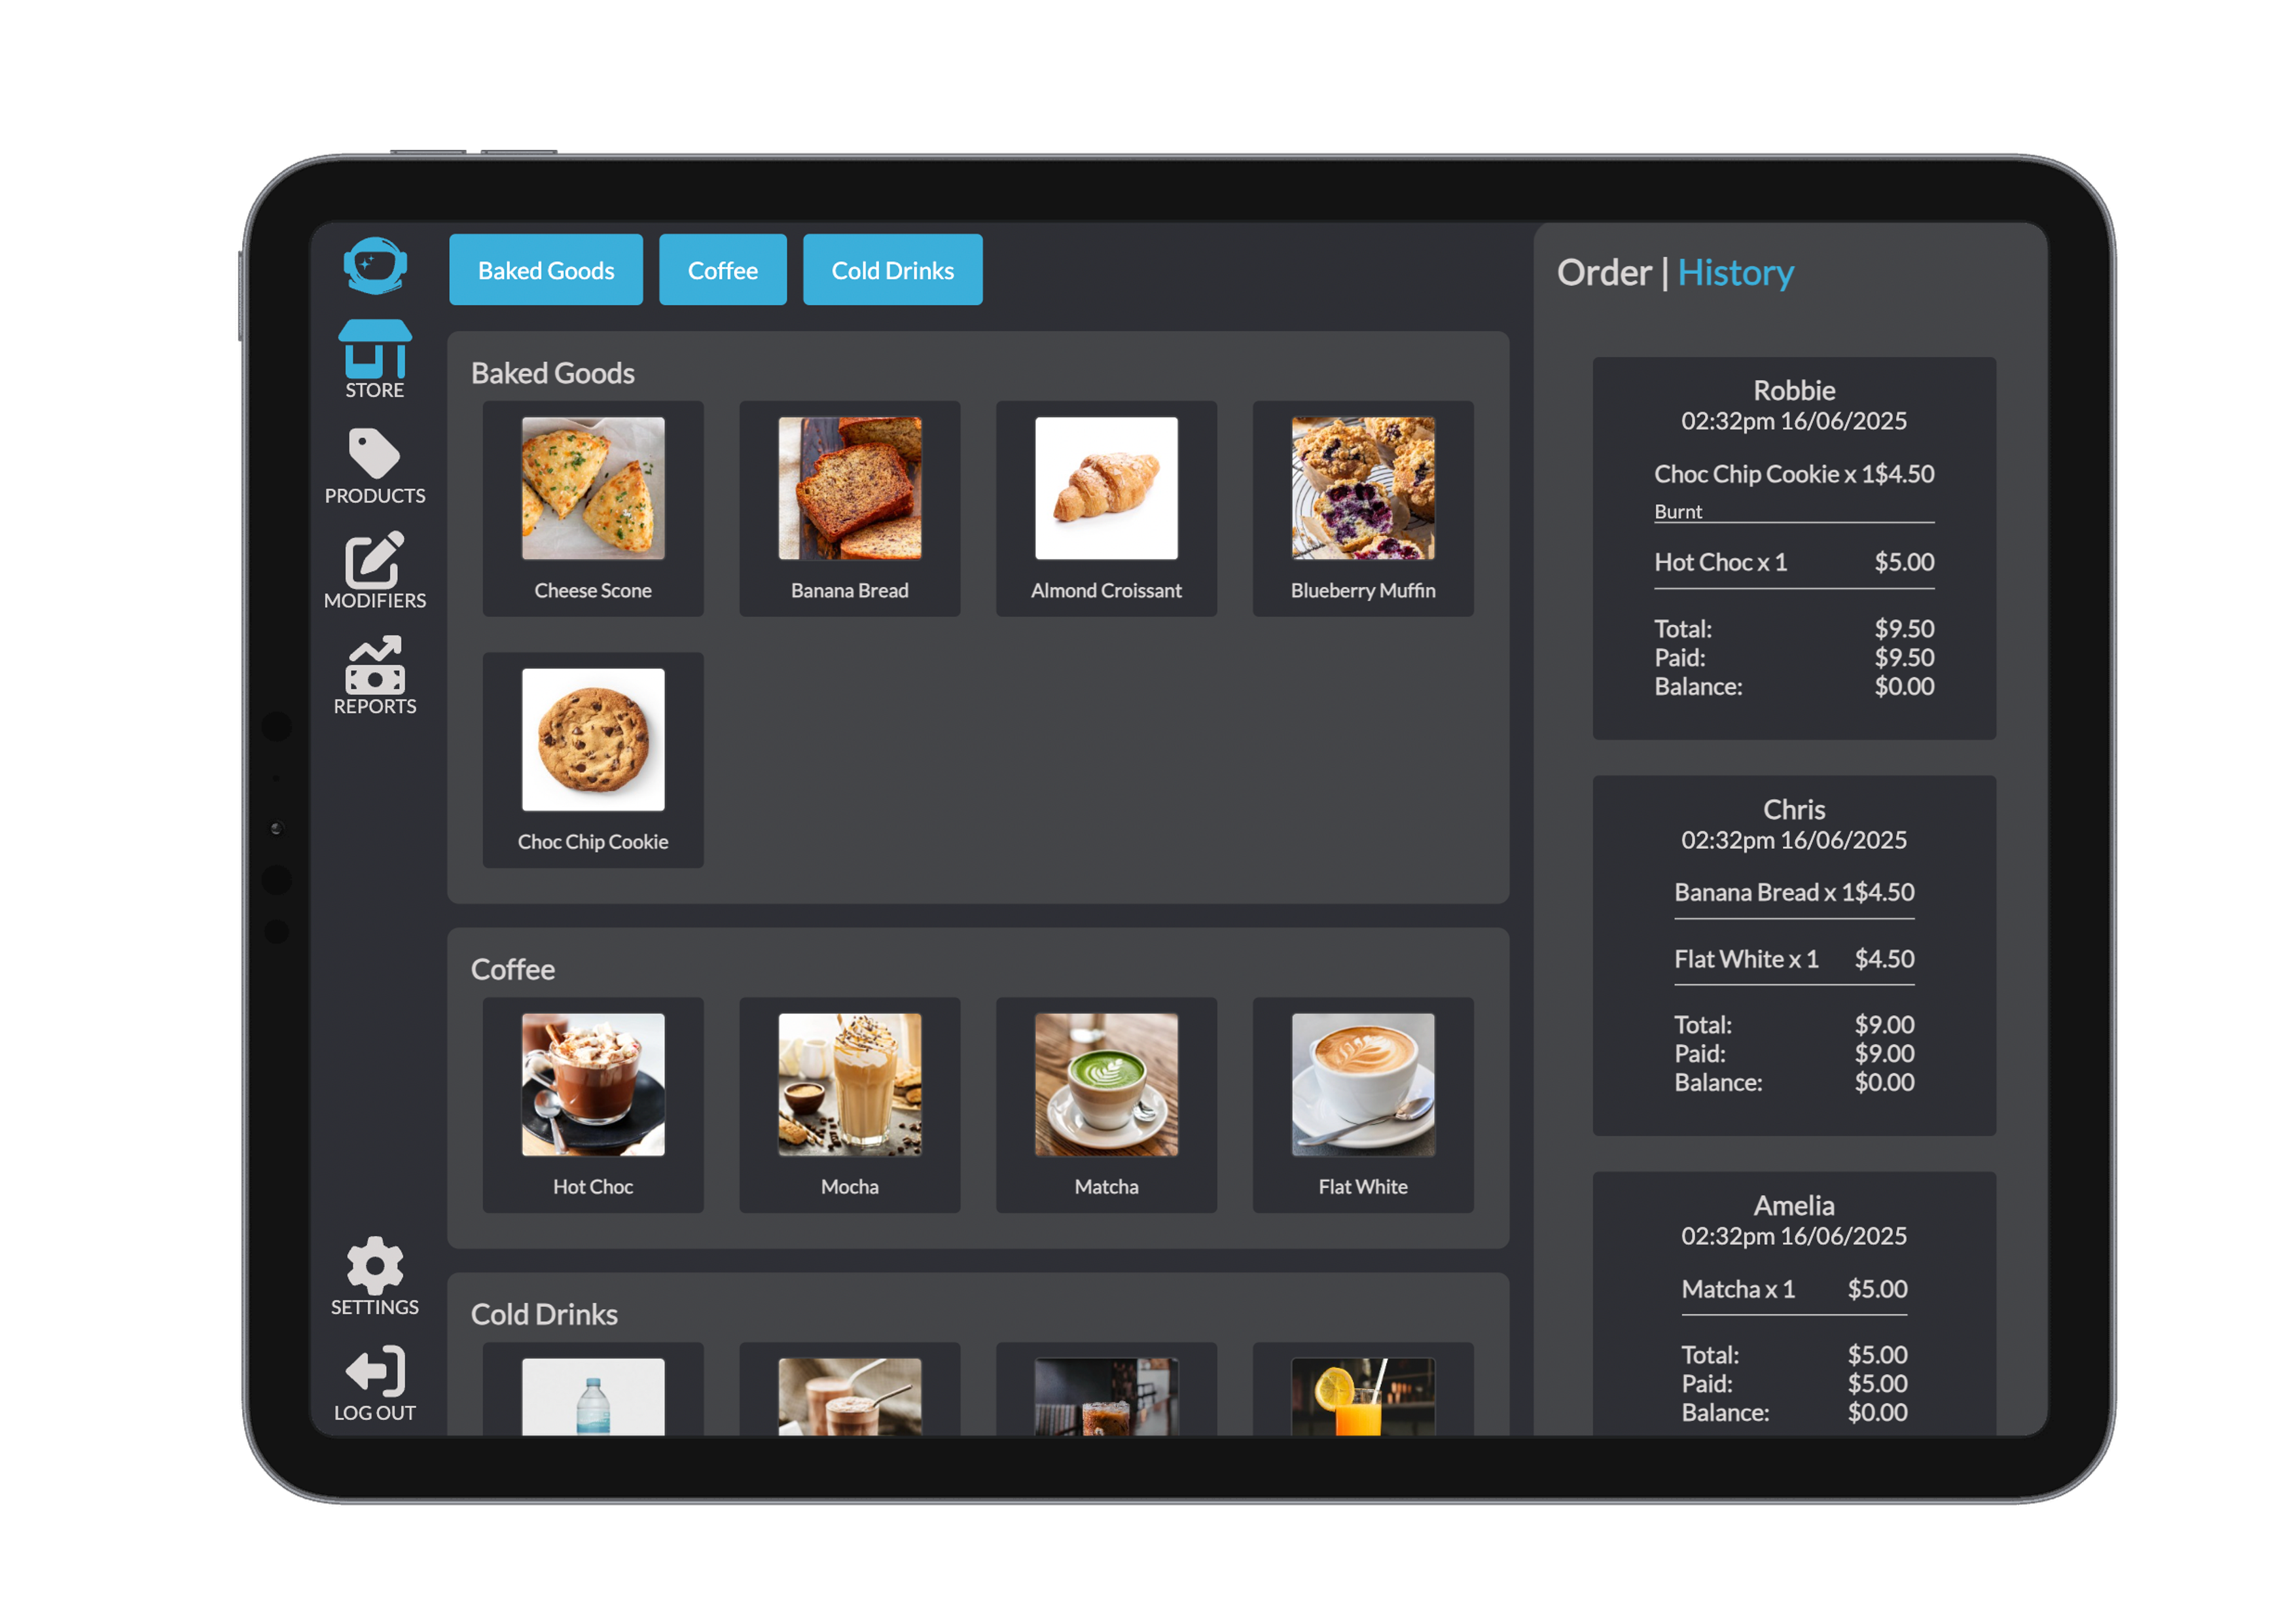
Navigate to the Order Bar on the right and click the History tab. The system shows 50 past orders at a time, with scroll to load more.
The filter allows you to filter by delivery type or by payment type. The filter is used on the current 50 orders in the history, so if there are no orders that match in the 50 current orderst then nothing is displayed untill another 50 orders are loaded in by scrolling down the history of orders.
Each history entry includes:
- Customer name or table number
- Item list with prices
- Total amount, payments made, and balance remaining
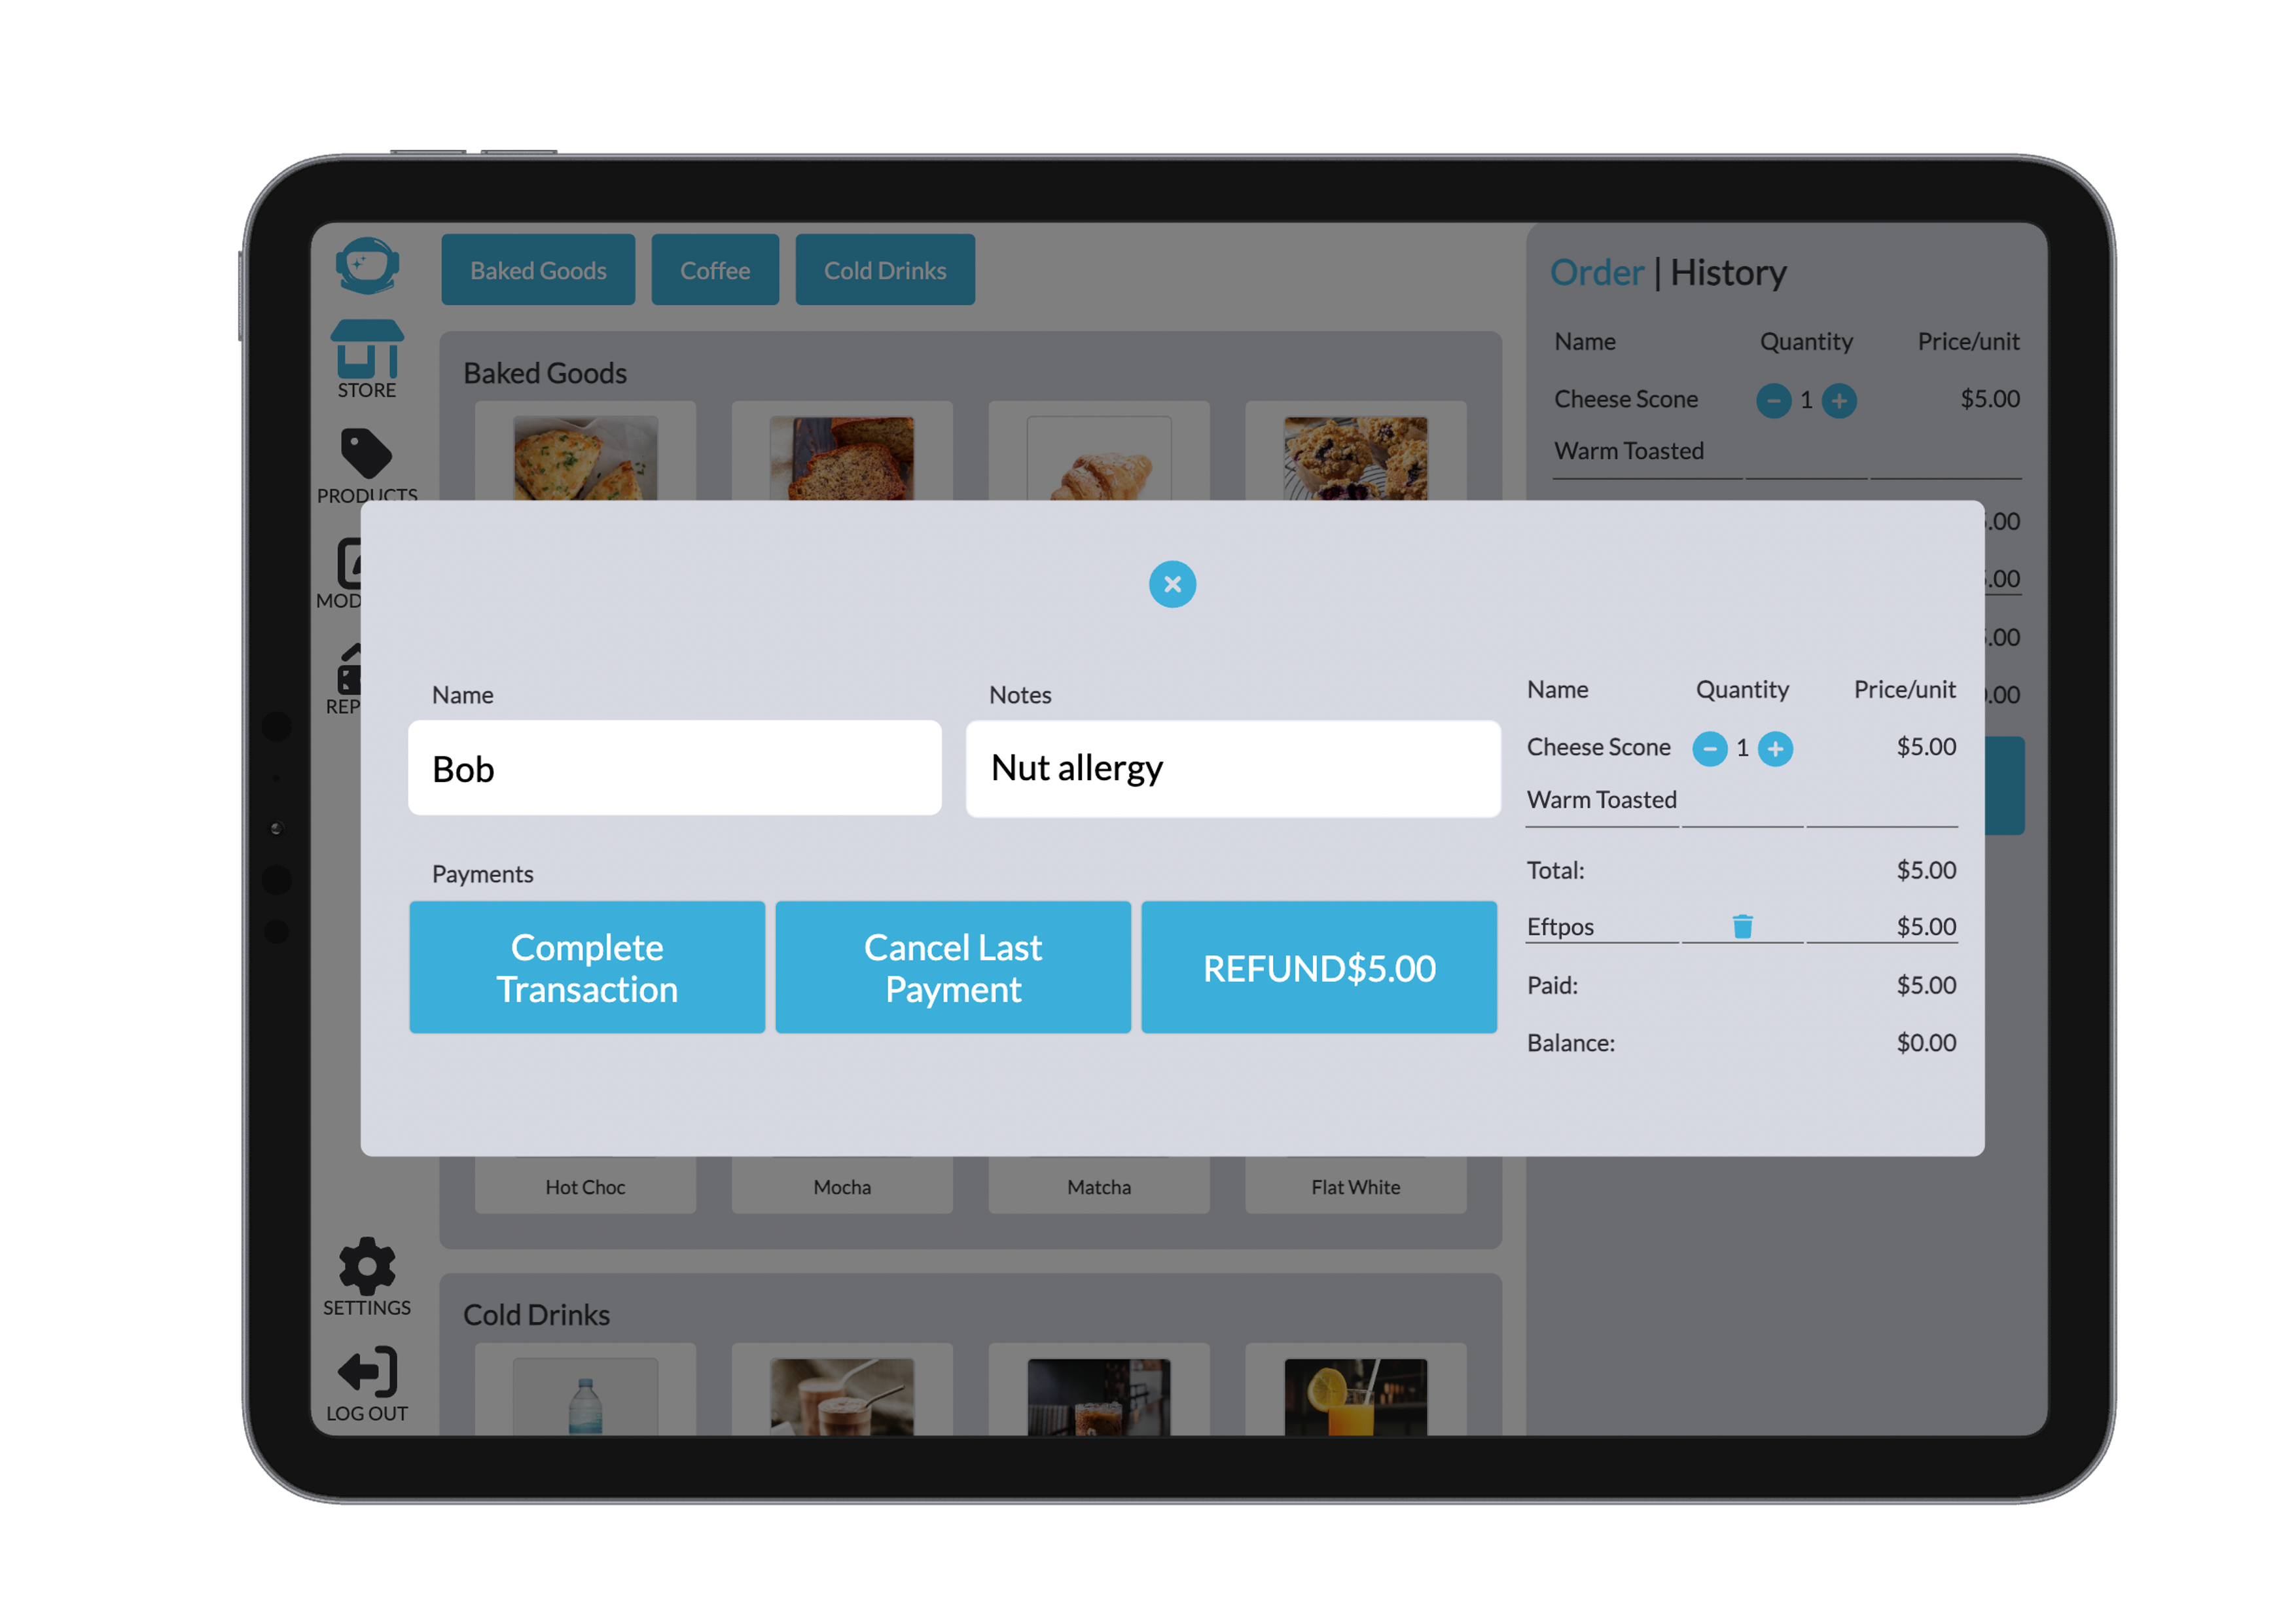
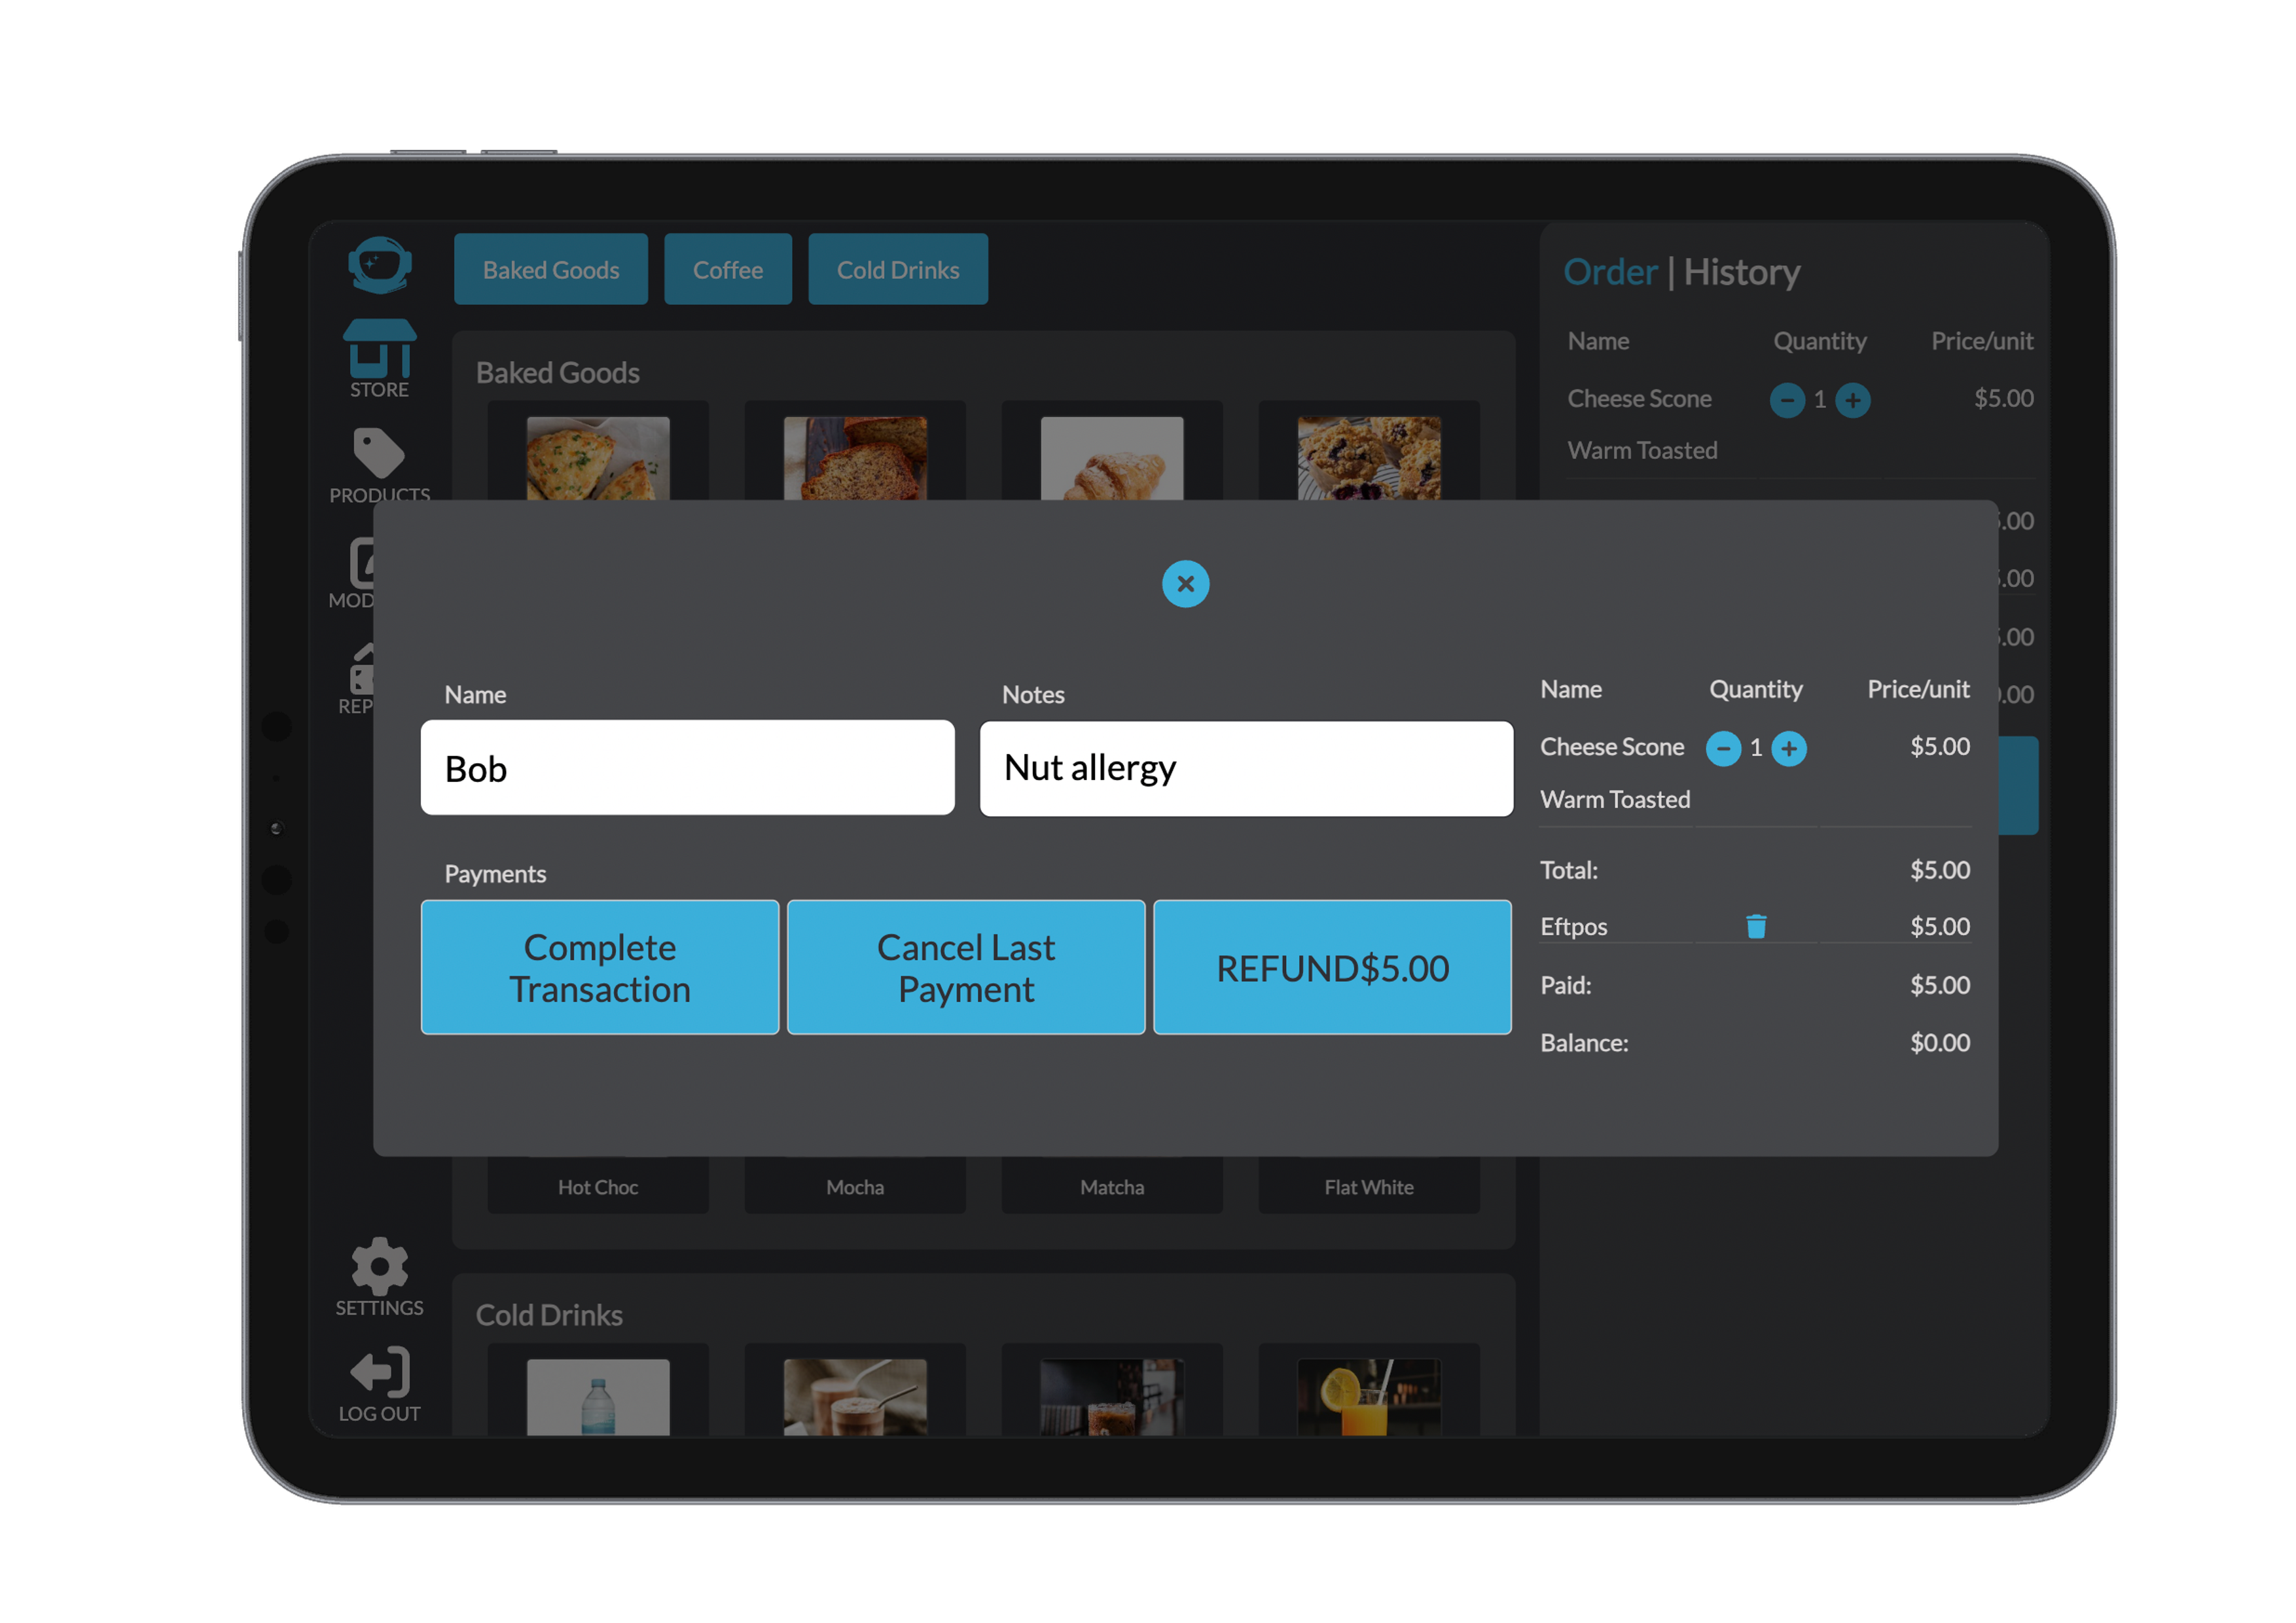
2. View or Reload a Past Order
Click an order to open a pop-up with full details:
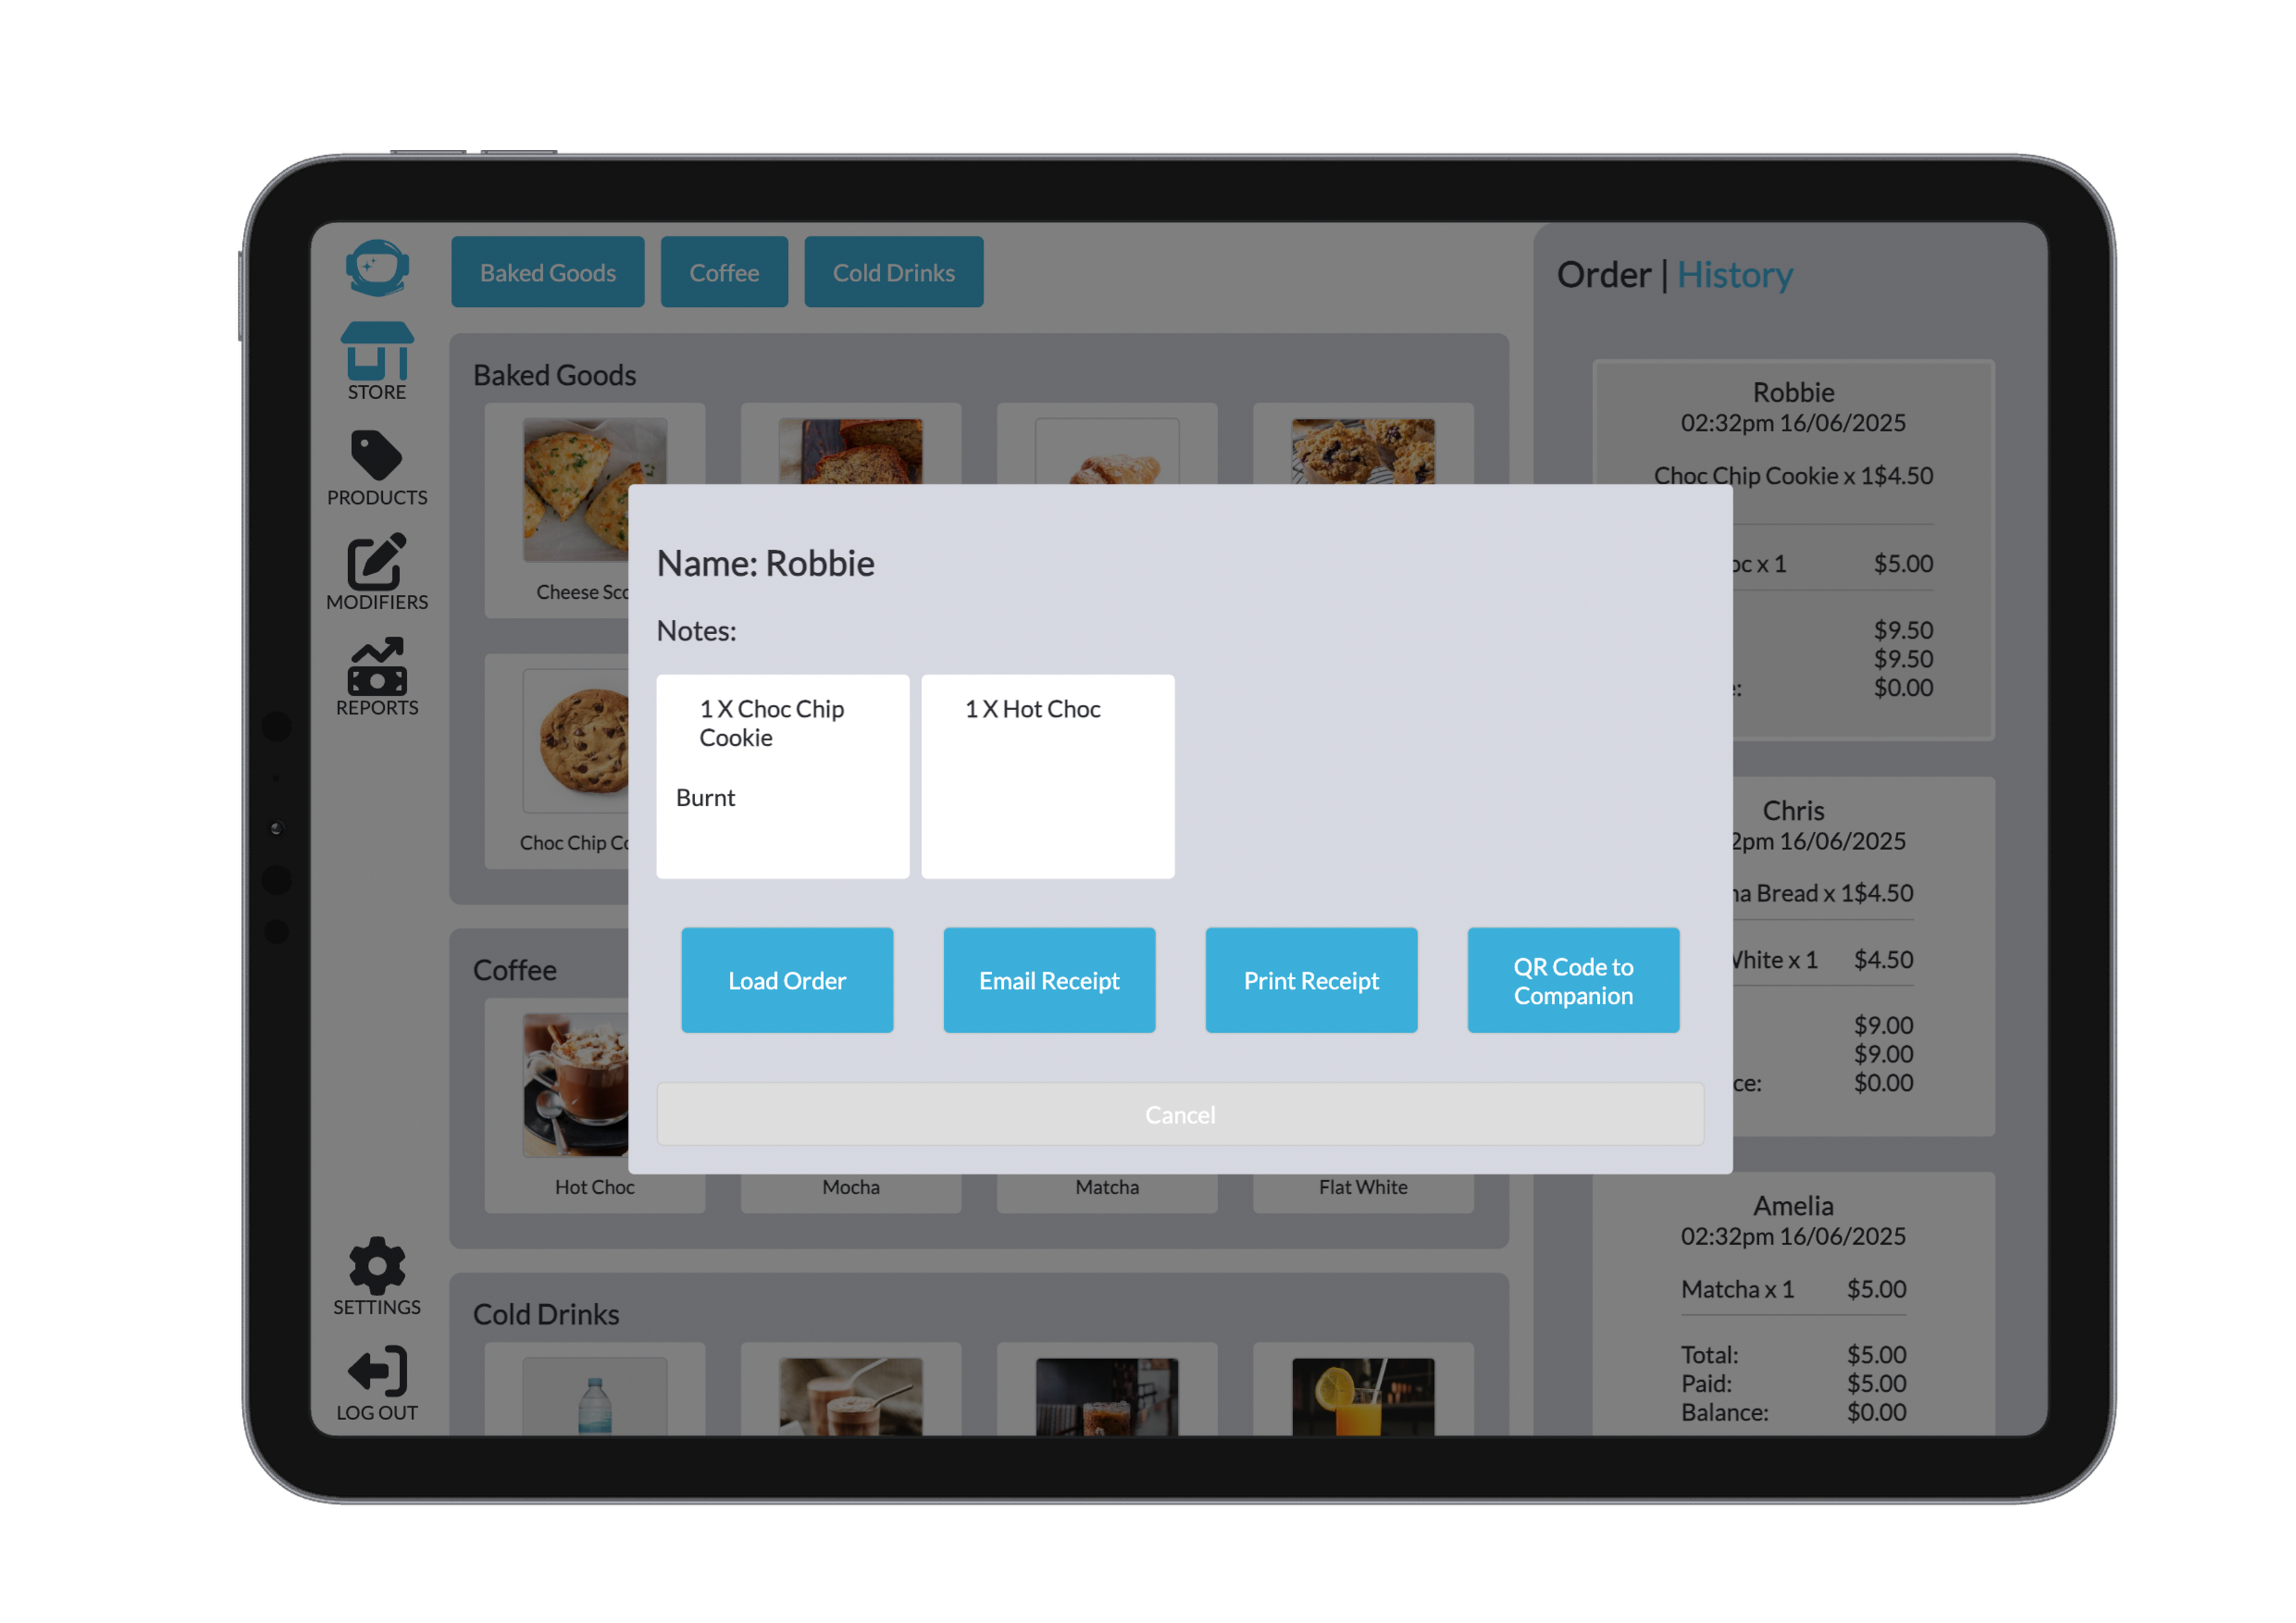
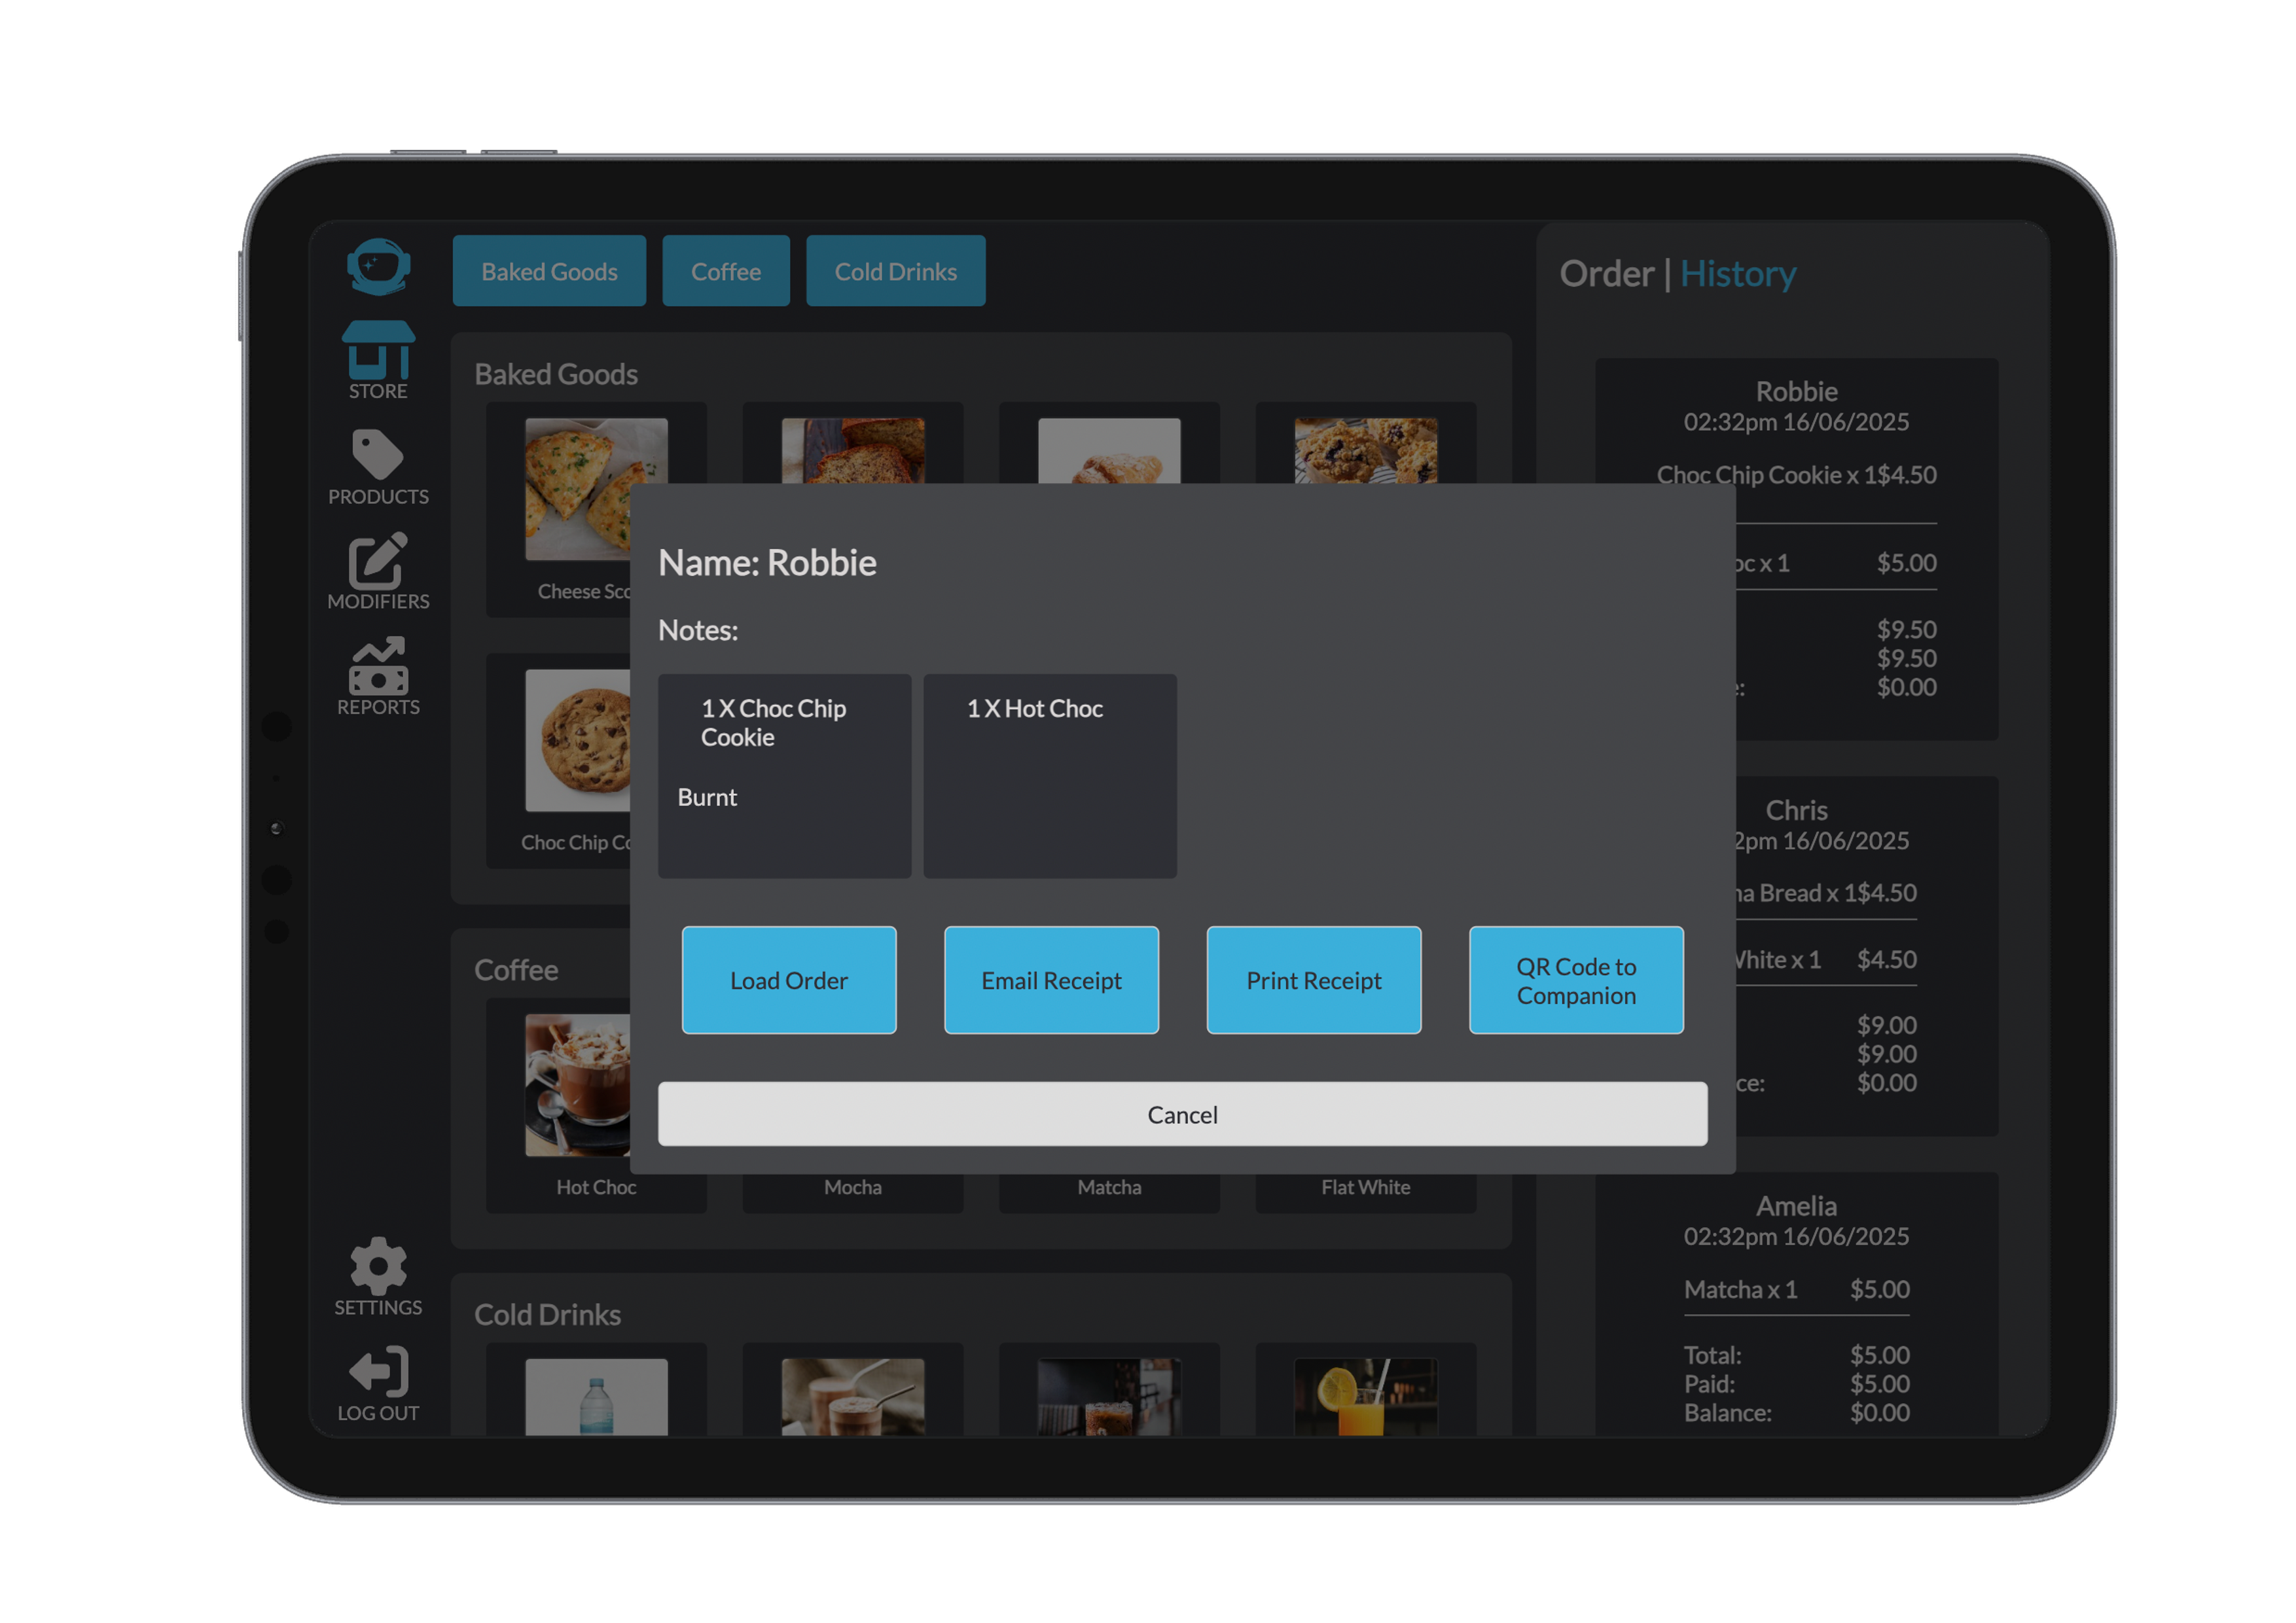
From here, you can:
- Load Order to reprocess or edit it
- Make changes, then click Complete Transaction to re-add it to history
Note
This may update the timestamp or metadata, depending on system settings.
3. Additional Options
Email Receipt: Enter the customer’s email and click Send
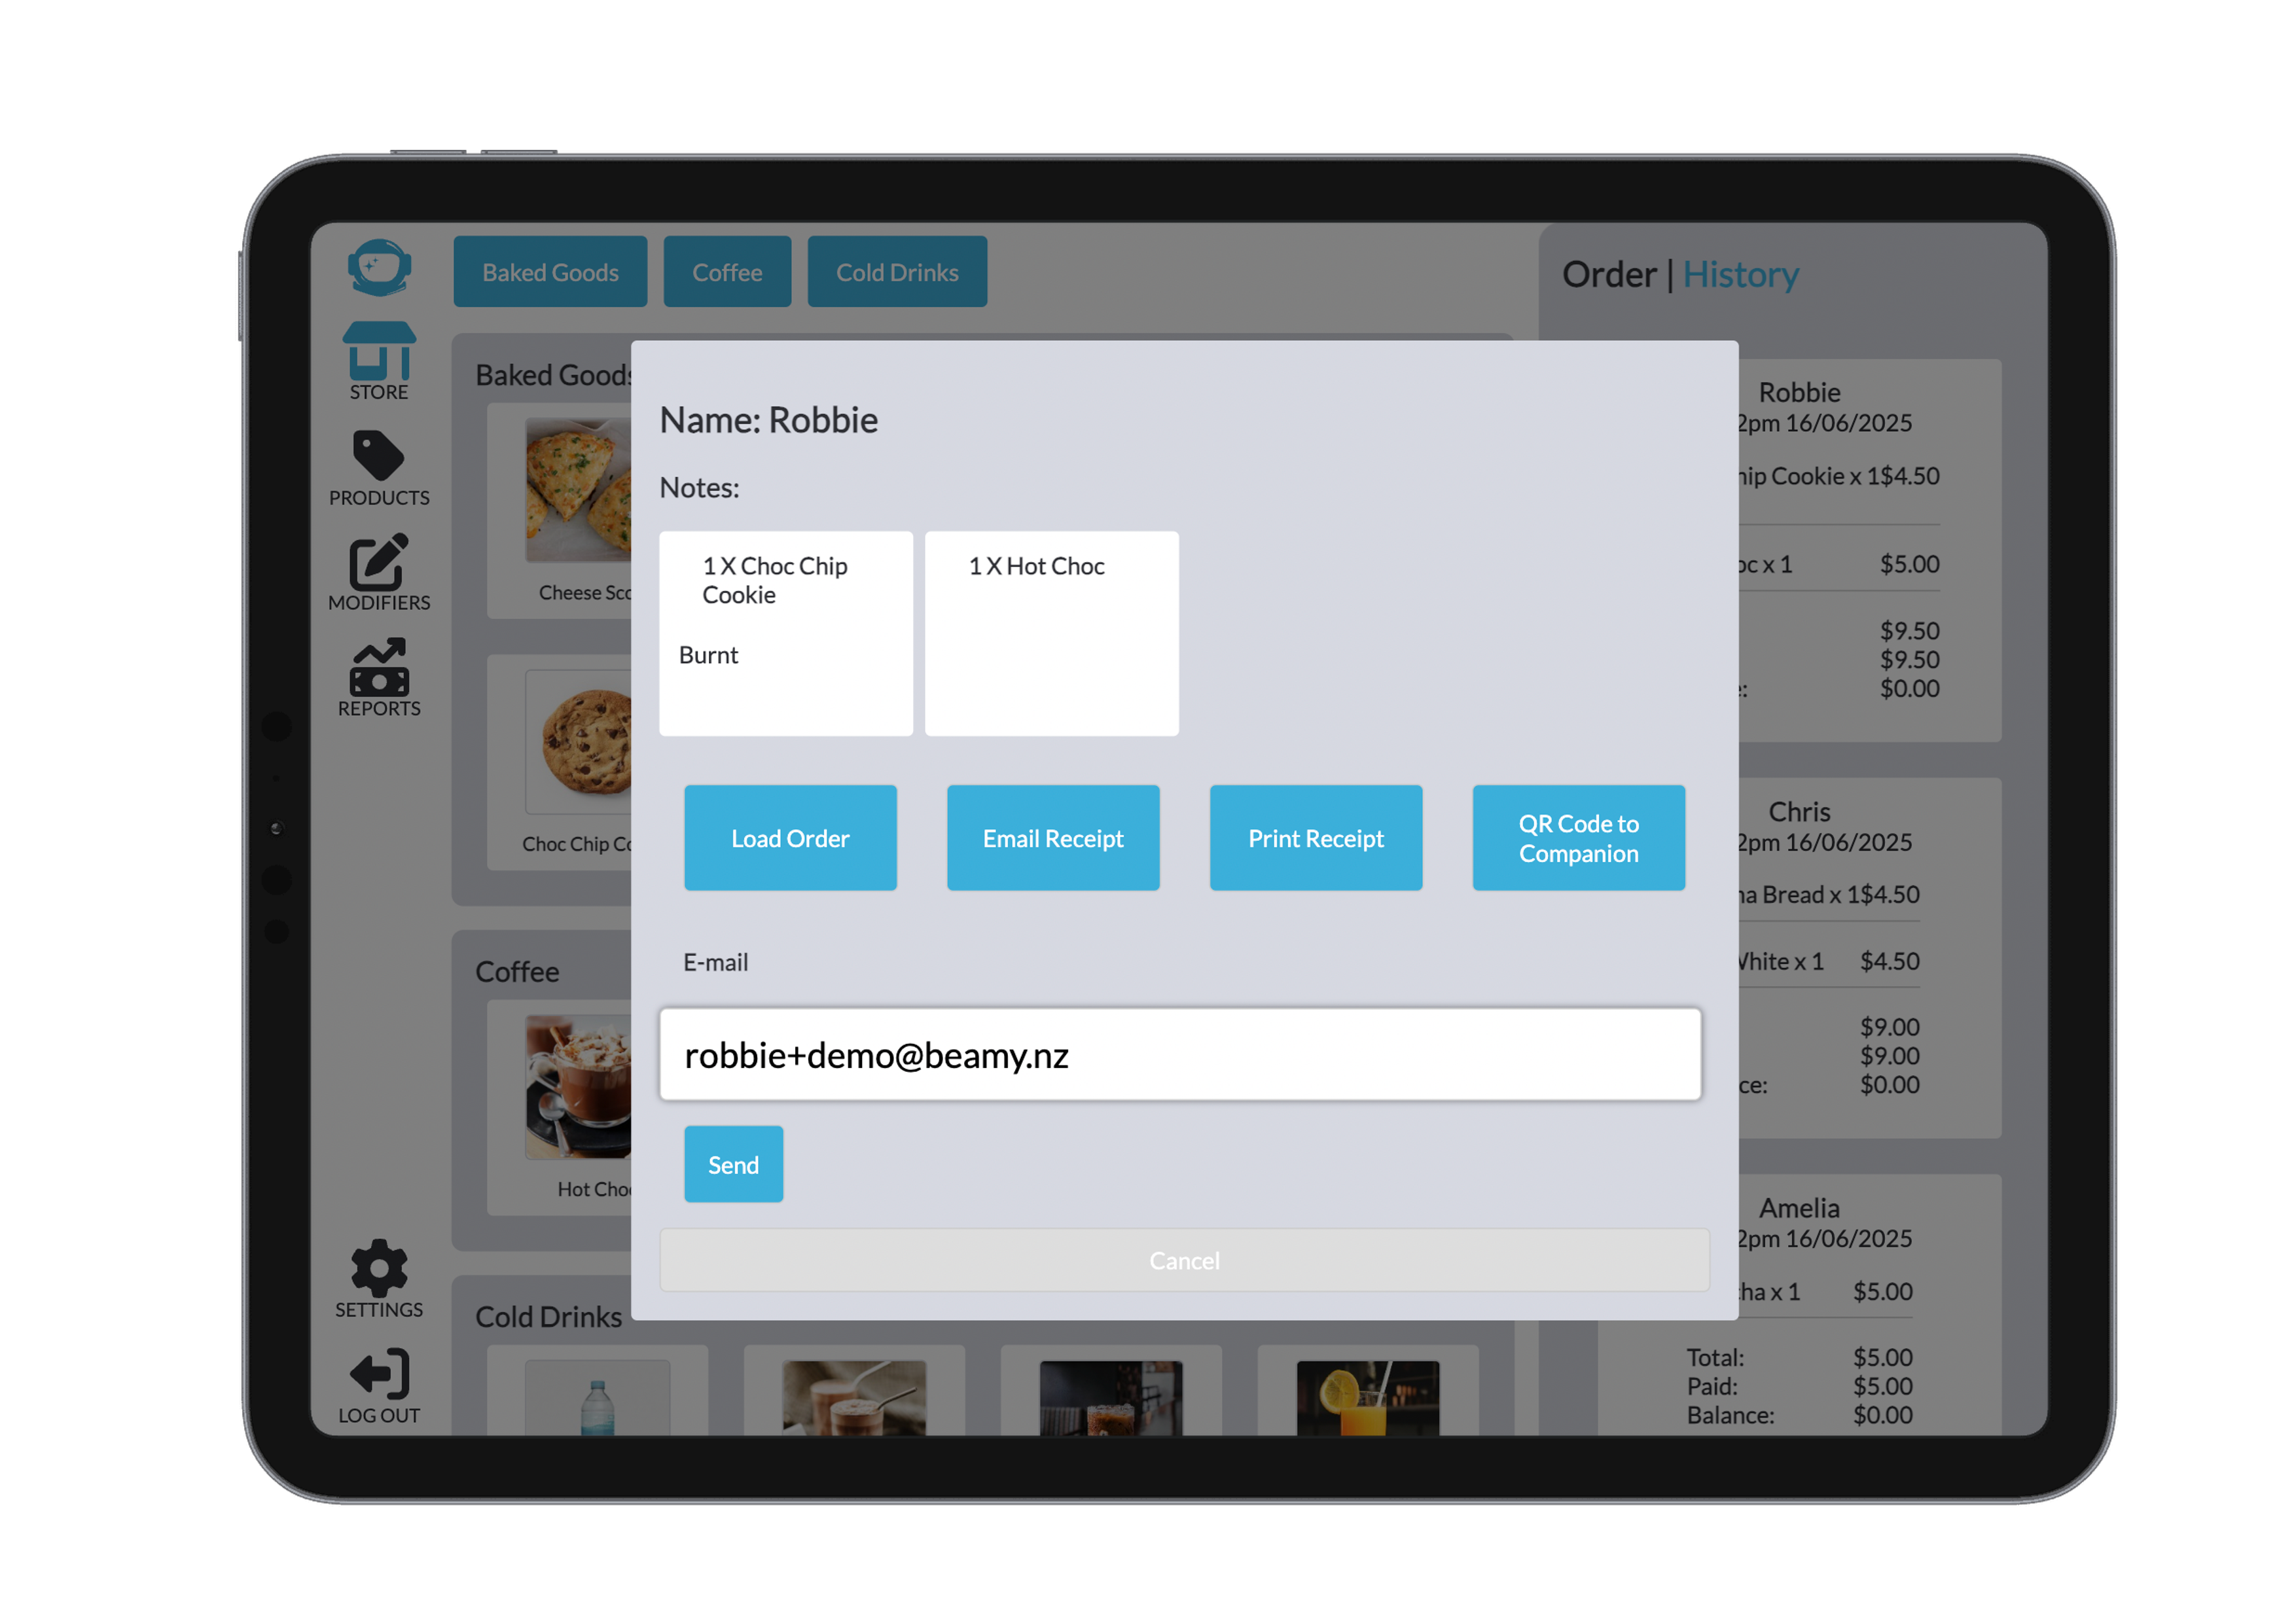
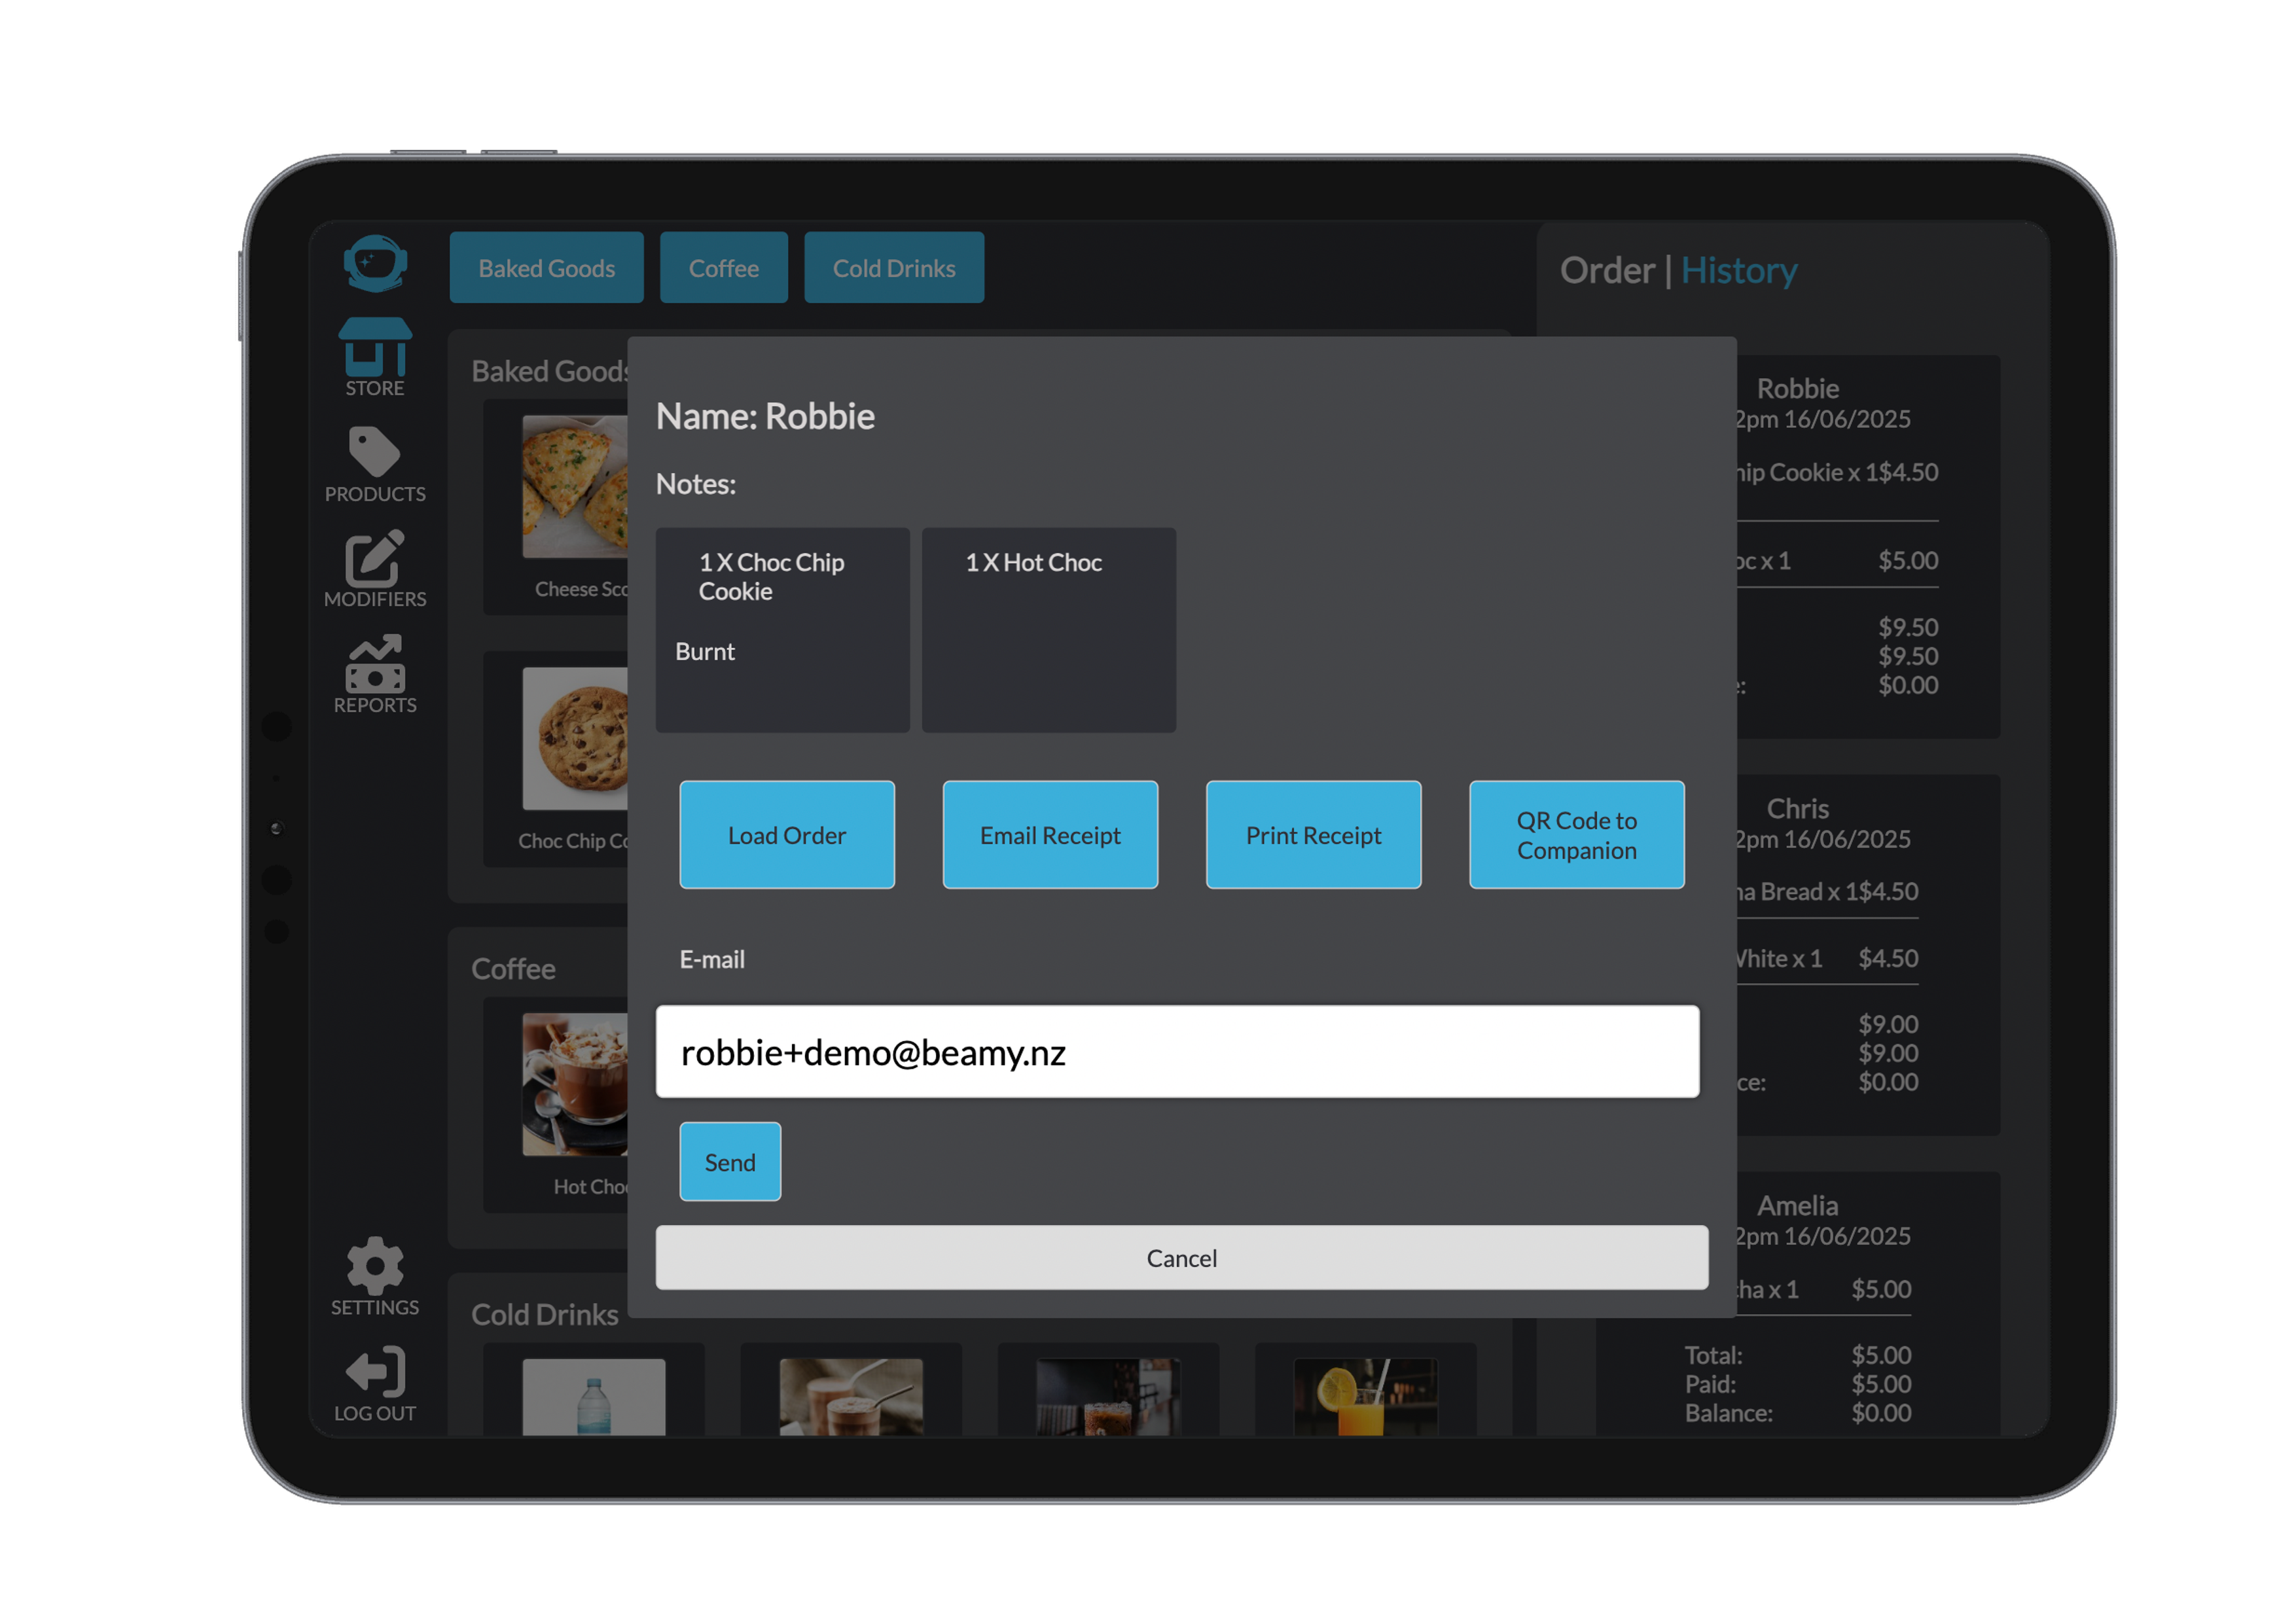
Print Receipt: Sends it to the connected EFTPOS unit
Present QR Code: Displays a scannable receipt for the customer on the companion device
These tools help with order follow-up, reissuance, and customer satisfaction.
Troubleshooting
If issues arise during the order process, here are some quick checks:
- Missing required fields: Ensure all mandatory info (name, notes) is entered before checkout.
- Modifier errors: Reopen the item from the cart and update modifiers as needed.
- Partial payment issues: Verify custom amounts or cancel and reapply the payment.
- Receipt not sending/printing: Check device connectivity or email formatting.
- Order not appearing in history: Ensure Complete Transaction was clicked and the order was finalised.